Follow Techotopia on Twitter

On-line Guides
All Guides
eBook Store
iOS / Android
Linux for Beginners
Office Productivity
Linux Installation
Linux Security
Linux Utilities
Linux Virtualization
Linux Kernel
System/Network Admin
Programming
Scripting Languages
Development Tools
Web Development
GUI Toolkits/Desktop
Databases
Mail Systems
openSolaris
Eclipse Documentation
Techotopia.com
Virtuatopia.com
Answertopia.com

How To Guides
Virtualization
General System Admin
Linux Security
Linux Filesystems
Web Servers
Graphics & Desktop
PC Hardware
Windows
Problem Solutions
Privacy Policy


Chapter 10.  Menus

Table of Contents

1. Introduction to the GIMP Menus
1.1. Context Menus
1.2. Detachable Submenus
2. Toolbox File Menu
2.1. The “File” Menu of the Toolbox
2.2. Acquire
2.3. The Preferences command
2.4. The Dialogs sub-menu
3. Xtns
3.1. Introduction to the “Xtns” menu
3.2. The Module Manager
3.3. The Unit Editor
3.4. Plug-In Browser
3.5. The Procedure Browser
3.6. The “Script-Fu” submenu
4. The “Help” Menu of the Toolbox Window
4.1. Introduction to the “Help” menu
4.2. Help
4.3. Context Help
4.4. Tip of the Day
4.5. About
4.6. The GIMP Online
5. The “File” Menu of the Image Window
5.1. File menu
5.2. New
5.3. Open
5.4. Open Location
5.5. Open Recent
5.6. Open as Layer
5.7. Save
5.8. Save as
5.9. Save a Copy
5.10. Save as Template
5.11. Revert
5.12. Print
5.13. Close
5.14. Quit
6. The “Edit” Menu of the Image Window
6.1. Edit” menu entries
6.2. Undo
6.3. Redo
6.4. Undo History
6.5. Cut
6.6. Copy
6.7. Copy Visible
6.8. Paste
6.9. Paste Into
6.10. Paste as New
6.11. Buffers
6.12. Clear
6.13. Fill with FG Color
6.14. Fill with BG Color
6.15. Fill with Pattern
6.16. Stroke Selection
6.17. Stroke Path
7. Select
7.1. Introduction to the “Select” menu
7.2. Select All
7.3. None
7.4. Invert
7.5. Float
7.6. By Color
7.7. From Path
7.8. Selection Editor
7.9. Feather
7.10. Sharpen
7.11. Shrink
7.12. Grow
7.13. Border
7.14. Rounded Rectangle
7.15. Toggle QuickMask
7.16. Save to Channel
7.17. To Path
8. View
8.1. Introduction to the “View” Menu
8.2. New View
8.3. Dot for Dot
8.4. Zoom
8.5. Shrink Wrap
8.6. Full Screen
8.7. Info Window
8.8. Navigation Window
8.9. Display Filters
8.10. Show Selection
8.11. Show Layer Boundary
8.12. Show Guides
8.13. Snap to Guides
8.14. Show Grid
8.15. Snap to Grid
8.16. Padding Color
8.17. Show Menubar
8.18. Show Rulers
8.19. Show Scrollbars
8.20. Show Statusbar
9. The “Image” Menu of the Image Window
9.1. The “Image” Menu of the Image Window
9.2. Duplicate
9.3. Mode
9.4. RGB mode
9.5. Grayscale mode
9.6. Indexed mode
9.7. Decompose
9.8. Compose
9.9. Transform
9.10. Flip Horizontally; Flip Vertically
9.11. Rotation
9.12. Guillotine
9.13. Canvas Size
9.14. Print Size
9.15. Fit Canvas to Layers
9.16. Scale Image
9.17. Crop Image
9.18. Autocrop Image
9.19. Zealous Crop
9.20. Merge Visible Layers
9.21. Flatten Image
9.22. Guides
9.23. Remove all guides
9.24. New Guide (by Percent)
9.25. New Guide
9.26. New Guides from Selection
9.27. Configure Grid
10. Layers
10.1. Introduction to the “Layer” Menu
10.2. New Layer
10.3. Duplicate layer
10.4. Anchor layer
10.5. Merge Down
10.6. Delete Layer
10.7. The “Stack” Submenu
10.8. Select Previous Layer
10.9. Select Next Layer
10.10. Select Top Layer
10.11. Select Bottom Layer
10.12. Raise Layer
10.13. Lower Layer
10.14. Layer to Top
10.15. Layer to Bottom
10.16. The “Colors” Submenu
10.17. Desaturate
10.18. Invert
10.19. Layer Color-Stretching Commands
10.20. The “Auto” Submenu
10.21. Equalize
10.22. White Balance
10.23. Stretch Contrast
10.24. Color Enhance
10.25. Stretch HSV
10.26. Normalize
10.27. Autocrop Layer
10.28. The “Mask” Submenu
10.29. Add Layer Mask
10.30. Apply Layer Mask
10.31. Delete Layer Mask
10.32. Edit Layer Mask
10.33. Disable Layer Mask
10.34. Show Layer Mask
10.35. Mask to Selection
10.36. Add Layer Mask to Selection
10.37. Subtract Layer Mask from Selection
10.38. Intersect Layer Mask with Selection
10.39. The “Transparency” Submenu of the “Layer” menu
10.40. Add Alpha Channel
10.41. Color to Alpha
10.42. Semi-flatten
10.43. Threshold Alpha
10.44. Alpha to Selection
10.45. Add to Selection
10.46. Subtract from Selection
10.47. Intersect with Selection
10.48. The “Transform” Submenu
10.49. Flip Horizontally
10.50. Flip Vertically
10.51. Rotate 90 degrees CW
10.52. Rotate 90 degrees CCW
10.53. Rotate 180 degrees
10.54. Arbitrary Rotation
10.55. Offset
10.56. Layer Boundary Size
10.57. Layer to Image Size
10.58. Scale Layer
10.59. Crop Layer
10.60. Align Visible Layers
11. Tools
11.1. Introduction to the “Tools” Menu
12. The “Filters” Menu of the Image Window
12.1. Introduction to the “Filters” menu
12.2. Repeat Last
12.3. Re-show Last
12.4. Reset All Filters

1.  Introduction to the GIMP Menus

Revision History
Revision $Revision$ 2006-08-17 scb

Figure 10.1.  The Toolbox Menu

The Toolbox Menu

There are many places in GIMP where you can find menus. The aim of this chapter is to explain all the commands that are accessible from the menus in the Toolbox and Image windows. All the context menus and the menu entries for the other dialogs are described elsewhere in the chapters that describe the dialogs themselves.

1.1.  Context Menus

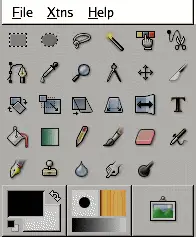
If you right-click on certain parts of the GIMP interface, a “context menu” opens, which leads to a variety of functions. Some places where you can access context menus are:

  • Clicking on an image window displays the Image menu. This is useful when you are working in full-screen mode, without a menubar.

  • Clicking on a layer in the Layers Dialog or on a channel in the Channels Dialog displays functions for the selected layer or channel.

  • Right-clicking on the image menubar has the same effect as left-clicking.

  • Right-clicking on the title bar displays functions which do not belong to GIMP, but to the window manager program on your computer.

1.2.  Detachable Submenus

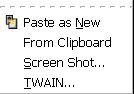
There is an interesting property associated with some of the menus in GIMP. These are any of the menus from the Toolbox menubar and any of their submenus, as well as the Image context menu you get by right-clicking on the image window and any of its submenus. (You can tell that a menu item leads to a submenu because there is an icon next to it.) When you bring up any of these menus, there is a dotted line at the top of it. By clicking on this dotted line, you detach the menu under it and it becomes a separate window.

Figure 10.2.  The “Acquire” submenu and its detached submenu

The Acquire submenu and its detached submenu

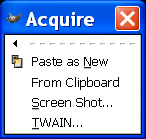
Detached submenus originating from the Toolbox are only visible when the Toolbox is active. Detached submenus originating from the Image window are actually independent. They are always visible, their functions always apply to the current image, and they persist when all of the images are closed. You can close a detached submenu by clicking on the dotted line again or closing the window from the window manager on your computer (often by clicking on an X icon in the upper right corner of the window).


  Published under the terms of the GNU General Public License Design by Interspire