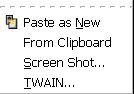
Figure 10.4.
The “Acquire” submenu of the Toolbox File menu
The Acquire submenu of the Toolbox's
File menu contains a list of ways you can
import images into the GIMP. This
allows you to import images from sources other than a disk or the
network, such a screen capture or an image from a scanner.
2.2.1.
Activating the Submenu
You can access this submenu from the Toolbox menubar through
File->Acquire
2.2.2.
Submenu entries
These commands vary somewhat, depending upon your system, since
the GIMP makes calls to system functions.
Paste as new
The Paste As New command is the
same as the Paste as New command of
the Edit menu. Both of them open a new image and paste
the contents of the clipboard in it.
Tip
The Print Screen key captures the
screen and puts it in the clipboard. By doing this, you can
capture submenus that would otherwise disappear as soon as you
click on the screen.
Screen Shot
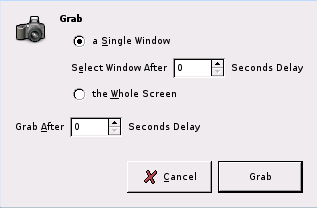
Figure 10.5.
The “Screen Shot” window
The Screen Shot command opens a
dialog which has four options for grabbing the object:
a Single Window: You can
select the window you want to capture.
Select Window After ... Seconds Delay:
If you enter 0 seconds in the text box, the window is
captured as soon as you click on it. If you enter a delay,
you have time to modify the window before it is captured.
the Whole Screen: The entire
screen is captured.
Grab After ... Seconds Delay:
If you enter 0 seconds in the text box, the screen is
captured as soon as you click on the
Grab button. If you enter a delay,
you have time to modify the screen before it is captured.
Note
Before you begin the capture, make sure that the window
you want to capture is not partially obscured by another one.
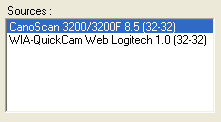
Image capture devices
Figure 10.6.
Scanner and Webcam
The kinds of devices used to take pictures are too varied
to be described here. Fortunately, their use is fairly
intuitive. In the example shown, you can start a scanner
or take an image with a webcam.
Published under the terms of the GNU General Public License


![[Tip]](../images/tip.png)
![[Note]](../images/note.png)