|
 |
|
| |
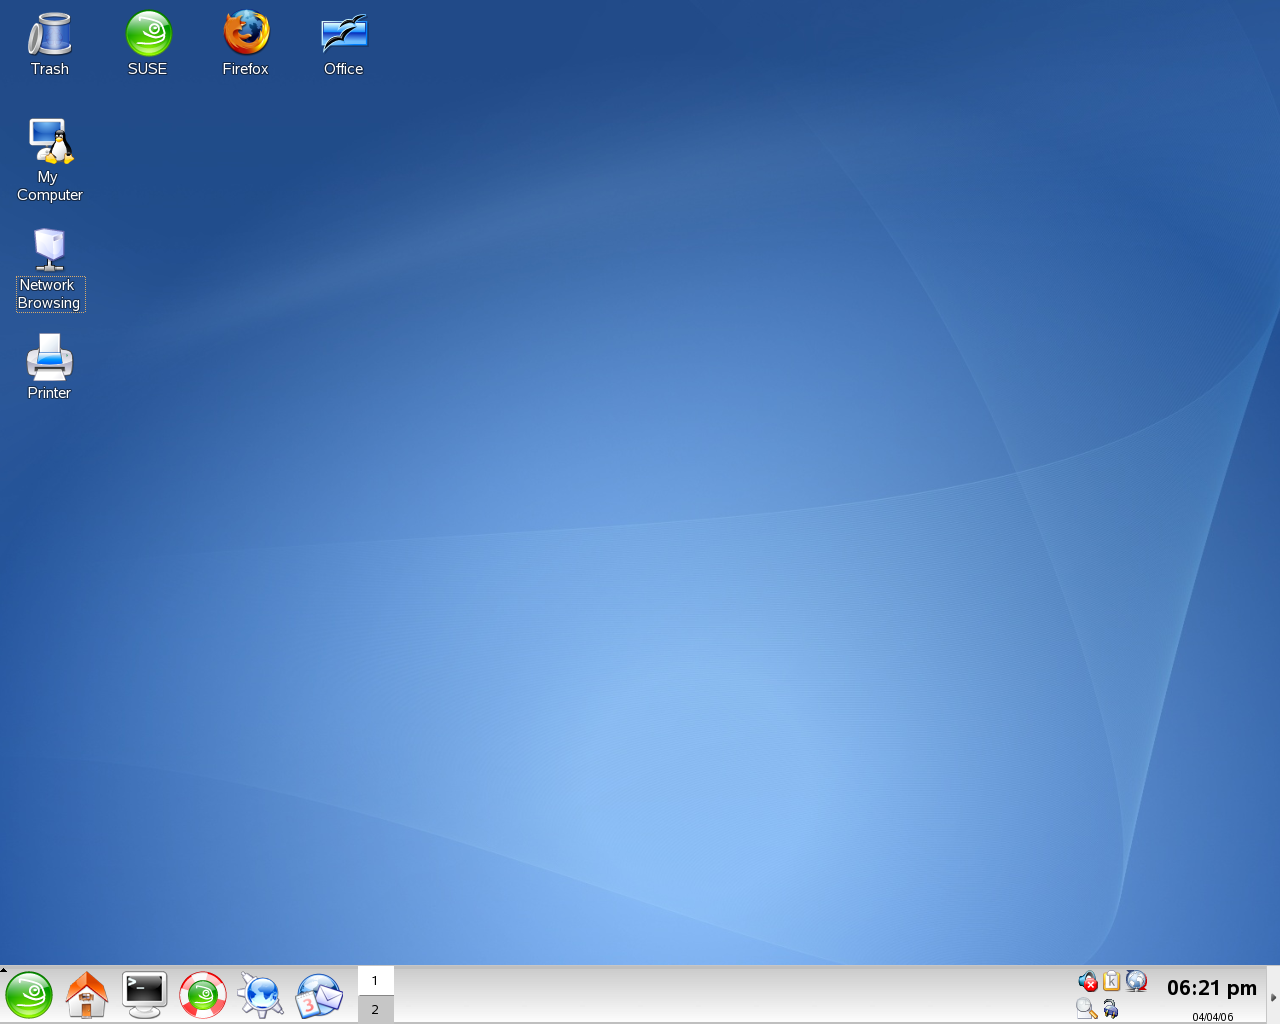
1.3 Desktop Components
The graphical desktop environment should not pose any problems
for former Windows or Macintosh users. The main components of the
desktop are the icons on the desktop and the panel at the bottom of
the screen.
Desktop icons represent files, directories, applications,
functions, and removable media, like CDs or DVDs.
The desktop has the following icons by default:
-
-
Contains files and folders that have been deleted. For
information about using the trash bin, see Section 1.3.4,
Managing the Trash Bin.
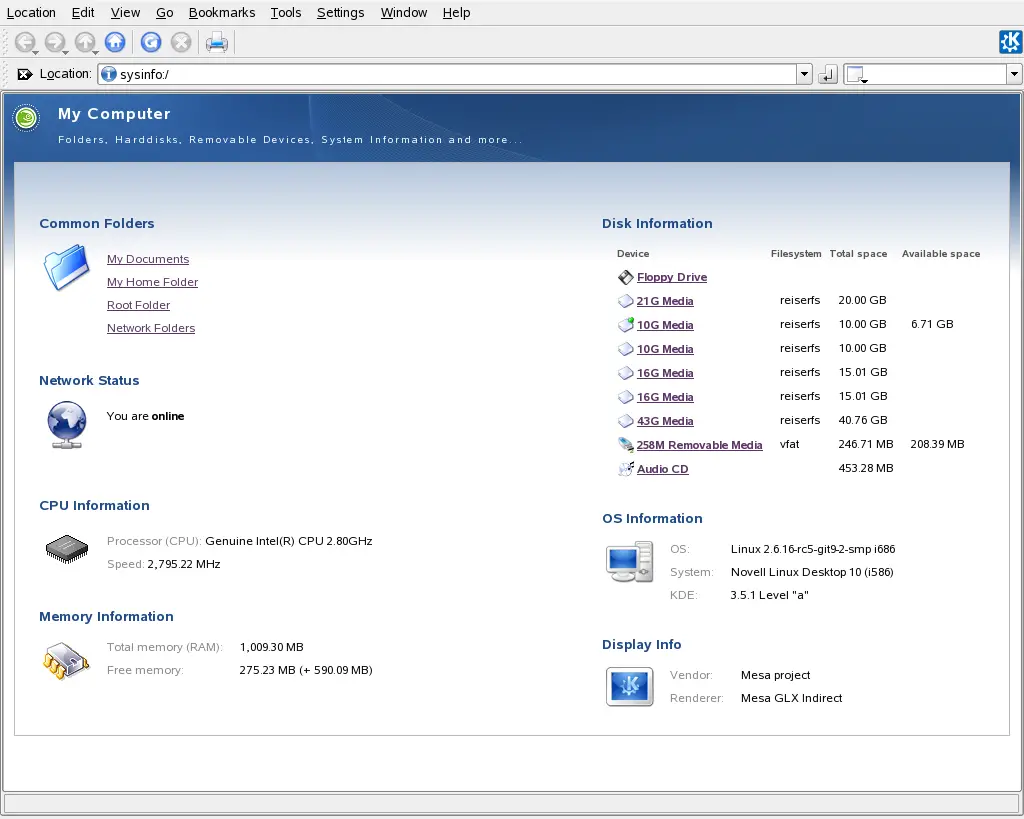
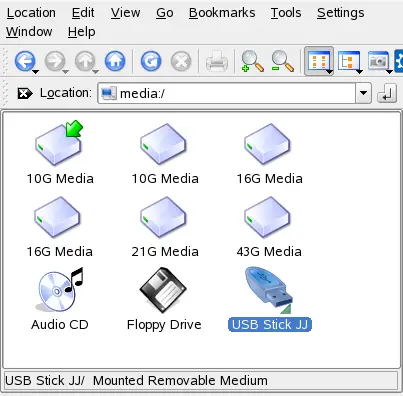
-
-
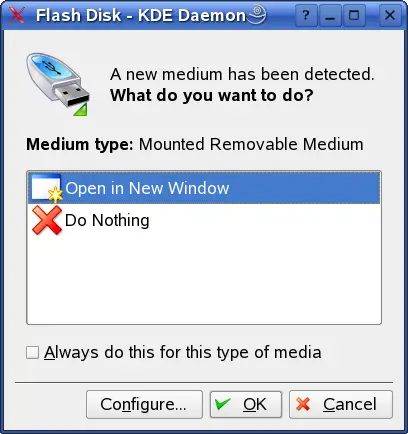
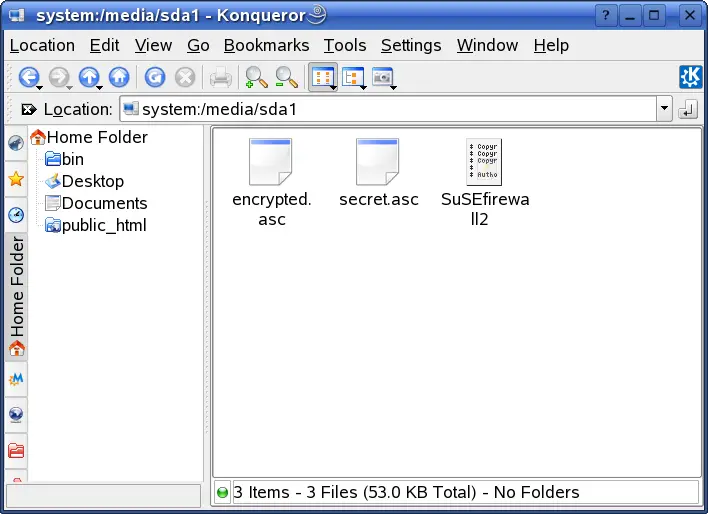
Displays information about hardware, network status,
operating system, hard disks, common folders, and removable
devices. For more information, refer to Section 1.3.3,
Accessing Removable Media.
-
-
Displays network services you can access. Some of the
services might require authentication. To learn more, refer to
Section 9.0,
Accessing Network Resources.
-
-
Opens KJobViewer that displays print jobs you have sent to
printers. See Section 12.4,
Starting Print Jobs in KDE for more
information.
-
-
Opens the Firefox Web browser. For more information, refer to
Section 14.0,
Browsing with Firefox.
-
-
Opens a new OpenOffice.org document. For an introduction to
this office suite, refer to Section 3.0,
The OpenOffice.org Office Suite.
The panel (in KDE also called Kicker ) is
a bar, typically located at the top or the bottom of the screen. It
is designed to provide information about running applications or the
system and easy access to some important functions or applications.
If you hold your pointer over an icon, a short description is
displayed.
The panel typically consists of the following areas:
- Main Menu Icon
-
By default, the left end of the panel has an icon that opens
the main menu, similar to the start button on
the MS Windows desktop. The main menu has a well-ordered structure
for accessing the main applications. It also contains menu items
for major functions like logging out or searching for
applications. For more information, see Section 1.3.1,
Accessing the Main Menu.
- Quick Launcher
-
Next to the main menu icon, find the quick launcher. It holds
some icons for the most important functions or applications to
enable you to start them without going through the main menu. It
also contains an icon for the Help Center, which provides online
help for your system.
- Desktop Previewer
-
Next to the quick launcher, find the desktop
previewer, which shows your different desktops. These virtual
desktops enable you to organize your work. If you use many
programs simultaneously, you might want to run some programs in
one desktop and other programs in the other desktop. To switch
between desktops, click the desktop symbol in the panel.
- Taskbar
-
The taskbar is located next to the desktop previewer. By
default, all started applications and open windows are displayed
in the taskbar, which allows you to access any application
regardless of the currently active desktop. If you click a window
title in the taskbar, the application is moved to the foreground.
If it is already in the foreground, clicking minimizes the
application.
- System Tray
-
The rightmost part of the panel usually holds the system
clock, the volume control, and several other helper
applications.
To learn how to configure the appearance and behavior of your
desktop, including the main menu, desktop icons, or the panel, refer
to
Changing Panel Elements.
1.3.1 Accessing the Main Menu
Open the main menu by clicking the icon to the far left of the
panel. Alternatively, press
Alt
F1
. The main menu is subdivided into these sections:
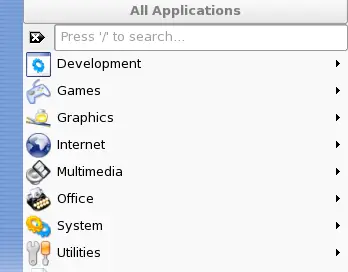
, (a menu with all applications sorted
according to categories), and .
Applications that you start most often appear in the section.
The function-oriented menu structure makes it easy to find the
right application for your purpose even if you do not know the
application names yet. If you already know the name of an
application (or at least a part of its name) but are not sure how to
start it from the main menu, you can use the search function
provided in the section.
Figure 1-4 Main Menu Search Function
Just type a part of the application name into the search field
without pressing the key
afterwards. If the application is installed on your system, the menu
structure leading to this application is highlighted in the main
menu.
The following section provides information about a number of
actions that can be triggered from the main menu.
-
-
Lists the most recently opened files or folders. When you
select a document, the application to view or edit this document
is started. You can also clear the history of documents.
-
-
Gives quick access to some places often needed, such as your
home directory or media devices.
-
-
Opens a dialog where you can enter an command to start the
application. The name of the command is often (but not always)
the application name written in lowercase. You can use
autocompletion of the command by typing the first letters then
pressing . If the command was
executed before and can be uniquely identified, it is completed
to full length.
-
-
To start a second session with a graphical user interface on
your machine, select . Your
current session remains active while you are taken to the login
screen where you can log in as a different user. You can access
the first session by pressing
F7
. To access a new session, press F8
instead of F7. Additional sessions can be
accessed by pressing
F9
to F12.
-
-
If you leave your computer you can prevent unauthorized
access by others by locking your screen. After locking, a
screensaver starts. Access to the session can only be regained
with a password. To unlock, enter your normal login
password.
-
-
Opens a dialog with several options: you can end the current
session, turn off the computer, restart the computer, or cancel
the logout. leaves your
system running and restores the applications for your next login.
If your system provides power management, you are also offered to
suspend the computer, making the next system start much faster
than a complete boot.
1.3.4 Managing the Trash Bin
The trash bin is a directory for files marked for deletion.
Drag icons from the file manager or the desktop to the trash bin
icon by keeping the left mouse button pressed. Then release to drop
them there. Alternatively, right-click an icon and select
from the menu. Click the trash bin
icon to view its contents. You can retrieve an item from the trash
if desired.
Files removed with are not moved to
the trash bin, but deleted completely. To delete the files in the
trash bin completely, right-click the trash bin icon then click
.
|
|
|