|
 |
|
| |
Using the Ant view
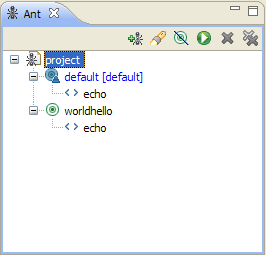
Eclipse provides a standard view, the
Ant view
, that lets you
work with your Ant buildfiles. This view is tree-structured, showing Ant buildfiles
as top-level entries and targets & internal targets as children. The main
advantage of this view is that you can work with all of your Ant buildfiles
in one place, as opposed to hunting them down in one of the navigation views.
- Open the
Ant view
from the workbench menu by selecting Window > Show
View > Ant.
- By default, the Ant view is empty. There are three ways to add Ant buildfiles
to this view:
- Click Add Buildfile [
 ].
This brings up a dialog in which you explicitly select those Ant buildfiles
you want to add ].
This brings up a dialog in which you explicitly select those Ant buildfiles
you want to add
- Click Add Buildfiles with Search [
 ].
This brings up a search dialog in which you can specify a filename pattern
for your Ant buildfiles and search within the entire workspace or a specified
working set. ].
This brings up a search dialog in which you can specify a filename pattern
for your Ant buildfiles and search within the entire workspace or a specified
working set.
- Drag and drop buildfiles from other views to the
Ant view
.
Once added to the Ant view, Ant buildfile entries remain in the view across
workbench invocations until explicitly removed or the associated project is closed.
- Click Add Buildfiles with Search. Suppose you only remember
that the buildfile you want to work with starts with
H. Enter H*.xml for
the buildfile name. Make sure Workspace is selected for the scope, then click
Search. The HelloWorld.xml file is found and placed in the
Ant view
.
- Expand the top-level entry to see the default target
Hello, and the internal
target World.

- Select the
World internal target and click Run the Selected Target [ ].
Notice that just the ].
Notice that just the World target gets executed.
- Select the top-level
HelloWorld buildfile and click Run the Default
Target of the Selected Buildfile [ ].
Notice that just the default target, ].
Notice that just the default target, Hello, gets executed.
- To edit your buildfile, bring up the context menu on the
HelloWorld file
and select Open With > Ant Editor.
- To edit the default launch configuration, select Run As > Ant Build... from
the context menu.
- The Run Ant launch configuration dialog appears. Here you can modify the way in which the buildfile
is run from the
Ant view
.
- Select the
HelloWorld file, then click the Remove button. The buildfile
is removed from the view.
Note: This does not delete the file from the workspace.

Creating Ant buildfiles
Editing Ant buildfiles
Saving & Reusing Ant options
Running Ant buildfiles
Creating a project builder Ant buildfile
Ant buildfiles as project builders
Executing project builders
External tools
Non-Ant project builders
Stand-alone external tools
|
|
|
