3.5.3 Using Zoom
One of the most useful tools that can be used in conjunction with the
Bezier Path selection tool is the Zoom tool, found in the
Toolbox and in the Image:View menu. This tool was covered in
some detail in Section
1.8.1; however, its value for aiding
selections is emphasized here.
When attempting to perform a precise selection of a subject, it is
essential to get in close to the pixels.
Figure
3.26(a)
Figure 3.26:
Using Zoom to Aid with Selections
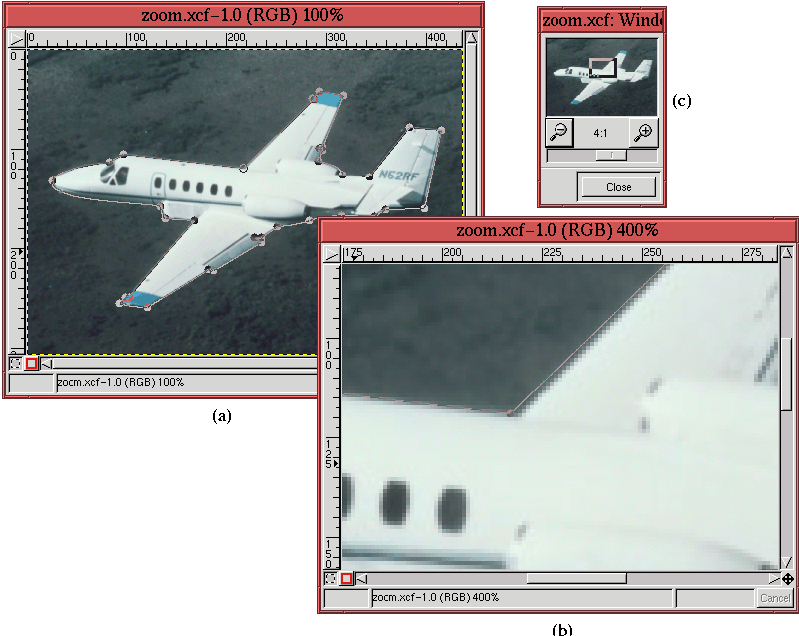 |
shows a Bezier path of an airplane that is to be converted to a
selection. However, prior to the conversion it is desirable to
examine the path to verify its accuracy.
Figure
3.26(b) is a 400% zoom of
Figure
3.26(a). As can be seen the control point
of the Bezier path located at the junction of the right wing and the
fuselage is not quite correctly positioned. It is only through the
use of Zoom that such a careful examination of the selection can
be made. It is quite easy to improve the positioning of the control
point using the Edit Point mode button in the Paths dialog.
Although the Zoom tool was used in
Figure
3.26(b) to verify a Bezier path, it is
often a good strategy to draw the path from the start in a zoomed
window. A useful tool for helping with this is the Navigation
Window, found in the Image:View menu.
Figure
3.26(c) illustrates this tool, which
consists of a thumbnail of the image with a panning rectangle
superimposed on it. This panning rectangle shows the part of the
image that can be viewed in the zoomed image window. The panning
rectangle can be dragged with the left mouse button, and this makes
the image in the zoomed window move in tandem with it. In addition to
the panning function of the Navigation Window it also contains +
and - buttons, which can control the amount of zoom applied to the
image window.


