Follow Techotopia on Twitter

On-line Guides
All Guides
eBook Store
iOS / Android
Linux for Beginners
Office Productivity
Linux Installation
Linux Security
Linux Utilities
Linux Virtualization
Linux Kernel
System/Network Admin
Programming
Scripting Languages
Development Tools
Web Development
GUI Toolkits/Desktop
Databases
Mail Systems
openSolaris
Eclipse Documentation
Techotopia.com
Virtuatopia.com
Answertopia.com

How To Guides
Virtualization
General System Admin
Linux Security
Linux Filesystems
Web Servers
Graphics & Desktop
PC Hardware
Windows
Problem Solutions
Privacy Policy


Red Hat Enterprise Linux 9 Essentials Book now available.

Purchase a copy of Red Hat Enterprise Linux 9 (RHEL 9) Essentials

Red Hat Enterprise Linux 9 Essentials Print and eBook (PDF) editions contain 34 chapters and 298 pages

Preview Book

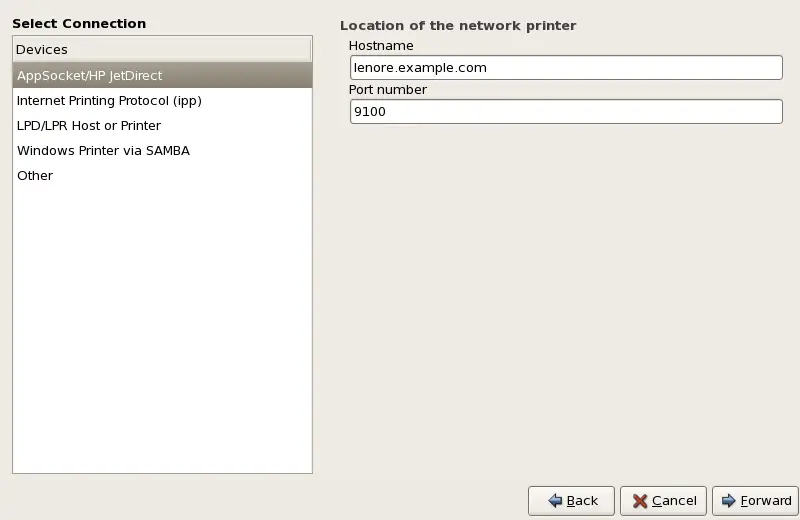
33.4. Adding a JetDirect Printer

To add a JetDirect or AppSocket connected printer share, click the New Printer button in the main Printer Configuration Tool window to display the window in Figure 33.2, “Adding a Printer”. Enter a unique name for the printer in the Printer Name field. The printer name can contain letters, numbers, dashes (-), and underscores (_); it must not contain any spaces.

You can also use the Description and Location fields to further distinguish this printer from others that may be configured on your system. Both of these fields are optional, and may contain spaces.

Adding a JetDirect Printer

Figure 33.6. Adding a JetDirect Printer

Click Forward to continue.

Text fields for the following options appear:

  • Hostname — The hostname or IP address of the JetDirect printer.

  • Port Number — The port on the JetDirect printer that is listening for print jobs. The default port is 9100.

Next, select the printer type. Refer to Section 33.5, “Selecting the Printer Model and Finishing” for details.


  Published under the terms of the Open Publication License Design by Interspire