|
 |
|
| |
2.3 Look and Feel
In the following sections, find examples of how to configure some look
and feel aspects of your GNOME desktop, like desktop background and
screens saver, 3D desktop effects, themes, window behavior, or menus.
2.3.1 Changing the Desktop Background
The desktop background is the image or color that is applied to your
desktop. You can customize the desktop background in the following ways:
-
Select an image for the desktop background. The image is superimposed
on the desktop background color. The desktop background color is
visible if you select a transparent image or if the image does not
cover the entire desktop.
-
Select a color for the desktop background. You can select a solid
color or create a gradient effect with two colors. A gradient effect
is a visual effect where one color blends gradually into another
color.
To change the desktop preferences:
-
Click .
-
To change the picture on the background, select one of the
from the list and select the
style in which to arrange the image on the desktop.
-
To use a custom picture, click and
select an image file from the file system.
-
If you do not want a picture on the background, specify a color scheme
using the options in the drop-down
list and the color selector buttons.
-
When you are satisfied with your choices, click
.
Your desktop immediately changes to show the new settings.
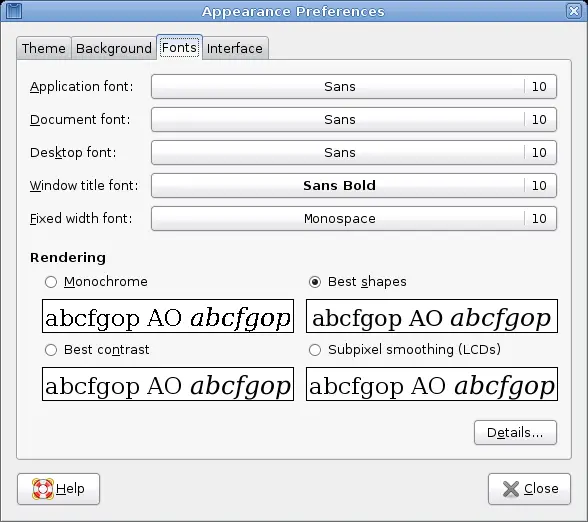
2.3.2 Configuring Fonts
To select the fonts to use in your applications, windows, terminals, and
desktop, click .
The upper part of the dialog shows the fonts selected for applications,
documents, the desktop, window titles, and a fixed-width font for
terminals. Click one of the buttons to open a selection dialog where you
can set the font family, style, and size. For more information on the
individual options, click .
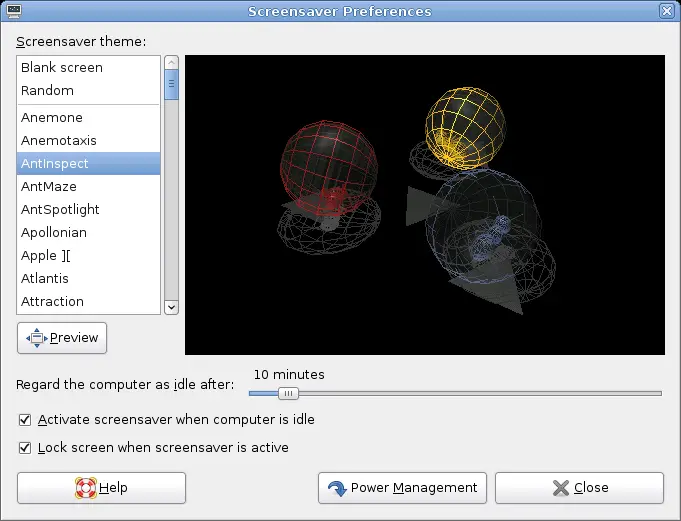
2.3.4 Configuring the Screen Saver
A screen saver is a program that blanks the screen or displays graphics
when the computer is not used for a specified amount of time.
Originally, screen savers protected monitors from having images burned
into them. Now they are used primarily for entertainment or security.
To configure a screen saver, click .
You can select from (random selection of
screen savers from a custom-defined list), , or a selection of installed screen savers.
Select a screen saver from the list to choose it. The currently selected
screen saver is displayed in the small preview window. Specify the
amount of time that the screen is to be idle before the screen saver is
activated, and whether the screen is locked when the screen saver is
activated.
2.3.5 Choosing a Theme
A theme is a group of coordinated settings that specifies the visual
appearance of a part of the desktop. You can choose themes to change the
appearance of the desktop. Use the
tool to select from a list of preinstalled themes. The list of available
themes includes several themes for users with accessibility
requirements.
To choose a theme, click .
A theme contains settings that affect different parts of the desktop, as
follows:
- Controls
-
The controls setting for a theme determines the visual appearance of
windows, panels, and applets. It also determines the visual
appearance of the GNOME-compliant interface items that appear on
windows, panels, and applets, such as menus, icons, and buttons. Some
of the controls setting options that are available are designed for
special accessibility needs. You can select an option for the
controls setting in the tabbed page of
the tool.
- Window frame
-
The window frame setting for a theme determines the appearance of the
frames around windows only. You can select an option for the window
frame setting in the tabbed page of
the tool.
- Icon
-
The icon setting for a theme determines the appearance of the icons
on panels and the desktop background. You can select an option for
the icon setting in the tabbed page of the
tool.
The color settings for the desktop and applications are controlled using
themes. You can choose from a variety of preinstalled themes. Selecting
a style from the list overview applies it automatically.
opens another dialog where you can customize
the style of single desktop elements, like window content, window
borders, and icons. Making changes and leaving the dialog by clicking
switches the theme to . Click to save your
modified theme under a custom name. The Internet and other sources
provide many additional themes for GNOME as .tar.gz
files. Install these with .
Creating a Custom Theme
The themes that are listed in the
tool are different combinations of controls options, window frame
options, and icon options. You can create a custom theme that uses
different combinations of options.
-
Click .
-
Select a theme from the list of themes, then click .
-
Select the controls option that you want to use in the custom theme
from the list in the tabbed page.
-
Click the tab, then select the window
frame option that you want to use in the custom theme.
-
Click the tab, then select the icons option
that you want to use in the custom theme.
-
Click .
A dialog is displayed.
-
Type a name and a short description for the custom theme in the
dialog, then click .
The custom theme now appears in your list of available themes.
Installing a New Theme
You can add a theme to the list of available themes. The new theme must
be an archive file that is tarred and zipped (a
.tar.gz file).
-
Click .
-
Click .
-
Specify the location of the theme archive file in the
field, then click .
You can also click to browse for the file.
-
Click to install the new theme.
Installing a New Theme Option
You can install new controls options, window frame options, or icons
options. You can find many controls options on the Internet.
-
Click .
-
Click , then click the tab for the
type of theme you want to install.
For example, to install an icons option, click the
tab.
-
Click .
-
Specify the location of the theme archive file in the
field, then click .
-
Click to install the new theme option.
Deleting a Theme Option
You can delete controls options, window frame options, or icons
options.
-
Click .
-
Click , then click the tab for the
type of option you want to delete.
-
Click .
A file manager window opens on the default option folder.
-
Use the file manager window to delete the option.
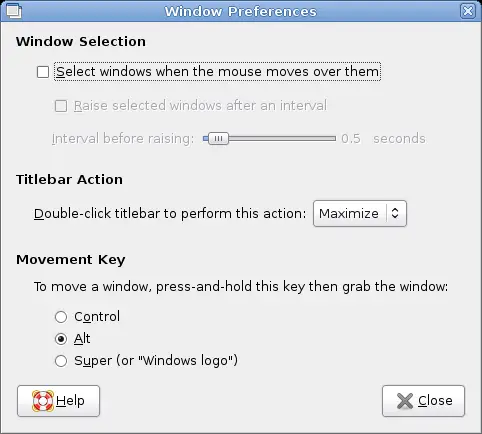
2.3.6 Customizing Window Behavior
Use the tool to customize window
behavior for the desktop. You can determine how a window reacts to
contact with the mouse pointer or to double-clicks on its title bar, and
you can define which key to hold for moving an application window.
To customize window behavior, click .
When several application windows populate the desktop, the active one by
default is the one last clicked. Change this behavior by activating
. If
desired, activate and adjust the latency time with the slider. This
raises a windows a short time after the window receives focus.
Application windows can be shaded (rolled up) by double-clicking the
title bar, leaving only the title bar visible. This saves space on the
desktop and is the default behavior. It is also possible to set windows
to maximize when the title bar is double-clicked.
Using the radio buttons, select a modifier key to press for moving a
window (Ctrl, Alt,
Hyper, or the Windows key).
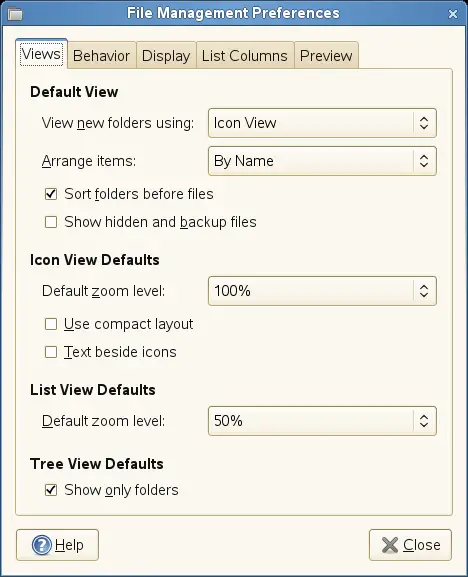
2.3.7 File Management Preferences
You can change the preferences for Nautilus file manager in the Control
Center by clicking , or from Nautilus by
clicking .
-
On the tab, define options for various
Nautilus views, for example, select if Nautilus should also show
hidden files and backup files.
-
On the tab,you can define several options
such as to open files or folders in Nautilus upon single or double
mouse-click, or to include a menu item in
Nautilus which deletes files or folders directly from your file system
instead of moving them to the trash.
-
On the tab, configure the date format and
the way icon captions appear in Nautilus.
-
Switch to the tab to configure the
columns that appear in Nautilus, as well as the order in which they
appear.
-
Click the tab to specify for which files to
show previews in Nautilus and if folders should the number of items
they contain.
-
For more information on the available options click
.
-
If all options are set according to your wishes, click
to apply the changes.
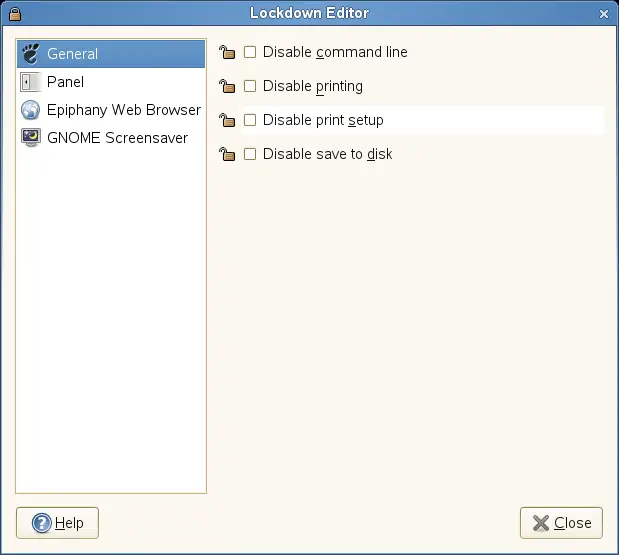
2.3.8 Locking Desktop Functions
openSUSE ships with a graphical lockdown editor
(pessulus package) that lets you disable
(lockdown) certain desktop functions. This is useful if you want to
restrict the actions that users can perform on a computer. For example,
you might want to prevent command line operations on a computer that is
for public use at a trade show.
If the pessulus package is already installed,
start the Lockdown Editor from the main menu with or press Alt+F2 and enter pessulus.
When the Lockdown Editor starts, it tries to connect to the GConf
mandatory configuration source
(xml:merged:$prefix/etc/gconf/gconf.xml.mandatory).
If you run pessulus as root, you have access to
this configuration source and a lock icon is displayed next to the
checkbox for each setting. Click the lock to specify if the setting is
mandatory. If the setting is mandatory, regular users will not be able
to change or override the setting. If you do not have access to the
mandatory configuration source, the lock icon does not appear. In this
case, all disabled settings are stored in the user's default
configuration source and can be modified later using other tools such as
gconf-editor or gconftool-2. For more information about GConf and
mandatory configuration sources, see
Using GConf in the
GNOME Desktop System Administration
Guide
.
Click a category on the left to view the settings for this category that
can be disabled.
-
To disable printing (or prevent the user from modifying print
settings), access to the command line, and saving to disk, set the
according options in the category.
-
To lock down the panel, disable the panel applets you specify, and
disable the force quit, lock screen, and log out options, use the
options in the category.
-
To control access to features in Epiphany, use the options in the
category.
-
Use the options in the category
to lock the screen when the screen saver goes active, enable or
disable the log out after a delay option in the unlock dialog box, and
to enable or disable the switch user option in the unlock dialog box.
-
For more information on the available options of each category, click
.
-
If all options are set according to your wishes, click
to apply the changes.
2.3.9 Customizing the Main Menu
Use the application to customize the GNOME
Main menu. To start the application in system view, root
privileges are needed.
. To start the application in user view
, click .
Figure 2-11 Main Menu Editor
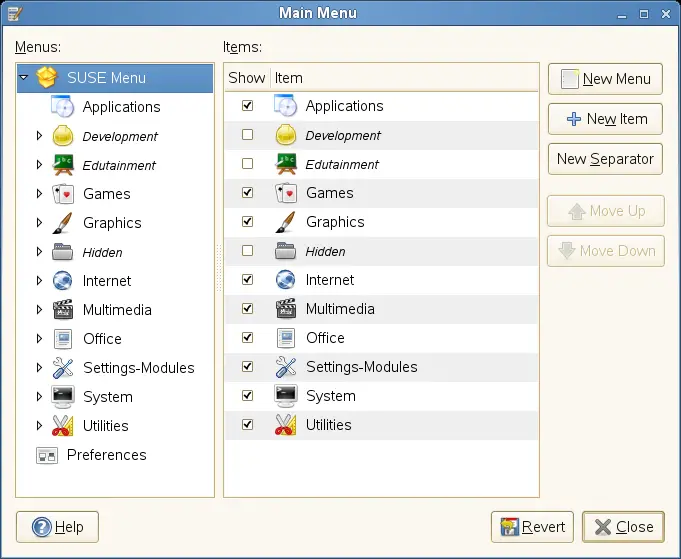
The window shows the selected
at the top. The current main menu
submenus are displayed on the left of the main window, the items
belonging to the selected submenu are shown on the right. Groups in a
submenu are nested below that submenu. To find an item, click the arrow
next to a submenu in the list, select the group
containing that item, then locate the item in the
list.
NOTE: Implications of Main Menu Changes
Changes you make to the main menu are not overwritten during a
subsequent system update. Changes are applied after the latest menu
view is generated.
Editing the Main Menu
You can change the order in which items appear in the main menu, rename
menu items, show or hide menu items, or delete items from the menu
altogether, and add new menu items. For example, you might want to
place your frequently used applications at the top of the menu or at
the top of their groups to make them easier to find. Adding new items
to the main menu is helpful when you install an application, but it is
also useful if you have other applications that do not currently appear
on the menu. You can also add a directory, a link, or another type of
item to the menu.
-
To move a menu item, click the menu item in the
list on the right and drag it to a new
location in the menu. You can move the item to a new location in the
same menu, or drop it on an item in the list
to move it to a new menu or group. Use the
and buttons to change an item’s
location in the menu.
-
To rename an existing menu item, right-click the item in the
list, select ,
and enter a new name.
-
To hide an item so it does not appear in the menu, deactivate the
checkbox next to the item in the list. An
activated checkbox indicates that the item is currently shown in the
menu. When an item is hidden, it still remains in the
list and can be shown at any other time if
you decide you want it to (re)appear in the menu.
-
To delete an item from the list altogether,
right-click the item and click . If you want
to show a deleted item in the menu again, you must add it like you
would a new application.
-
To add a new item, proceed as follows:
-
In the list, click the arrow next to the
menu containing the group where you want to add the application,
then select the group. The contents of that group appear in the
list.
-
Click and select the
of menu item to add. For example, to add a
directory, select .
-
Click and select the item to add.
-
Enter a for the new menu item.
-
If you want a short description to appear in the main menu if a user
hovers the mouse pointer over the menu item, enter the description
in the field.
-
If you want to assign an icon to the new item, click the image frame
on the left, then select an icon for the item. If you do not select
an icon, the item appears in the menu without an icon.
-
If you want to restore the default menu layout, click
.
-
If all options are set according to your wishes, click
to apply your changes.
NOTE:
The first time you use the application
to edit the menu, changes do not take effect until you log out and
log back in. After the first time, changes appear immediately when
you make them.
2.3.10 Improving Access for the Visually Impaired
The Orca screen reader assists visually impaired users so they can read
the information on the screen, either by magnifying the screen, reading
screen output aloud, or outputting information from the screen in
Braille to a screen reader. To configure Orca, click .
The first time you run this module, a terminal opens so you can set up
the Orca screen reader. This setup consists of a series of yes/no
questions. Answer the questions as appropriate for your setup. After the
setup is complete, you must log out and log back in for your setup to
take effect.
After the initial setup, to change the preferences you set during setup
or to set additional options, click .
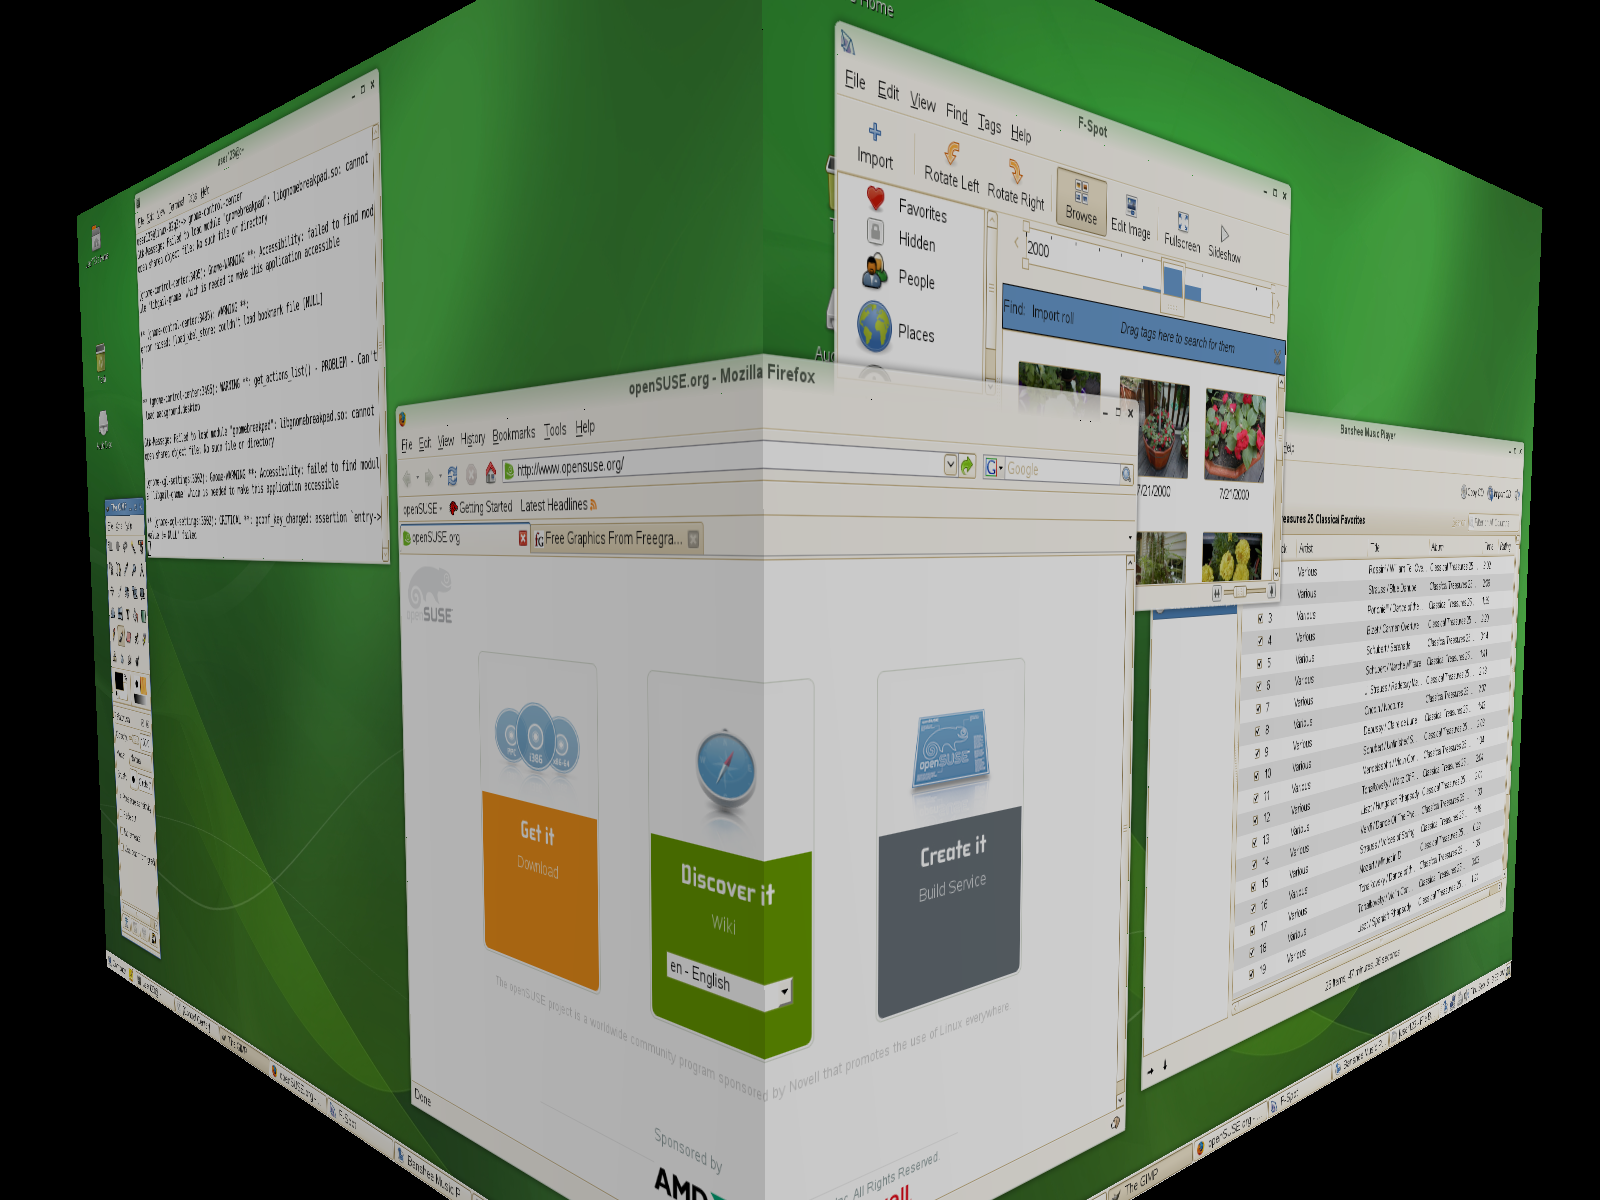
2.3.11 Configuring Desktop Effects
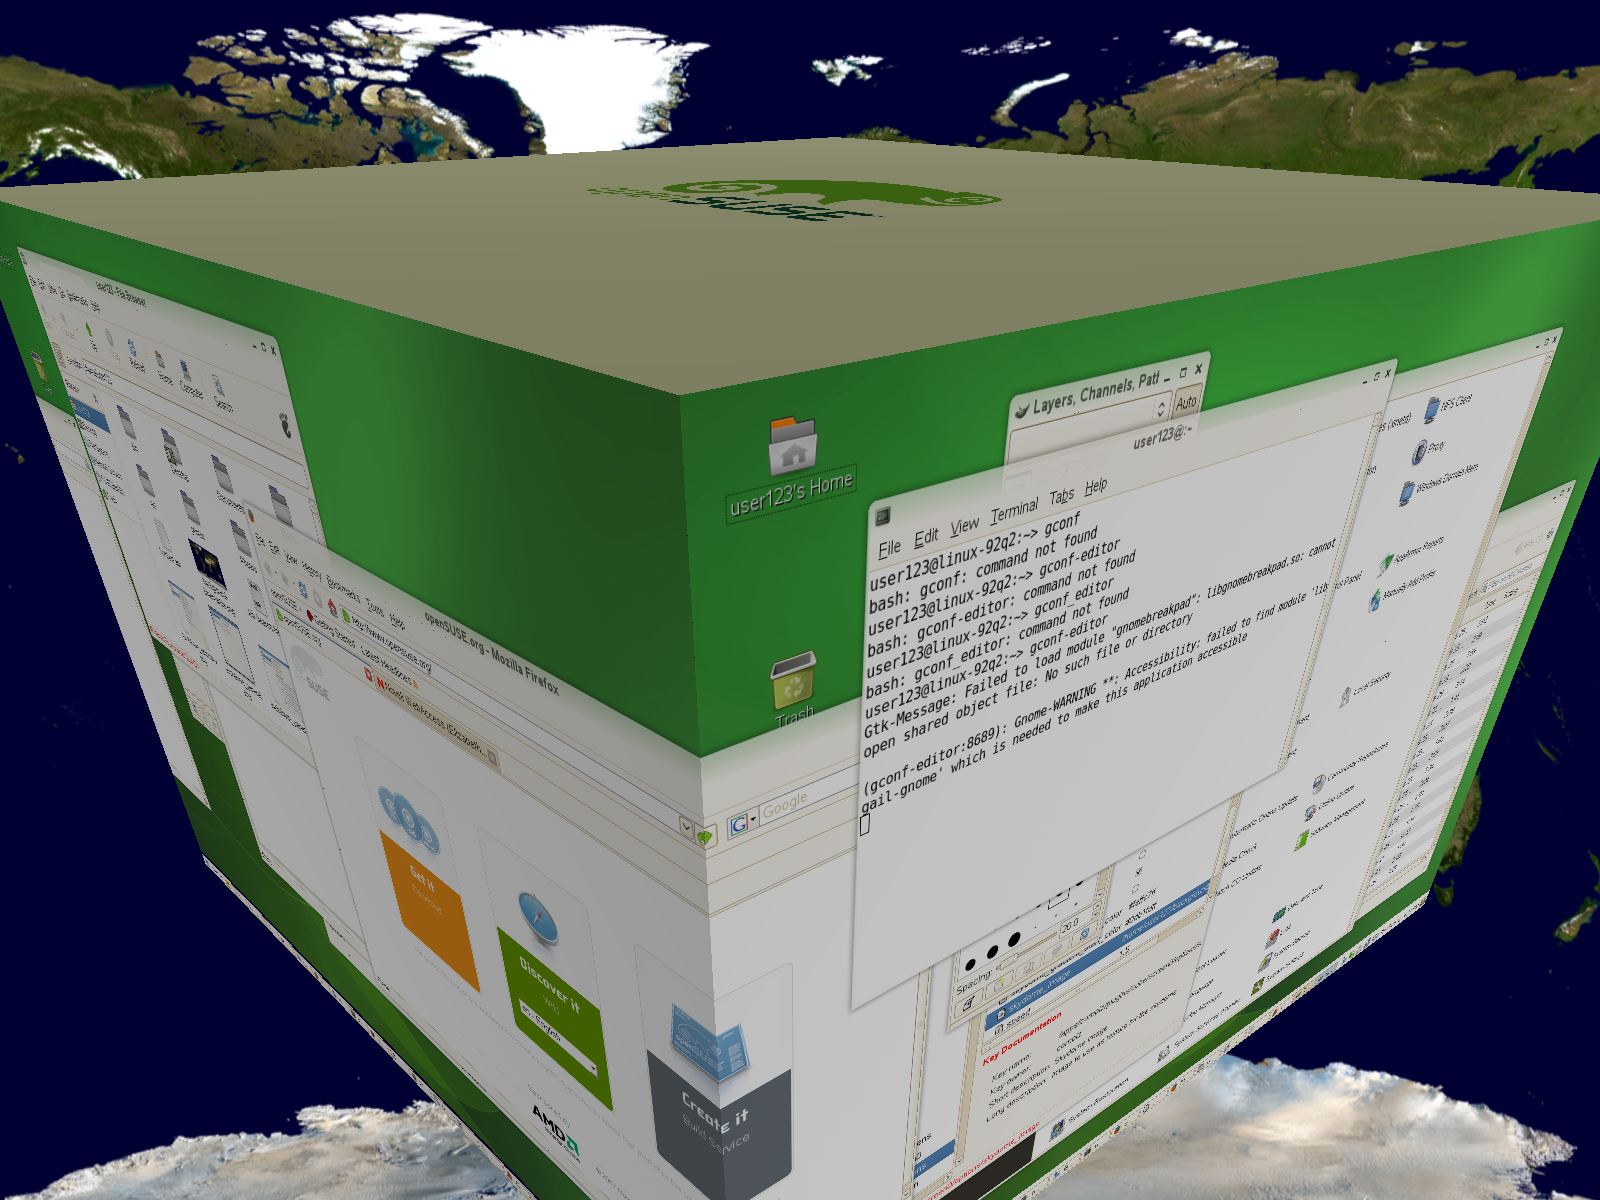
Xgl is an X server architecture that lets you turn your desktop into a
rotating 3D cube, tile windows so they do not overlap, and switch tasks
while viewing live thumbnails. You can enable translucent or transparent
windows, zoom in and out of the desktop screen, and use other window
effects such as shadows, fading, and transformations. You can also
configure windows to snap to other windows and screen edges when they
are moved.
Enabling Desktop Effects
To enable Xgl, you need a graphics adapter capable of providing 3D
support, and you also need the graphics driver that Linux uses to
operate the graphics adapter. This driver must be able to handle OpenGL
(or 3D) requests from the Linux kernel. For a list of supported
adapters, see the /etc/X11/xgl-hardware-list file
that is included with the openSUSE installation. This file tells
you which graphics cards are known to work with Xgl, which cards do not
work with Xgl, and which cards might work with Xgl but are not
supported because they are either too slow or contain too many known
defects.
Your screen resolution must be within the 1024x768 to 1920x2000 range,
and your color depth must be set at 24-bit. 3D acceleration must also
be enabled. Use SaX2 to change your graphics card and monitor
properties if necessary.
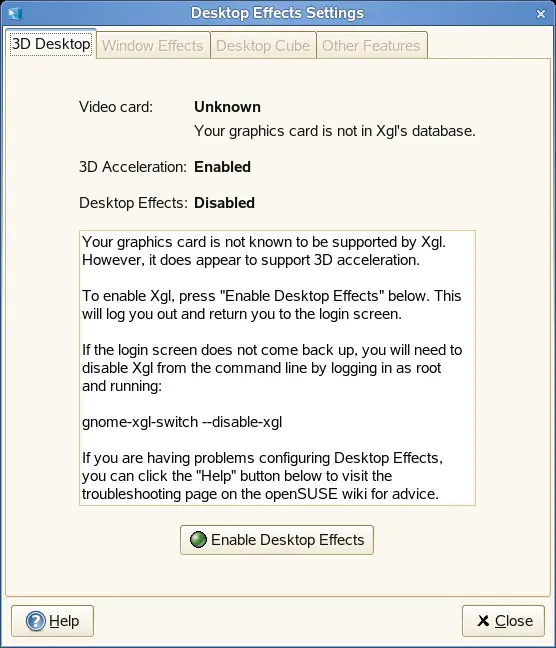
To enable desktop effects:
-
Click .
-
Click in the group.
The Desktop Effects tool analyzes your system and tries to determine
whether or not you can run Xgl. If it finds anything wrong, it
advises you on what actions you can take. For example, you might be
advised to change your screen resolution or color depth, or to
activate 3D acceleration. Follow the on-screen prompts to configure
your system for Xgl.
-
After your system is configured for Xgl, click .
-
Type the root password, then click
.
-
Click to log out of your session, then
type your username and password to log back in.
The default desktop effects are now enabled. For example, windows
wobble when they first appear and when you move them,
they fade away when you close them, and dragging a window to the far
right of the screen rotates the desktop cube. To change any of these
effects, see Modifying Desktop Effects.
You can also enable Xgl by running the following command as
root:
gnome-xgl-switch --enable-xgl
To disable Xgl, click in the
dialog box, or run the
following command as root:
gnome-xgl-switch --disable-xgl
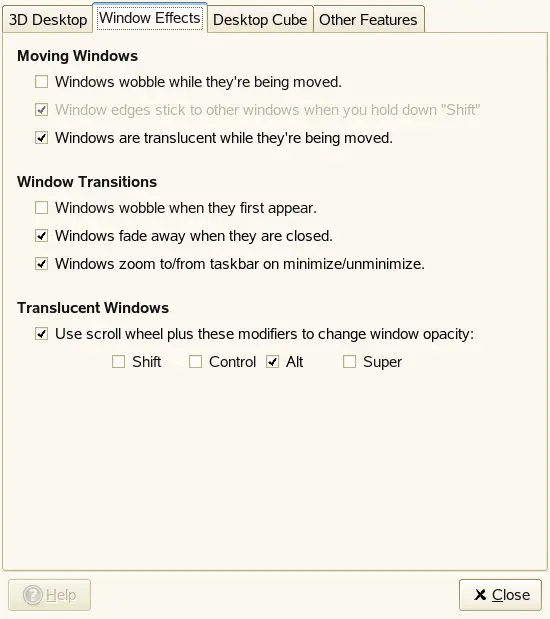
Modifying Desktop Effects
Use the tool to enable or
disable specific desktop effects, or to change the keystrokes or mouse
actions used to control those effects.
Open from the main menu by
clicking .
-
Use the options on the tab to
specify what happens when you move windows, how window transitions
appear, and to change window opacity.
-
Switch to the tab to specify how many
sides your desktop cube has, which keystroke and mouse button
combination you can use to drag the cube, and to configure edge
flipping.
-
To configure window tiling, zooming, and water effects, click the
tab.
-
For more information on the individual options, click
.
-
If all options are set according to your wishes, click
to apply the changes.
You can also use gconf-editor to change Xgl settings.
-
Click or press Alt+F2 and enter
gconf-editor.
-
Navigate to the apps/compiz/general and
apps/compiz/plugins registry folders and make
the changes you want.
-
Click to close the .
Xgl Shortcuts
The following table contains a list of the default keystrokes and mouse
movements you can use to perform desktop effects. To change any of
these shortcuts, see
Modifying Desktop Effects.
Table 2-1 Desktop Effects Shortcuts
|
Activate or deactivate rain effect
|
Shift+F9
|
|
Create ripples with the mouse pointer
|
Ctrl+Alt+Super (Windows key) and move the
mouse pointer
|
|
Panoramic view of all desktop cubes
|
Ctrl+Alt+↓ (use the Left and Right
arrows to scroll)
|
|
Rotate desktop cube
|
Ctrl+Alt+← or
→ or drag a window to the edge of the
screen
|
|
Rotate desktop cube manually
|
Ctrl+Alt+left-click the desktop and drag the
mouse pointer
|
|
Rotate desktop cube while keeping the current active window with
you
|
Ctrl+Alt+Shift+←
or →
|
|
Switch windows (thumbnail view)
|
Alt+Tab
|
|
Tile windows
|
Ctrl+Alt+↑ or move the mouse pointer to
the top left corner of the screen
|
|
Wobbly window
|
Left-click the window and drag
|
|
Zoom once
|
Super key (Windows key) and Button 3
|
|
Zoom in manually
|
Super key (Windows key) and scroll wheel up
|
|
Zoom out manually
|
Super key (Windows key) and scroll wheel down
|
More Desktop Effects
Here are some other things you can do with Xgl.
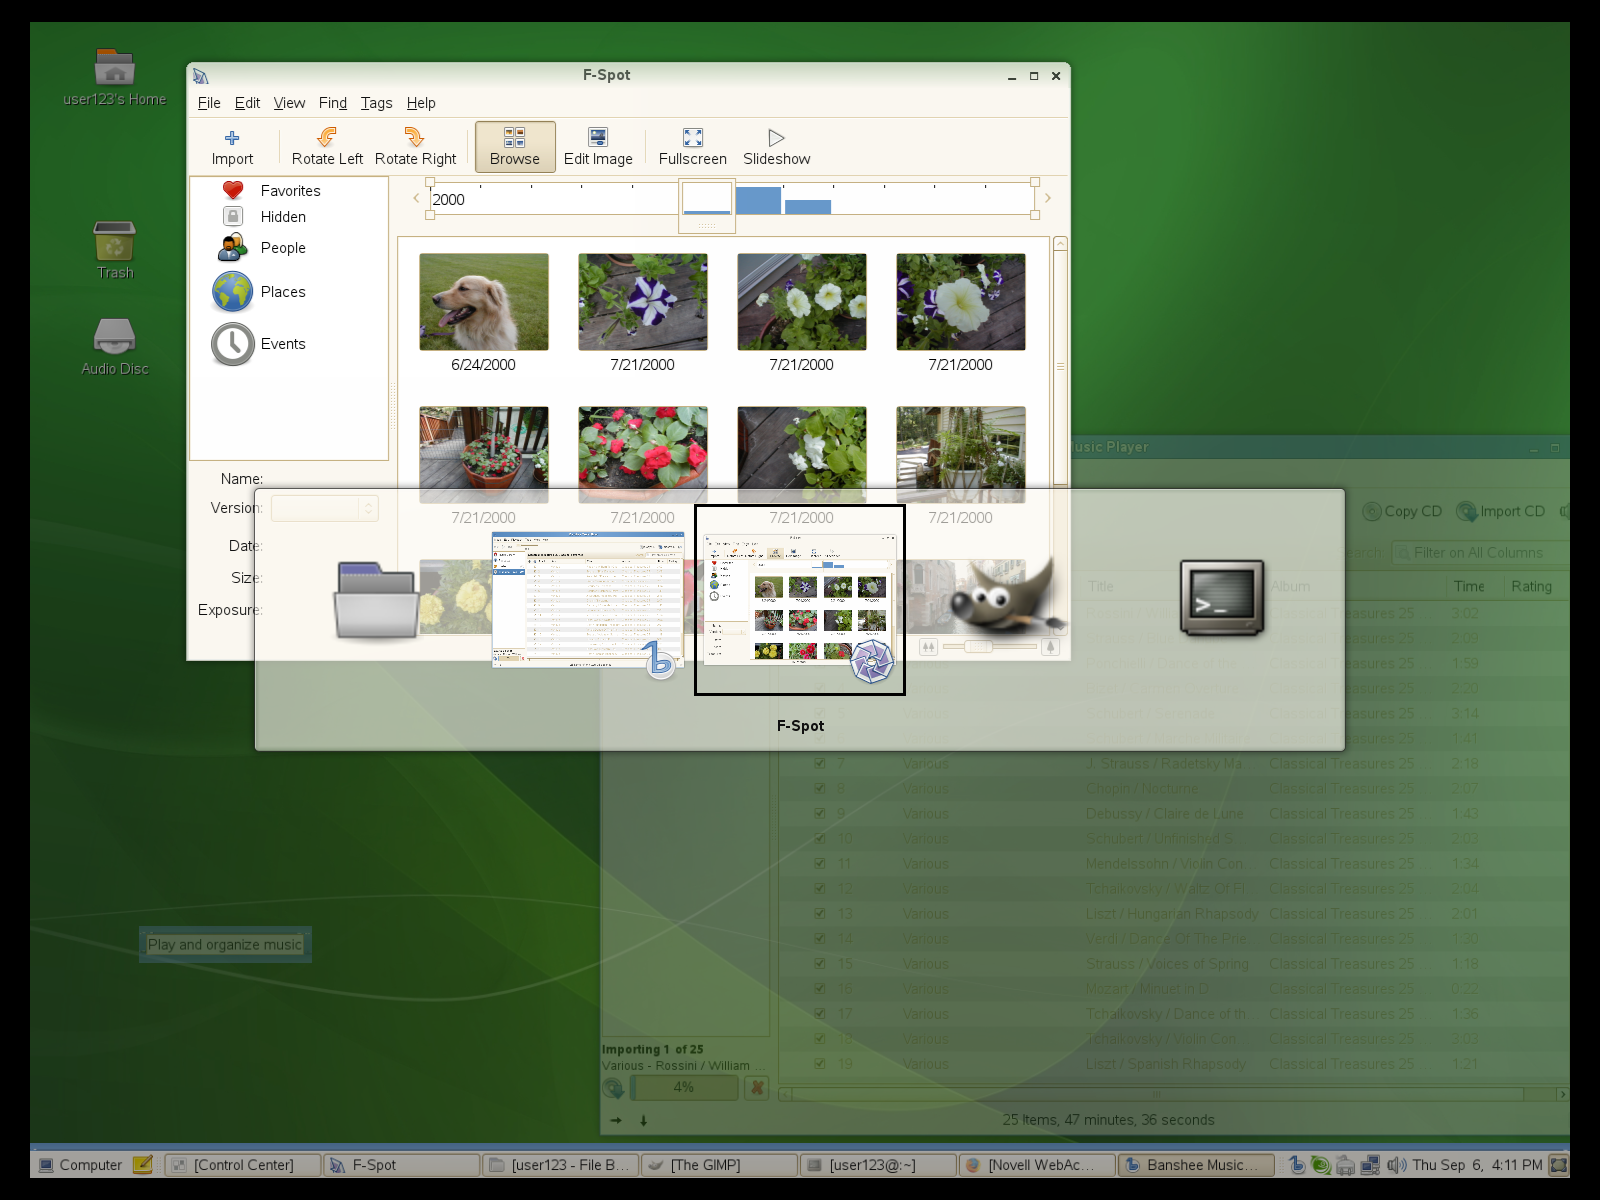
Switching Tasks
Press Alt+Tab to display a thumbnail view of all windows open on your
desktop. While holding the Alt key down,
press Tab to cycle through the list of
windows. The currently highlighted window will appear in focus.
Release the keys to access that window.
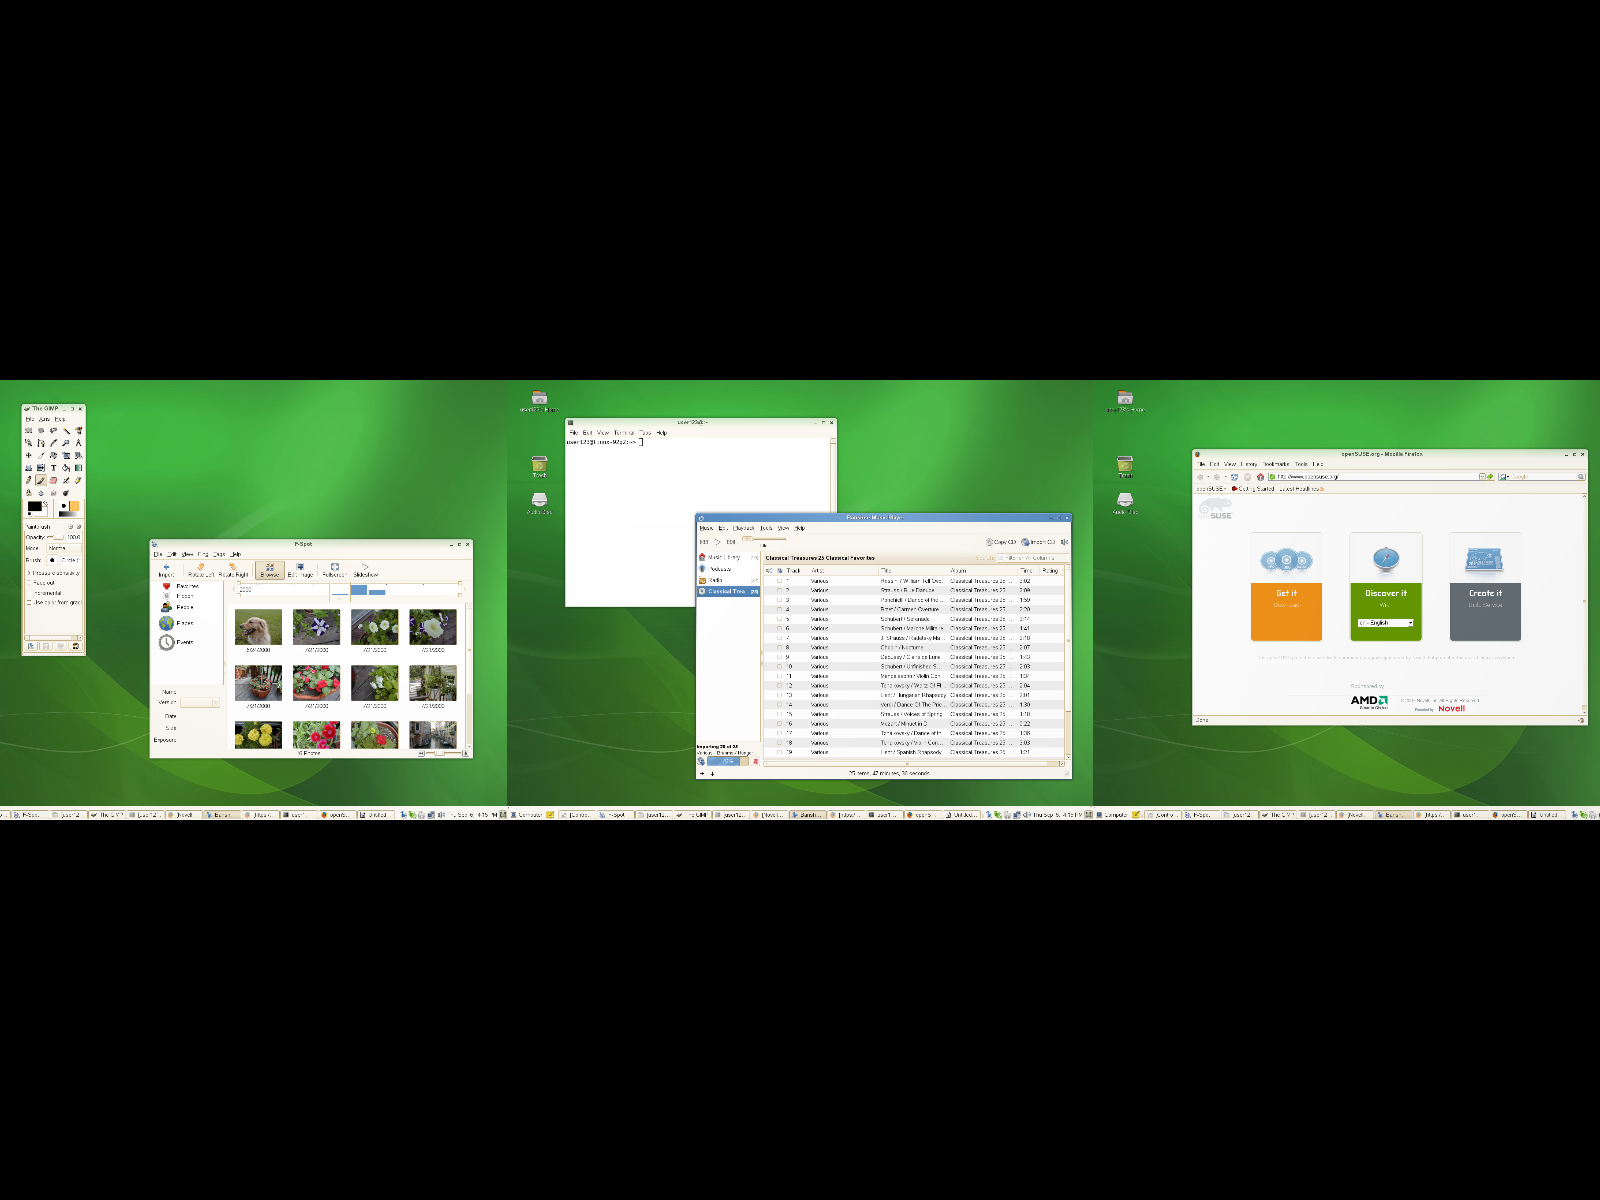
Unfolding the Cube
Press Ctrl+Alt+↓ to unfold the desktop cube,
opening a panoramic view of all your desktops. Your desktop cube is
laid out like a film strip on your screen, and you can use
← and → to select a
different screen. This is similar to the switcher feature (Alt+Tab), but
lets you view a thumbnail of your entire desktop instead of only your
active windows.
Displaying a Skydome Image Behind the Cube
You can add background wallpaper (also known as a skydome image) that
is visible when you rotate or unfold the desktop cube.
-
Click or press Alt+F2 and enter
gconf-editor.
-
Navigate to the
apps/compiz/plugins/cube/screen0/options
registry folder.
-
Scroll down the list on the right side of the and select .
-
Double-click and specify the path
to the skydome image you want to display behind the cube.
Skydome images must be in .png format. The
suggested image sizes for skydome images are 1024 x 1024, 1024 x
2048, 1024 x 4096, 2048 x 1024, 2048 x 2048, 2048 x 4096, 4096 x
1024, 4096 x 2048, and 4096 x 4096.
-
(Optional) Select to make it
look like you are moving around the cube when you use your mouse to
rotate the cube.
-
Click .
-
Click to close the .
|
|
|