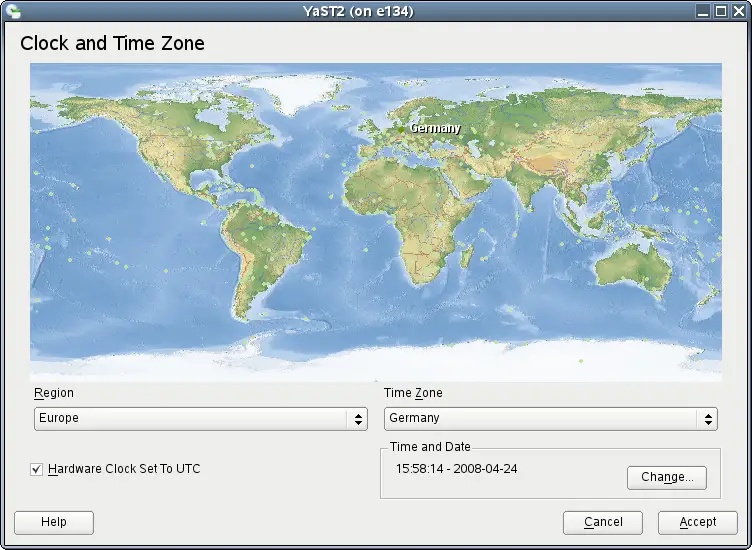
6.2 Changing the Country and Time Settings
Using the YaST date and time module, adjust your system date, clock and
time zone information to the area you are working in. First, select a
general region, such as , for example. Choose an
appropriate time zone that matches the one you are working in, for
example, .
Depending on which operating systems run on your workstation, adjust the
hardware clock settings, accordingly:
-
If you run another operating system on your machine, such as Microsoft
Windows*, it is likely your system does not use UTC, but local time. In
this case, uncheck .
-
If you only run Linux on your machine, set the hardware clock to UTC
and have the switch form standard time to daylight saving time
performed automatically.
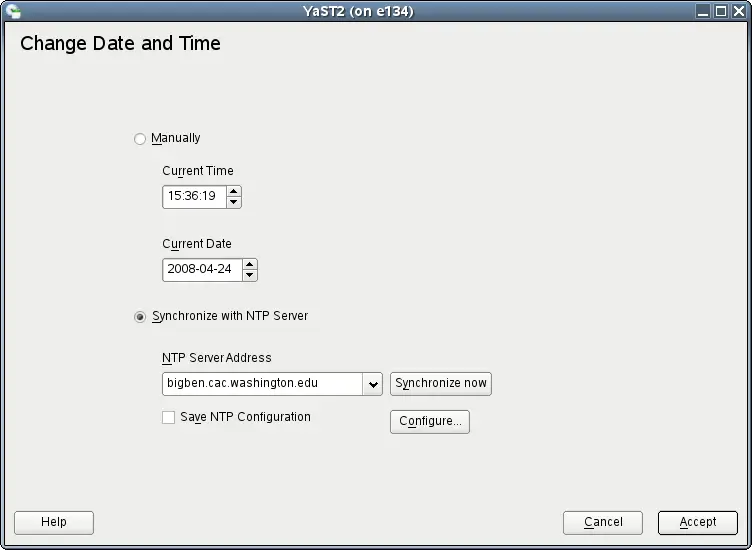
You can change the date and time manually or opt for synchronizing your
machine against an NTP server, either permanently or just for adjusting
your hardware clock. If you want to set date and time manually, proceed
as follows:
-
Click to set date and time.
-
Select and enter date and time values.
-
Confirm with .
If you want to make use of an NTP server:
-
Click to set date and time.
-
Select .
-
Enter the address of an NTP server, if not prefilled.
-
Press , to get your system time set
correctly. If you want to make use of NTP permanently, enable
.
-
Confirm with .
With the button, you can also open the
advanced NTP configuration. For details, see
Section 24.1, Configuring an NTP Client with YaST,
(↑ Reference ).