Formatting shadows
Shadowing can be applied to both lines and areas. To apply a shadow to an area, first select the object to which shadowing should be applied, then select Format > Area.
Shadows can also be applied to lines, but it is not very obvious how to do it. One way is to click the Shadow icon on the Line and Filling toolbar (see the last tool in the figure below). The other way is to apply a style to the line that uses a shadow (see
Using graphics styles to format graphics for additional information on using styles).

The Line and Filling toolbar provides quick access to many common formatting tools.
Using the first method, you cannot customize the shadow; it is applied according to the default settings. The second method offers full flexibility to configure the shadow properties. If the Line and Filling toolbar is not shown when selecting an object, open it using View > Toolbars on the menu bar.
The dialog to customize a shadow is shown below.
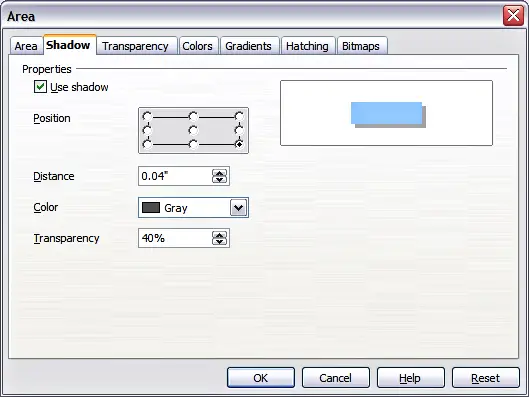
Dialog for customizing the shadowing of graphic objects.
When the Use shadow checkbox is selected, the following parameters can be set:
- Position: the selected point in the mini map determines the direction in which the shadow is cast.
- Distance: determines the distance between the object and the shadow.
- Color: sets the color of the shadow.
- Transparency: determines the amount of transparency for the shadow.
 | By setting the transparency value above 0%, the objects below the shadow are not completely hidden by the shadow. This produces a pleasant visual effect, as shown below.
|

Shadow with 50% transparency.


