Customizing menu content
You can customize menus in OpenOffice.org.
- Choose Tools > Customize.
- On the Customize dialog, pick the Menus page.
- In the Save In drop-down list, choose whether to save this changed menu for Impress or for a selected document.
- In OpenOffice.org Impress Menus, select the menu you want to customize in the Menu drop-down list.
- To customize the selected menu, click on the Menu or Modify buttons. You can also add commands to a menu by clicking on the Add button. These actions are described in the following sections. Use the up and down arrows next to the Entries list to move the selected menu item to a different position.
- When you are done customizing menus, click OK to save your changes.

The Menus page of the Customize dialog.
Creating a new menu
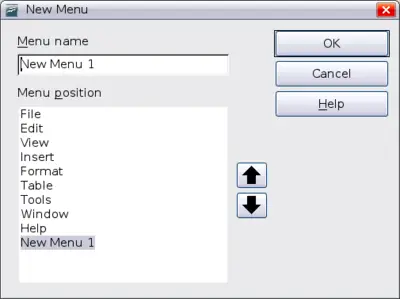
In the Customize dialog, click New to display the dialog shown below.
- Type a name for your new menu in the Menu name box.
- Use the up and down arrow buttons to move the new menu into the required position on the menu bar.
- Click OK to save.
The new menu now appears on the list of menus in the Customize dialog. (It will appear on the menu bar itself after you save your customizations.)
After creating a new menu, you need to add some commands to it, as described in
Adding a command to a menu.
Adding a new menu
Modifying existing menus
To modify an existing menu, select it in the Menu list and click the Menu button to drop down a list of modifications: Move, Rename, Delete. Not all of these modifications can be applied to all the entries in the Menu list. For example, Rename and Delete are not available for the supplied menus.
To move a menu (such as File), choose Menu > Move. A dialog similar to the one shown above (but without the Menu name box) opens. Use the up and down arrow buttons to move the menu into the required position.
To move submenus (such as File | Send), select the main menu (File) in the Menu list and then, in the Menu Content section of the dialog, select the submenu (Send) in the Entries list and use the arrow keys to move it up or down in the sequence. Submenus are easily identified in the Entries list by a small black triangle on the right hand side of the name.
In addition to renaming, you can specify a keyboard shortcut that allows you to select a menu command when you press Alt+ an underlined letter in a menu command.
- Select a menu or menu entry.
- Click the Menu button and select Rename.
- Add a tilde (~) in front of the letter that you want to use as an accelerator. For example, to select the Save All command by pressing Alt+V, enter Sa~ve All.
Adding a command to a menu
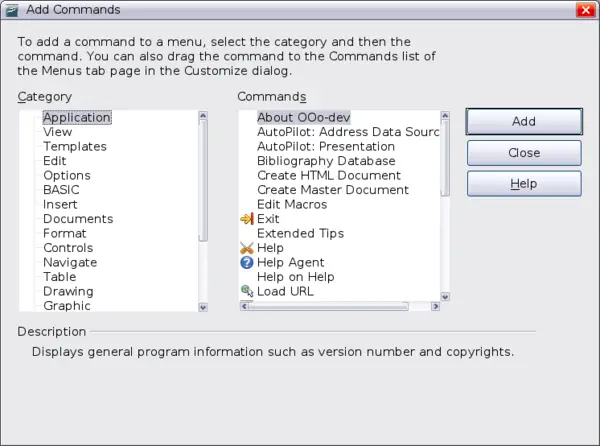
You can add commands to the supplied menus and to menus you have created. On the Customize dialog, select the menu in the Menu list and click the Add button in the Menu Content section of the dialog.
On the Add Commands dialog, select a category and then the command, and click Add. The dialog remains open, so you can select several commands. When you have finished adding commands, click Close. Back on the Customize dialog, you can use the up and down arrow buttons to arrange the commands in your preferred sequence.
Adding a command to a menu
Modifying menu entries
In addition to changing the sequence of entries on a menu or submenu, you can add submenus, rename or delete the entries, and add group separators.
To begin, select the menu or submenu in the Menu list near the top of the Customize page, then select the entry in the Entries list under Menu Content. Click the Modify button and choose the required action from the drop-down list of actions.
Most of the actions should be self-explanatory. Begin a group adds a separator line after the highlighted entry.


