-
If the presentation that you want to export is not already open, go to
and select the
presentation that you want to export.
-
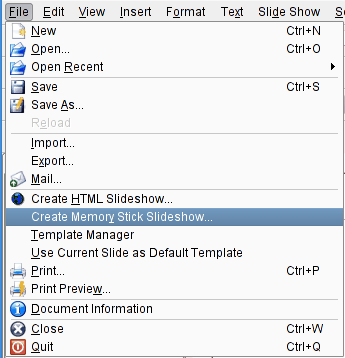
Now, select the
menu and choose
.
-
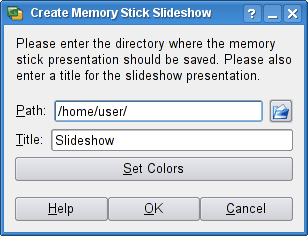
This will bring up the
Create Memory Stick
Slideshow
dialog.
The
Path
is the directory in which your presentation will
be exported to as directories (DCIM and
MSSONY, see the directory structure
diagram above) will be created. If you are able to, you may wish to export
directly
to the Memory Stick™, in which case you would enter the
location of the medium here.
The
Title
is used for both the name of the index
file, and as a text label on the title slide. Note that this title
does not affect the titles on any of the normal presentation slides -
the title slide is visible using the Sony projector setup prior to
starting the actual presentation display.
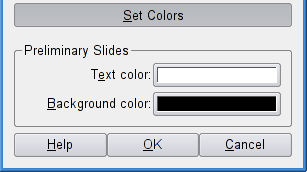
Select the
Set Colors
option to expand the
dialog:
These two color selectors are only used for the title slide. It
can be useful to change the title slides to make the presentations
easier to identify when working on the projector, though it is perfectly safe to
leave them as default.
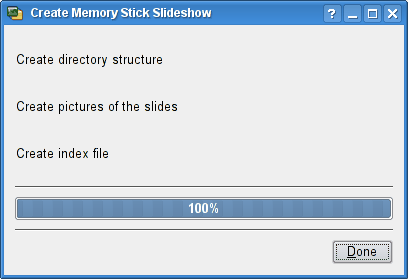
You can then press the
OK
button to proceed with the
actual export process.
-
Your presentation will now be exported into the correct format, with the
following dialog informing you of the progress of this process:
When the export is complete, you can select the
Done
button, and the dialog will close.
-
If you did not export the slideshow directly onto a Memory
Stick™, you will need to copy the correct files onto the
Memory
Stick™ before you can utilise the projector. As noted above,
you need to copy over the correct directories and files starting at
DCIM and MSSONY into the
"root", or / of the Memory Stick™. It
is
critical that the directory structure is maintained, and you may
find it easier to copy the whole of DCIM and
MSSONY directories.
If necessary, you can safely rename the index file (which is
Slideshow.SPP by default), however you cannot
rename the slide images, nor can you change the name of these directories,
as these are encoded into the index file.