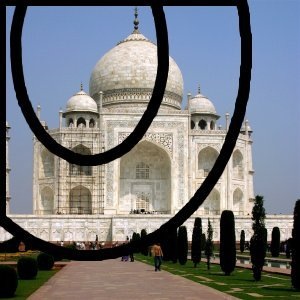
Figure 11.219.
The same image, before and after using Gfig
This filter is a tool: You can create geometrical figures to add them
to the image. It is very complex. I hope this paper will help you.
When using this filter, elements inserted in the image will be placed
in a new layer. So the image will not be modified, all modifications
occuring in this layer.
13.15.2.
Starting filter
You get to this filter via the Image menu through
Filters->Render->Gfig
13.15.3.
Options
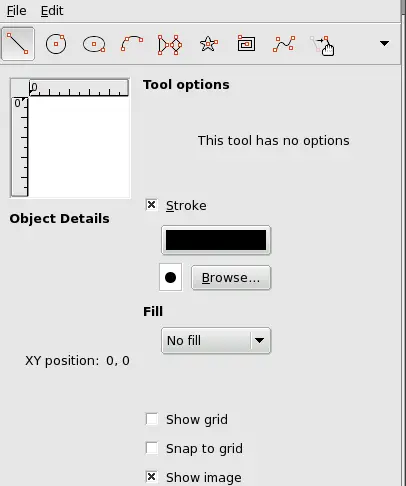
Figure 11.220.
“Gfig” filter options
The tool bar
At the top of dialog, you can find a set of icons which
represents the functions of this filter. Help pop-ups are
explicit.
Functions for object drawing
On the left part of tool bar, you can find some functions
for object drawing. You enable them by clicking on the
corresponding icon. You can create the following objects
(note that Control points are
created at the same time as object):
Line: With this tool, you can
draw lines. Click on Preview to mark start point, then
drag mouse pointer to the end point.
Circle: With this tool, you can
draw circles. Click on Preview to mark center, then
drag mouse pointer to the wanted radius.
Ellipse: With this tool, you can
draw ellipses. Click on Preview to mark center, then
drag mouse pointer to get the wanted size and form.
Arc: With this tool, you can
draw circle arcs. Click on Preview to set start point.
Click again to set another arc point. Without
releasing mouse button, drag pointer; when you
release mouse button, the arc end point is placed and
an arc encompassing these three points is drawn.
Regular polygon: With this
tool, you can create a regular polygon. Start with
setting side number in Tool Options
at the right of Preview. Then click on
Preview to place center and, without releasing mouse
button, drag pointer to get the wanted size and
orientation.
Star: With this
tool, you can create a star. Start with
setting side number (spikes) in Tool Options
at the right of Preview. Then click on
Preview to place center and, without releasing mouse
button, drag pointer to get the wanted size and
orientation.
Spiral: With this
tool, you can create a spiral. Start with
setting spire number (sides) and spire orientation in
Tool Options at the right of
Preview. Then click on Preview to place center and,
without releasing mouse button, drag pointer to get
the wanted size.
Bezier's Curve: With this tool,
you can create Bezier's curves. Click on Preview to
set start point and the other points: the curve will
be created between these points. To end point creation
press Shift key when creating last
point.
Functions for object management
In the middle of tool bar, you can find tools to manage
objects:
Move (Object): With this tool,
you can move the active object. To enable an object,
click on a control point created at the same time as
the object.
Move (Point): With this tool, you
can click-and-drag one of the control points created
at the same time as object. Each of these points moves
the object in a different way.
Copy: With this tool, you can
duplicate an object. Click on an object control point
and drag it to the wanted place.
Delete: Click on an object
control point to delete it.
Select: With this tool, you can
select an object to active it. Simply click on one of
its control points.
Functions for object organisation
At the right of tool bar, you can find tools for object
superimposing (you can also get them by clicking on the
drop-down list button if they are not visible). You have:
Raise/Lower Selected Object:
With this tool, you can push the selected object one
level up or down.
Raise/Lower selected object to
top/bottom: self explanatory.
Functions for object display
The drop-down list in tool bar offers you some more
functions:
Back/Forward: These functions
allow you to jump from one object to another. Only
this object is displayed.
Show all objects: This function
shows all objects again, after using both previous
functions.
Preview field
Preview comes with several options:
Settings
In this area, you have several options to work with this filter.
Tool Options
This area shows tool options.
Stroke
If this option is checked, the object will be drawn. Two
buttons are available, to select color and brush type.
Filling
With help of this drop-down list, you can decide whether
and how the object will be filled, with a color, a pattern
or a gradient.
Show grid
If this option is checked, a grid is applied on Preview to
make object positioning easier.
Snap to Grid
If this option is checked, objects will align to the grid.
Show image
When this option is checked, the current image is
displayed in Preview. If not checked, a white surface is
shown and neither stroke color nor brush type are shown.
Published under the terms of the GNU General Public License