One of the primary uses you will make of channel masks is to save
selections. Why should you save a selection to a channel? There are
many reasons. The first is that saving the selection protects your
work, which is particularly important if you are making an involved
and difficult selection. Second, it allows you to make your
selections in parts. This helps divide and simplify the work. Third,
it allows you to reuse a selection for several purposes. This is
useful for all sorts of rendering operations, such as making drop
shadows, highlights, and special textures (for example, see
Section
8.5). Fourth, it allows you to refine your
selections in ways that would otherwise be impossible. Finally, many
special effects can be had using filter plug-ins on masks. As you can
see, saving a selection to a channel mask really has a very broad
range of benefits.
After making a selection with any of the tools described in
Chapter
3, we can save the selection to a channel
mask using the Save To Channel function, found in the Image:Select menu.
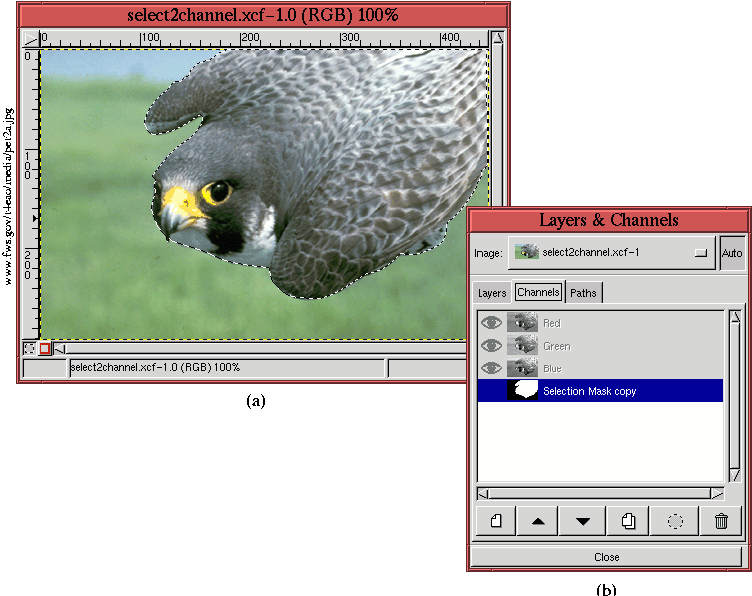
Figure
4.2(a)
Figure 4.2:
Saving a Selection to a Channel Mask
 |
illustrates an image of a selected falcon, and
Figure
4.2(b) shows the Channels dialog after
having used the
Save to Channel
function. The thumbnail appears as a grayscale image, where white
corresponds to fully selected, gray to partially
selected, and black to unselected
pixels. As seen in Figure
4.2(b), the
default channel mask title is Selection Mask copy.
After using Save to Channel, the active focus changes from the
Layers dialog to the newly created channel in the Channels dialog.
Nevertheless, the selection in the image window remains active. This
has several important consequences. First, since the new channel is
active, all ensuing filtering or painting operations are applied only
to this channel. Furthermore, since the original selection is still
active, the only parts of the new channel that can be affected are
those inside the selection area. For example, trying to paint outside
the selection will have absolutely no effect.
Thus, if the objective is to work on the newly created channel, the
selection must be canceled by typing C-S-a in the image window,
and the channel must be made visible by toggling on its Eye icon in
the Channels dialog. If the objective is to save the selection as a
channel and to move onto other image operations, the selection
must be canceled, and the appropriate layer in the Layers dialog must
be made active.
