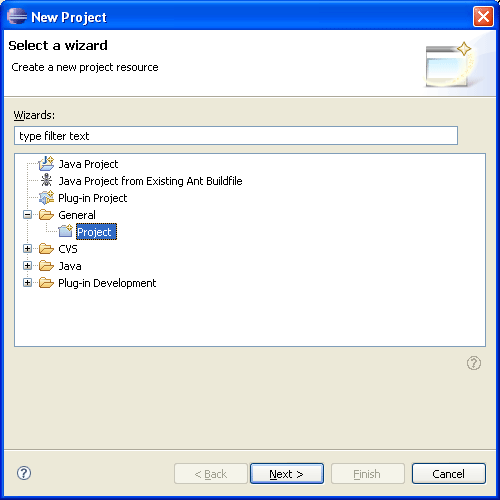
New Project wizard
This wizard helps you create a new project in the Workbench.
When you first bring up the New Project wizard, you need to select
the type of project you want to create. Select the General type if you
want to create a generic project. To assist in locating a particular wizard,
the text field can be used to show only the wizards that match the entered text.
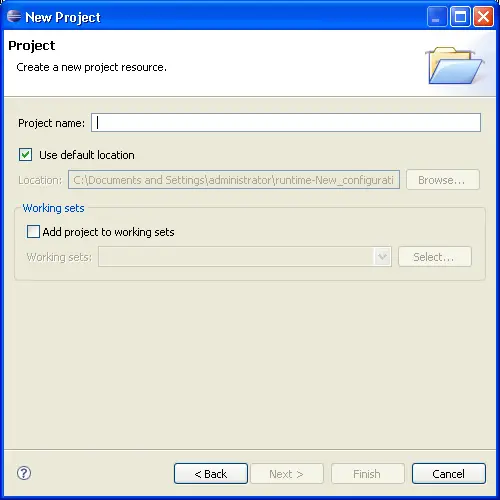
Create a New Project Resource Page
When you select Next, you will be presented with the New Project Resource
Page, containing the following edit fields:
|
Field
|
Description
|
Default
|
|
Project Name
|
The name of the new project to be created.
|
<blank>
|
|
Location
|
The location in the file system where the project will
be created. De-select "Use default location" to specify a location other
than the default. You can type the new location or browse to select
a file system location for the new project.
|
The workspace root directory
|
After you indicate a name and location for the project, you
can either click Finish to create the project, or you can
click Next to set up project dependencies on the Select Referenced
Projects page.
Here is what the New Project Resource page looks like:
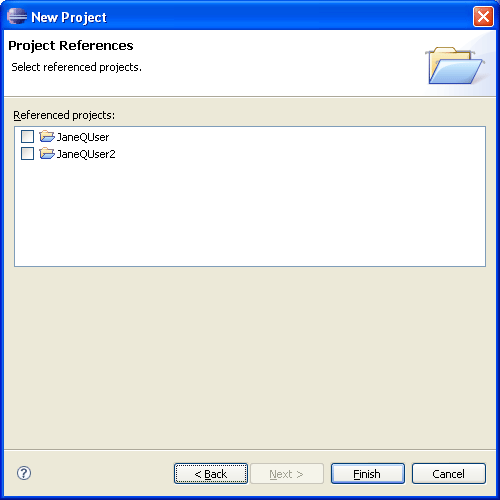
Select Referenced Projects page
In the Referenced Projects list, you can set project
dependencies for the new project. In the list of other projects in the
Workbench, you can select one or more projects on which you want the new
project to depend. Initially, no projects will be selected.
Click Finish when you are done to create the
new project in the Workbench.
Here is what the Select Referenced Projects page looks
like:
New Project perspective options
On the preferences page (
Window > Preferences > General
> Perspectives), you can change the way that new projects are initially
displayed. For details on how to change this option see
Workbench.

Project Explorer View


