Maximizing and minimizing elements of the eclipse presentation
The eclipse presentation provides a rich environment consisting of (in its basic form) an
Editor Area (containing one or more stacks showing the open editors) surrounded by
one or more View Stacks (each containing one or more views).These various parts compete
for valuable screen real-estate and correctly managing the amount of screen given to each
can greatly enhance your productivity within the IDE.
The two most common mechanisms for managing this issue are 'minimize' (i.e. make me use as
little space as possible) and 'maximize' (i.e. give me as much space as you can). The eclipse
presentation provides a variety of ways to access these operations:
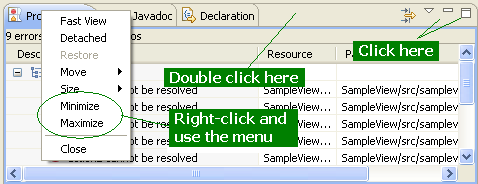
- Using the minimize and maximize buttons provided on a stack's border
- Selecting the 'Minimize' or 'Maximize' item on the context (right-click) menu for a stack
- Double-clicking on a stack
- Using 'Ctrl + M': this is a key binding for a command that will toggle the currently active
part between its 'maximized' and its 'restored' (i.e. normal) states.
Maximize:
It is desirable at times to focus your attention on one particular part to the exclusion of
the others. The most popular candidate for this is, of course, maximizing the editor area in
order to make as much of the display available for editing as possible (but there are workflows
where it would make sense to focus on a view as well).
As of 3.3 the default presentation implements the maximize behavior by minimizing all stacks
except the one being maximized. This allows the maximized stack to completely occupy
the main presentation while still allowing access any open views in your perspective by using
the icons in their Trim Stack (the area around the edges of the window is called the 'trim').
Also in 3.3 the behavior for managing the editor maximization has been changed to operate on
the complete Editor Area (rather than simply maximizing the particular Editor Stack as is the
case in the 3.0 and 2.1 presentations). This allows for 'compare' workflows which require the
ability to see both files in a split editor area at the same time.
Minimize:
Another way to optimize the use of the screen area is to directly minimize stacks that are of no current
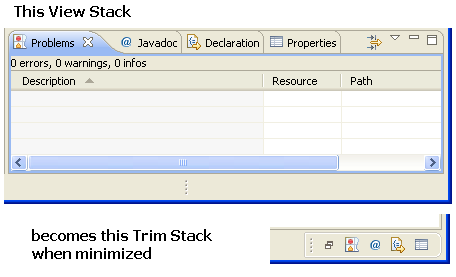
interest. As of 3.3 the default presentation minimizing a stack will cause it to be moved into
the trim area at the edges of the workbench window, creating a Trim Stack. View Stacks
get minimized into a trim representation that contains the icons for each view in the stack:
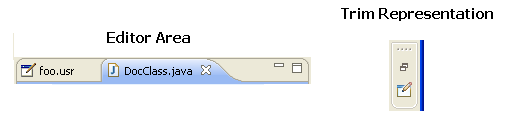
The minimize behavior for the Editor Area is somewhat different; minimizing the Editor Area
results in a trim stack containing only a placeholder icon representing the entire editor area
rather than icons for each open editor (since in most cases all the icons would be the same, making
them essentially useless).
If your particular workflow is such that you need to have more than one element (i.e. having the
Editor Area and a View Stack in the presentation at the same time)
you can still gain additional screen space by minimizing the stacks that aren't of current interest.
This will remove them from the main presentation and place them on the outer edge of the workbench
window as Trim Stacks,
allowing more space for the remaining stacks in the presentation.
Note: There are two ways to end up with a stack in the trim:
- Directly minimizing the stack
- As the result of another stack being maximized
Depending on how the Trim Stack was created its behavior is different; when un-maximizing only those
trim stacks that were created during the initial maximize will be restored to the main presentation
while stacks that were independently minimized stay that way.
Tip:
This difference is important in that it allows you fine grained control over the presentation. While
using maximize is a one-click operation it's an 'all or nothing' paradigm (i.e. no other stack is allowed
to share the presentation with a maximized stack). While adequate for most tasks you may find yourself wanting to
have the presentation show more than stack. In these scenarios don't maximize; minimize all the other stacks except
the ones you want in the presentaton. Once you have it set up you can still subsequently maximize the editor area but
the un-maximize will only restore the particular stack(s) that were sharing the presentation, not the ones you've
explicitly minimized.
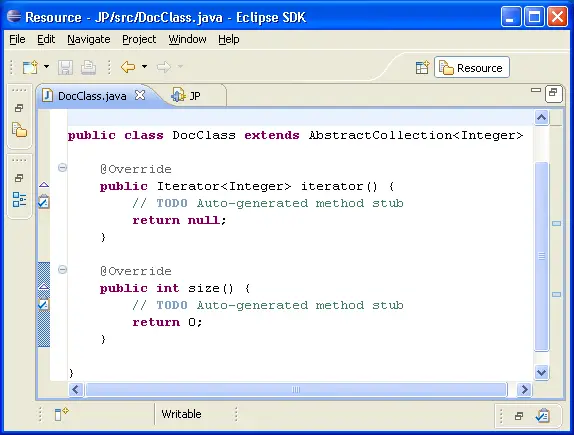
Normal Presentation

Editor Area Maximized