-
Click
 Window > Open Perspective > Other... > Java
to change to the Java perspective.
Window > Open Perspective > Other... > Java
to change to the Java perspective.
-
Click
File > New > Other... > Java Project
to open the New Java Project wizard.
-
Type "Framework" in the Project name field.
-
In Contents group, change selection to Create project from existing source.
Click Browse... and choose the
D:\Framework
directory.
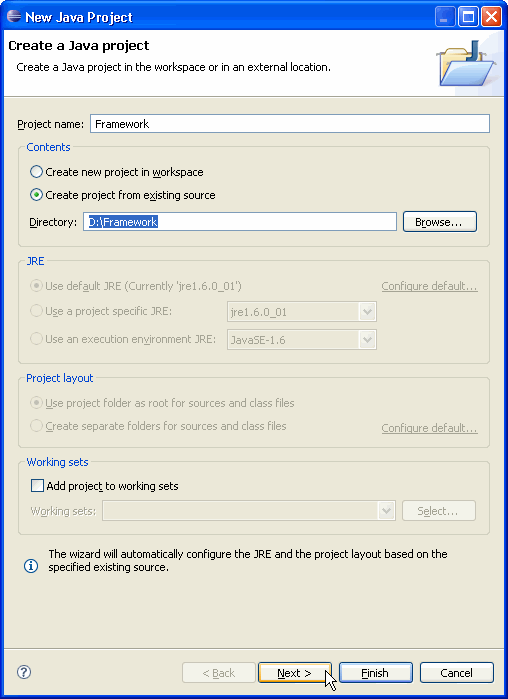
Click Next.
-
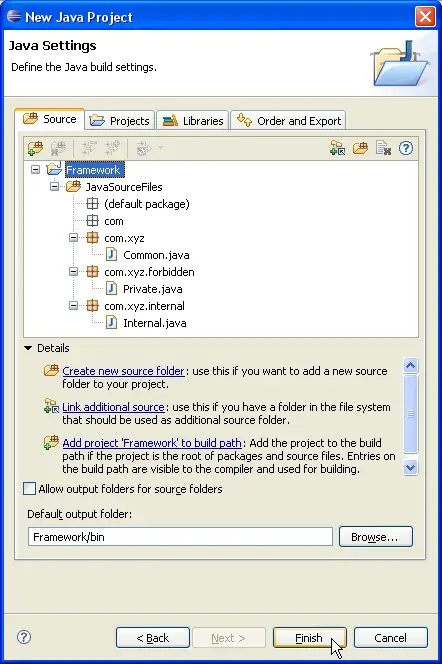
On the next page, verify that directory
JavaSourceFiles
has been automatically added as source folder.
Expand it to preview your project source folder contents:
-
Click Finish.
-
In Java perspective, type Ctrl+N to open New wizards dialog.
Select Java project in the list of wizards and click Next.
-
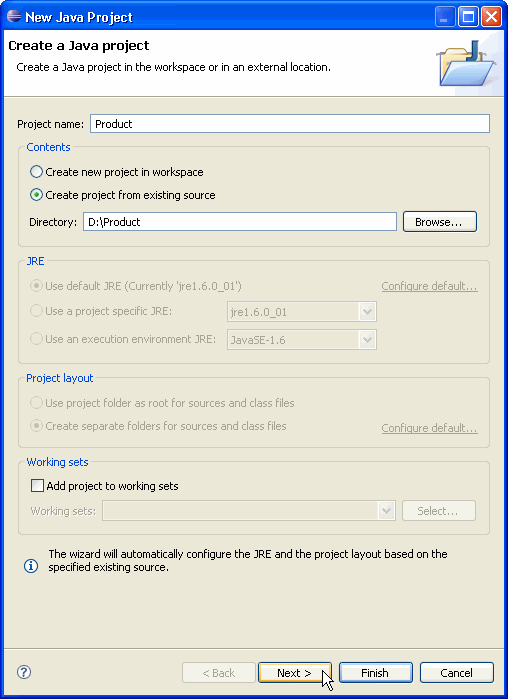
On the next page, type "Product" in the Project name field.
-
In Contents group, change selection to Create project from existing source.
Click Browse... and choose the
D:\Product
directory.
-
Click Next.
-
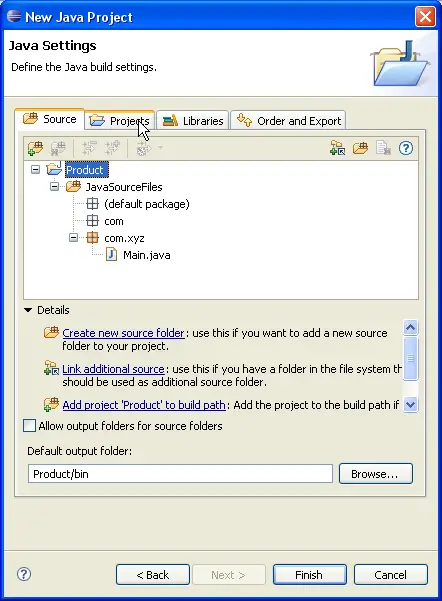
On the next page, verify that directory
JavaSourceFiles
has been automatically added as source folder.
Expand it to preview your project source folder contents:
-
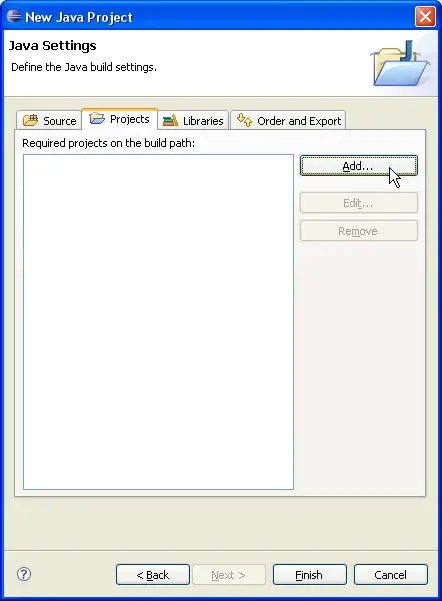
Select Projects tab.
Click Add...to add a dependency to source framework project...
-
In Required Project Selection, check "Framework".

-
Click OK to validate and close dialog.
-
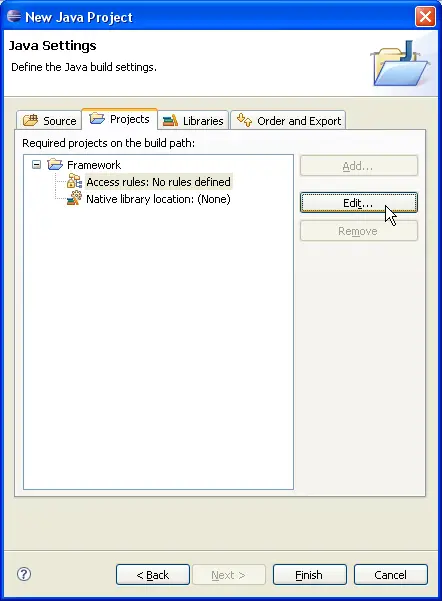
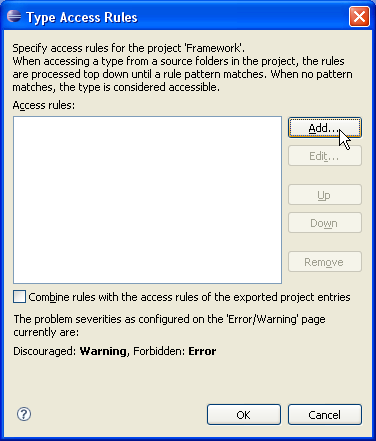
Now, let's put access rules on source framework content to authorize, discourage or forbid access to "Framework" source folders, package and classes...
In Projects tab, select "Access rules" of "Framework" depending project.
Click Edit....
-
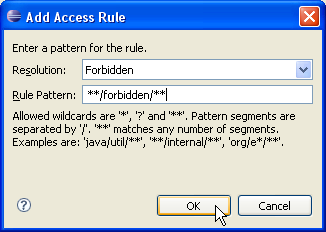
In Type Access Rules, click Add....
-
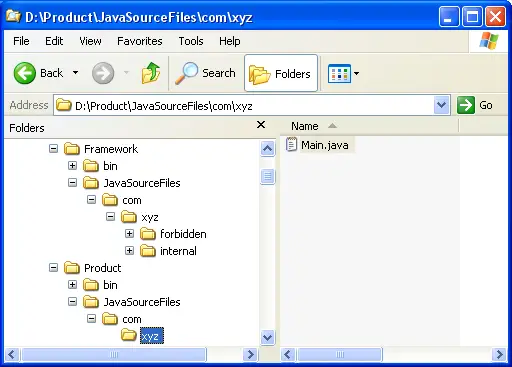
In Add Access Rule, select "Forbidden" for Resolution.
Type "**/forbidden/**" in Rule Pattern field.
-
Click OK to validate access rule and close dialog.
-
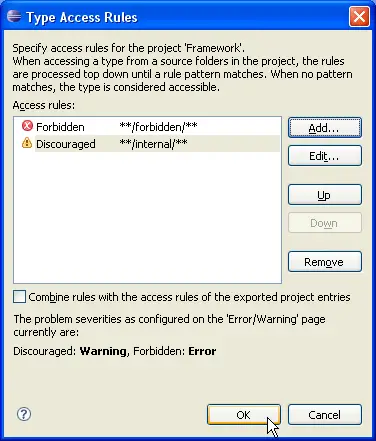
Add another access rule:
Resolution: "Discouraged" and Rule Pattern: "**/internal/**".
-
Your access rules now look as follows:
-
Click OK to validate these new rules and close dialog.
-
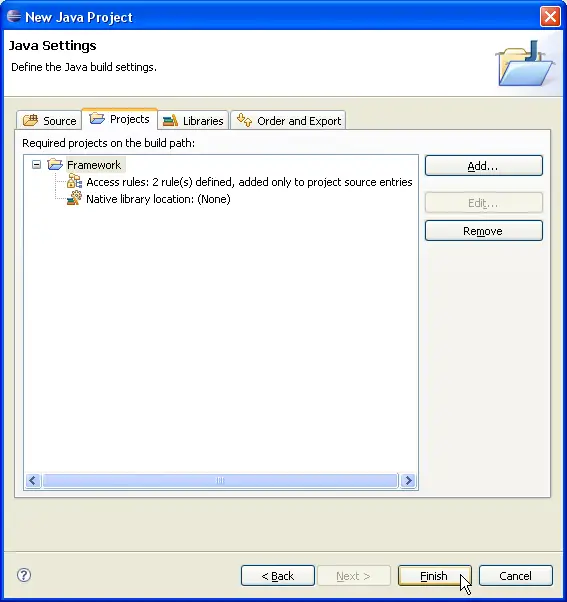
Dependent project has now 2 access rules set.
-
Click Finish.
-
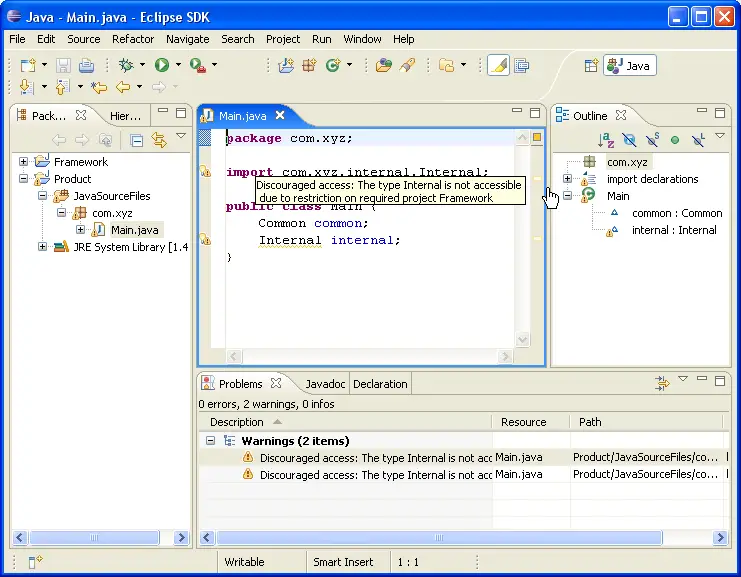
You now have a Java project which contains the source of "Product" and which is using the source of "Framework".
Some packages of the project "Framework" are restricted and if you try to import them, compiler displays either warnings or errors depending on your restriction level: