|
 |
|
| |
Creating your first Java project
In this section, you will create a new Java project. You will be using
JUnit as your example project. JUnit is an open source unit testing framework for Java.
Getting the Sample Code (JUnit)
First you need to download the JUnit source code.
- Click
here to download the JUnit source code.
- Save the archive (do not extract) to a directory from now on referenced as <Downloads>.
Creating the project
- Inside Eclipse select the menu item File > New >
Project.... to open the New Project wizard
- Select Java Project then click Next
to start the
 New Java Project
wizard:
New Java Project
wizard:
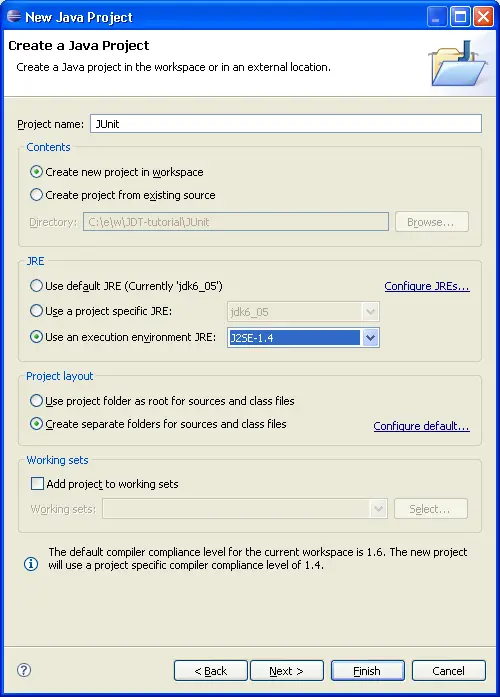
On this page,
- type "JUnit" in the Project name field, and
- select "J2SE-1.4" in the Use an execution environment JRE field.
Then click Finish.
- In the Package Explorer, expand the JUnit project and
select the source folder src.
- Select the menu item File > Import....
- Expand General, select Archive file, and click Next.
- Click the Browse button next to the Archive
file field and browse to select
<Downloads>/junit381src.jar
Note: This step assumes that you followed steps 1 and 2 in the Getting
the Sample Code section above.
- In the Import wizard, expand the root node, press Deselect All and select only the junit node.
You can expand and select elements within the junit
directory on the left pane to view the individual resources that you
are importing on the right pane. Note: Do not deselect any of the
resources in the junit directory at this time. You will need all
of these resources in the tutorial.
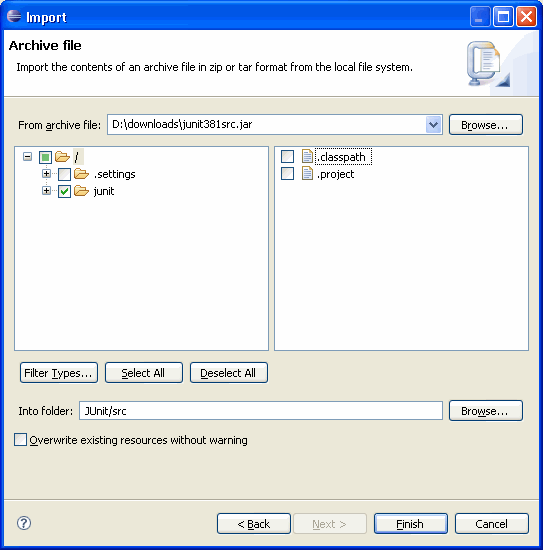
- Make sure that the JUnit project's source folder appears in the destination Into folder
field. Then click Finish. In the import progress
indicator, notice that the imported resources are compiled as they are
imported into the workbench. This is because the Build
automatically option is checked on the Workbench preferences
page.
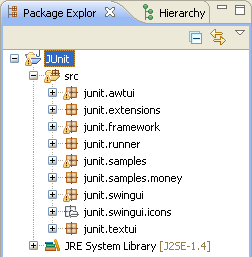
- In the Package Explorer view, expand the JUnit project and the src folder to view the
JUnit packages.

Java projects
Java views

New Java Project Wizard
Package Explorer View
|
|
|


