20.1 Creating a Data CD
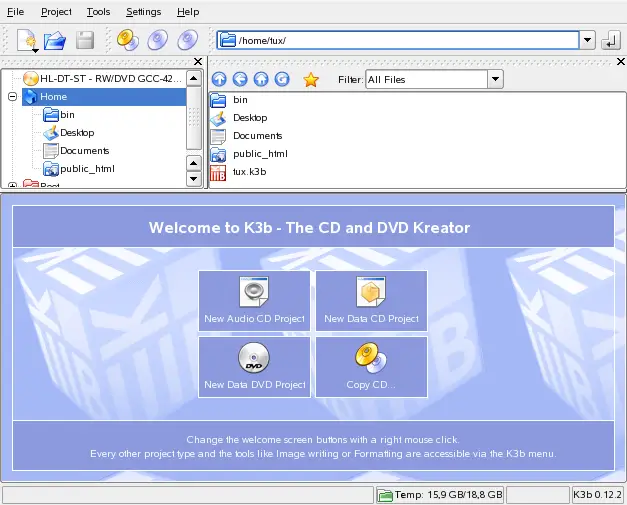
To create a data CD, go to . The project view appears in the lower part of the
window, as shown in Figure 20-1. Drag the
desired directories or individual files from your home directory
to the project folder and drop them there. Save the project under
a name of your choice with .
Figure 20-1 Creating a New Data CD
Then select from the toolbar or hit
Ctrl
B
. A dialog with six tabs offering various options for
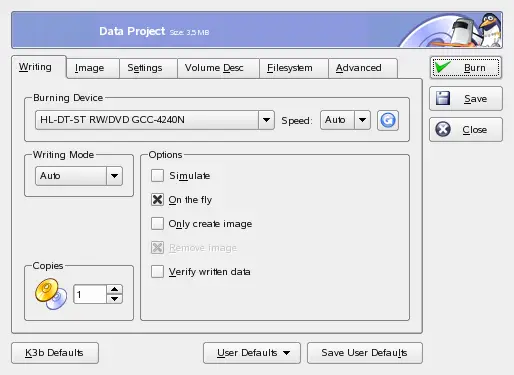
writing the CD opens. See Figure 20-2.
The tab has various settings for
the burning device, the speed, and the burning options. The
following options are offered here:
-
-
The detected writer is displayed under this pop-up menu.
You can select the speed here too.
WARNING: Select the Writing Speed with Care
Normally, you should select ,
which chooses the maximum writing speed possible. However,
if you increase this value but your system is not able to
send the data fast enough, the likelihood of buffer
underruns increases.
-
-
This option determines how the laser writes a CD. In
DAO (disk at once) mode, the laser is not deactivated while
the CD is written. This mode is recommended for the creation
of audio CDs. However, it is not supported by all CD
writers. In the TAO mode (track at once), a separate write
process is used for each individual track. The RAW mode is
not used very often, because the writer does not perform any
data corrections. The best setting is
, because it allows K3b to use the
most suitable settings.
-
-
This function can be used to check if your system
supports the selected writing speed. The writing is
performed with the laser deactivated to test the system.
-
-
Burns the desired data without first creating an image
file (do not use this feature on low-performance machines).
An image file—also known as an ISO
image—is a file containing the entire CD content
that is subsequently written to the CD exactly as it is.
-
-
This option creates an image file. Set the path for
this file under . The image
file can be written to CD at a later time. To do this, use . If this option is used, all other options in
this section are deactivated.
-
-
Remove the temporary image file from hard disk when
finished.
-
-
Check the integrity of the written data by comparing
the MD5 sums of the original and the burned data.
The tab is only accessible if the
option from the previous tab
is selected. If this is the case, you can determine the file where
the ISO is written.
The tab contains two options:
and . The options
contains configuration of how data tracks may be written. In
general, is considered the best suited
method. The is used to append
data to an already written but not finalized CD.
In the tab, enter some general
information that can be used to identify this particular data
project, its publisher and preparer, and the application and
operating system used in the creation of this project. Under
, specify settings for the file
system on the CD (RockRidge, Joliet, UDF). Also determine how
symbolic links, file permissions, and blanks are treated. In the
tab, experienced users can make
additional settings.
After adjusting all settings to your needs, start the actual
burning process using . Alternatively, save
these settings for future use and adjustment with
.