|
 |
|
| |
18.3 Using Digikam
Digikam is a KDE program for downloading photographs from
digital cameras. The first time it is run, Digikam asks where to
store your photo album. If you enter a directory that already
contains a collection of photographs, Digikam treats each
subfolder as an album.
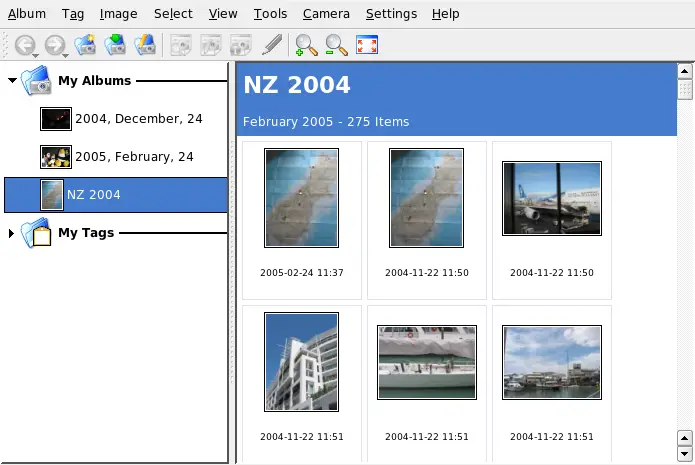
On start-up, Digikam presents a window with two sections:
your albums are displayed to the left and the photographs of the
current album are displayed to the right. See Figure 18-1.
Figure 18-1 The Main Window of Digikam
18.3.1 Configuring Your Camera
To set up a camera in Digikam, select . First, try to autodetect the camera with
. If this fails, browse the list
for your model with . If your camera model
is not included in the list, try an older model or use
. Confirm with
.
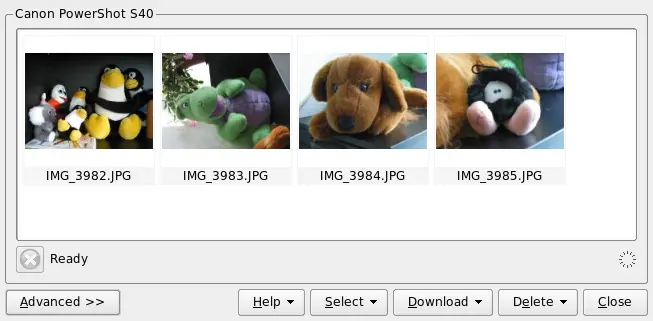
18.3.2 Downloading Pictures from Your Camera
After your camera has been configured correctly, connect to
your camera with the menu and the name
that you gave in the dialog from Section 18.3.1,
Configuring Your Camera. Digikam opens a window
and begins to download thumbnails and displays them as in Figure 18-2. Right-click an
image to open a pop-up menu with the options to
, display some
or , , or
the image. With
, select renaming options and how the
camera-provided information (EXIF) should be handled.
The renaming options can be very convenient if your camera
does not use meaningful filenames. You can let Digikam rename
your photographs automatically. Give a unique prefix and,
optionally, a date, time, or sequence number. The rest is done
by Digikam.
Select all photographs to download from the camera by
pressing the left mouse button or clicking individual
photographs with Ctrl
pressed. Selected photographs appear with inverted colors. Click
. Select the destination from the
list or by creating a new album with . This automatically suggests a filename with the
current date. Confirm with to start the
download process.
18.3.3 Getting Information
Getting information about the photograph is not difficult.
A short summary is displayed as a tool tip if you point with the
mouse cursor at the thumbnail. For longer information,
right-click the photograph and choose
from the menu. A dialog box opens
with three tabs, ,
, and .
lists the name, type, owner, and some
other basic information. The more interesting part is the
tab. The camera stores some metadata
for each photograph. Digikam reads these properties and displays
them in this list. Find the exposure time, pixel dimensions, and
others. To get more information for the selected list entry,
press
Shift
F1
. This shows a small tool tip. The last tab,
, shows some statistical
information.
18.3.4 Managing Albums
Digikam inserts a folder by
default, which collects all your photographs. You can store
these into subfolders later. The albums can be sorted by their
directory layout, by the collection name that has been set in
the album properties or by the date that the albums were first
created (this date can also be changed in the properties of each
album).
To create a new album, you have some possibilities:
-
Uploading new photographs from the camera
-
Creating a new album by clicking the button in the toolbar
-
Importing an existing folder of photographs from your
hard disk (select )
-
Right-clicking and
selecting
After selecting to create an album in your preferred way, a
dialog box appears. Give your album a title. Optionally, choose
a collection, insert some comments, and select an album date.
The collection is a way of organizing your albums by a common
label. This label is used when you select . The comment is shown in the banner at the top of
the main window. The album date is used when you select .
Digikam uses the first photograph in the album as the
preview icon in the list. To select
a different one, right-click the respective photograph and
select from the
context menu.
18.3.6 Exporting Image Collections
Digikam provides several export options that help you
archive and publish your personal image collections. It offers
archiving to CD or DVD (via k3b), HTML export, and export to a
remote gallery.
To save your image collection to CD or DVD, proceed as
follows:
-
Select .
-
Make your adjustments in the dialog using its various submenus. After
that, click to initiate the burning
process.
-
: Determine which part of
your collection should be archived by selecting albums
and tags.
-
: Decide whether your
image collection should be accessible via an HTML
interface and whether autorun functionality should be
added to your CD/DVD archive. Set a selection title and
image, font, and background properties.
-
: Change the
settings for volume description, if necessary.
-
: Adjust the burning
options to your needs, if necessary.
To create an HTML export of your image collection, proceed
as follows:
-
Select .
-
Adjust the settings in to your needs, using the various
submenus. When you are done, click to
initiate the gallery creation.
-
: Determine which part of
your collection should be archived by selecting albums
and tags.
-
: Set the title and appearance of
your HTML gallery.
-
: Determine the location of the
gallery on disk as well as image size, compression,
format, and the amount of metadata displayed in the
resulting gallery.
-
: As with the target
images, specify size, compression and file type for the
thumbnails used for gallery navitation.
To export your collection to an external image gallery on
the Internet, proceed as follows:
-
Get an account for an external web site holding your
gallery.
-
Select and provide URL, username, and password for
the external site when asked for them.
Digikam establishes a connection to the site specified
and opens a new window called .
-
Determine the location of your new album inside the
gallery.
-
Click and provide the
information requested by Digikam.
-
Upload the images to the new album with .
18.3.8 Basic Image Viewing and Editing with Digikam
Digikam includes its own lean image viewing and editing
program. It automatically opens if you double-click an image's
thumbnail.
Use this tool to do some basic image editing on the images
you just downloaded from your camera. You can crop, rotate or
flip the image, do some basic color adjustments, apply various
colored filters (for example, to export a colored image to black
and white), and efficiently reduce red eyes in portrait shots.
The most important menus are:
- Image
-
Use to
enter comments to a particular image and to assign a tag
(category) to this image.
takes you to a window consisting of three tabs providing
general information, EXIF information, and the histogram
of this image.
- Fix
-
This menu contains some of the editing functions most
needed in digital photography.
takes you to a submenu where you can modify all basic
color settings. You can also blur or sharpen either the
entire picture or just a part of the image you selected.
To reduce red eyes in a portrait shot, roughly select the
eye region of the face by just clicking and holding the
left mouse pointer and gradually expanding the selection,
select and choose
either mild or aggressive reduction depending on whether
you selected a whole region or just the eyes.
- Transform
-
The menu offers the crop,
rotate, flip, and resize functions. You can also use the
option to produce
crops in a fixed aspect ratio.
- Filters
-
If you need to transform your color shots into black
and white or want to achieve an aged look in your
photographs, check out the menu
and choose from the various export options.
A more detailed description of this tool can be found in
Digikam's online help in
digiKam Image Editor, which can be
reached with the button in Digikam's
menu bar.
|
|
|