|
 |
|
| |
1.4 Accessing Folders and Files
SUSE Linux Enterprise Desktop enables you to access folders
and files on your computer and on a network.
1.4.1 Managing
Folders and Files with Nautilus File Manager
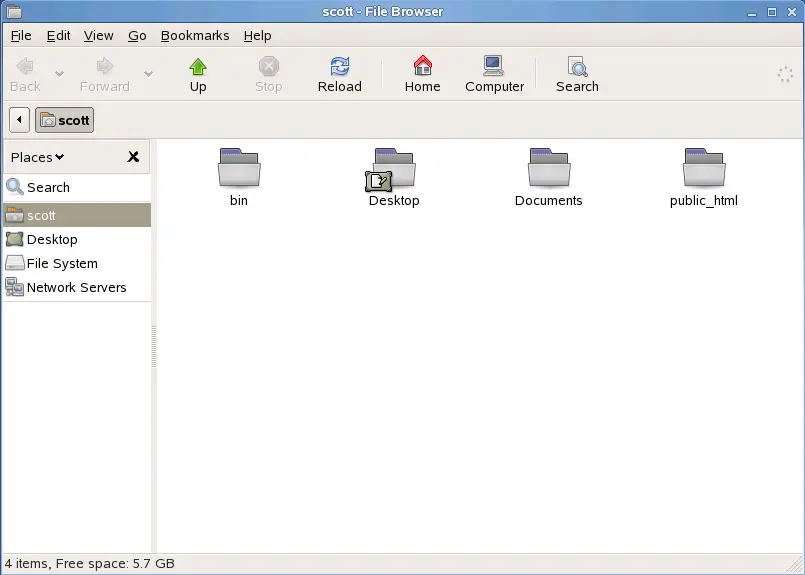
Use the Nautilus File Manager to create and view folders and
documents, run scripts, and create CDs of your data. In addition,
Nautilus provides support for Web and file viewing.
You can open Nautilus in the following ways:
- Click
- Click your Home directory icon on the desktop
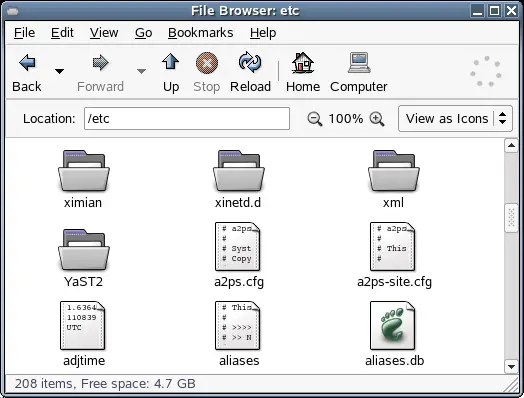
You can change to the browser mode by right-clicking the folder
and then clicking . This gives you
a familiar view with a location window that shows the current path
and buttons for common functions. This applies to the current Nautilus
window.
You can change the preferences for files and folders in Nautilus
by clicking , then
selecting from the following options:
Table 1-3 Nautilus
Options
|
|
Performs the default action for an item
when you click the item. If this option is selected and you point to
an item, the title of the item is underlined. |
|
|
Performs the default action for an item
when you double-click the item. |
|
|
Opens Nautilus in Browser mode whenever
you open it. |
|
|
Runs an executable file when you click
the file. An executable file is a text file than can execute (that
is, a shell script). |
|
|
Displays the contents of an executable
file when you click the file. |
|
|
Displays a dialog when you click an executable
file. The dialog asks whether you want to execute the file or display
the file. |
|
|
Displays a confirmation message before
the Trash is emptied or before files are deleted. |
|
|
Adds a menu
item to the menu and the pop-up menu that
is displayed when you right-click a file, folder, or desktop object.
When you select an item and then click ,
the item is immediately deleted from your file system. |
Some simple shortcuts for navigating include the following:
Table 1-4 Nautilus
Navigation Shortcuts
|
Backspace or Alt+Up-arrow |
Opens the parent folder. |
|
Up or Down |
Selects an item. |
|
Alt+Down, or Enter |
Opens an item. |
|
Shift+Alt+Down |
Opens an item and closes the current
folder. |
|
Shift+Alt+Up |
Opens the parent folder and closes the
current folder. |
|
Shift+Ctrl+W |
Closes all parent folders. |
|
Ctrl+L |
Opens a location by specifying a path
or URL. |
|
Alt+Home |
Opens your home directory. |
For more information, click in
Nautilus.
1.4.2 Accessing Floppy Disks,
CDs, or DVDs
To access floppy disks, CDs, or DVDs, insert the medium into
the appropriate drive. For several types of removable media, a Nautilus
window pops up automatically when the media is inserted or attached
to the computer. If Nautilus does not open, double-click the icon
for that drive to view the contents.
WARNING:Do not simply remove floppy disks from the drive after using
them. Floppy disks, CDs, and DVDs must always be unmounted from
the system first. Close all File Manager sessions still accessing
the medium, then right-click the icon for the medium and select from
the menu. Then safely remove the floppy disk or CD when the tray
opens automatically.
Floppy disks can also be formatted by clicking > > > .
In the Floppy Formatter dialog, select the density of the floppy
disk and the file system settings: Linux native (ext2), the file
system for Linux, or DOS (FAT) to use the floppy with Windows systems.
1.4.3 Finding Files on Your Computer
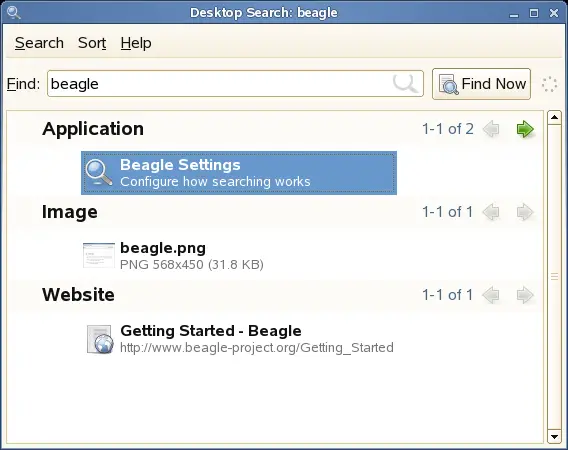
To locate files on your computer, click ,
enter your search terms in the field,
then press Enter. The results are displayed in the Desktop Search
dialog box.
You can use the results lists to open a file, forward it via
e-mail, or display it in the file manager. Simply right-click an
item in the results list and select the option you want. The options
available for an item in the results list depend on the type of
file it is. Clicking a file in the list displays a preview of the
file and information such as the title, path, and when the file
was last modified or accessed.
Use the menu to limit your search
to files in a specific location, such as your address book or Web
pages, or to display only a specific type of file in your results
list. The menu lets you sort the items in
your results list according to name, relevance, or the date the
file was last modified.
You can also access Desktop Search by clicking pressing
F12, or clicking  on
the bottom panel. on
the bottom panel.
Search Tips
- You can use both upper and lowercase
letters in search terms. Searches are not case sensitive by default.
To perform a case sensitive search, put double quotation marks
(“) around the word you want to match exactly. For example,
if you use “APPLE” in a search, apple would be
ignored.
- To search for optional terms, use OR (for example,
apples OR oranges).
IMPORTANT:The OR is case-sensitive when used to indicate optional search
terms.
- To exclude search terms, use a minus sign (-) in
front of the term you want to exclude (for example, apples -oranges
would find results containing apples but not oranges).
- To search for an exact phrase or word, put quotation
marks (“) around the phrase or word.
- Common words such as “a,” “the,” and “is” are
ignored.
- The base form of a search term is used when searching
(for example, a search for “driving” will match “drive,” “drives,” and “driven”).
Performing a Property Search
By default, the Beagle search tool looks for search terms
in the text of documents and in their properties. To search for
a word in a particular property, use property_keyword:query.
For example, author:john searches for files that
have “john” listed in the Author property.
Table 1-5 Supported Property Keywords
|
album |
Album of the media |
|
artist |
Artist |
|
author |
Author of the content |
|
comment |
User comments |
|
creator |
Creator of the content |
|
extension or ext |
File extension (for example, extension:jpeg
or ext:mp3). Use extension:or ext: to search in files with no extension. |
|
mailfrom |
E-mail sender name |
|
mailfromaddr |
E-mail sender address |
|
mailinglist |
Mailing list ID |
|
mailto |
E-mail recipient name |
|
mailtoaddr |
E-mail recipient address |
|
tag |
FSpot and Digikam image tags |
|
title |
Title |
Property searches follow the rules mentioned in Search Tips. You can
use property searches as an exclusion query or OR query, and phrases
can be used as query. For example, the
following line will search for all PDF or HTML documents containing
the word “apple” whose author property contains “john” and
whose title does not contain the word “oranges.”
apple ext:pdf OR ext:html author:john -title:oranges
Setting Search and Indexing Preferences
Use the Search Preferences dialog box to set search and indexing
preferences. To open Search Preferences, click . You can
also click in the Desktop
Search dialog box.
On the Search tabbed page, click to start the search daemon
when you log in (this is selected by default). You can also choose
the keystrokes that will display the Desktop Search window by specifying
any combination of Ctrl, Alt, and a function key. F12 is the default
keystroke.
On the tabbed page, you can choose
to index your home directory (selected by default), to not index
your home directory, and to add additional directories to index.
Make sure you have rights to the directories you add. You can also
specify resources that you don’t want indexed (see Preventing Files and Directories from
Being Indexed for more
information).
Preventing Files and Directories from
Being Indexed
Use the Search Preferences dialog box to specify resources
that you don’t want indexed. These resources can include
directories, patterns, mail folders, or types of objects.
-
Click .
-
Click .
-
On the Indexing tabbed page, click in
the Privacy section.
-
Select a resource to exclude from indexing,
then specify the path to the resource.
-
Click OK twice.
1.4.4 Accessing
Files on the Network
This chapter helps you access network resources using the
following tasks:
Connecting to Your
Network
There are essentially two ways that you can connect to a network:
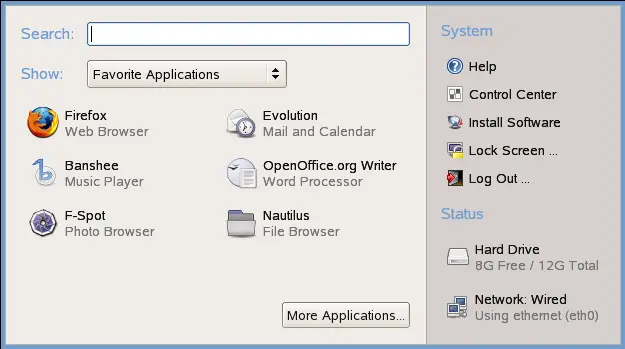
via wired and wireless connections. To view your network connection
status, click In the area
of the main menu, The icon
shows your network connection status. For example, in the following
figure, the computer is connected to a wired network using an Ethernet
connection.
Click on the icon to get information about your connection,
such as IP address, gateway address, and similar details.
Connecting to a Wired Connection
-
Make sure that
an Ethernet cable is connected to your computer's network interface
card.
-
Click the icon
on the main panel, then click .
After a wired network connection is established, the icon changes to show your connection type.
A connection to the network is confirmed when is
listed next to the menu item. You can
also confirm connectivity by clicking the icon.
If connected, the Connection Information window displays your IP
address and other details about your connection.
Connecting to a Wireless Connection
-
Make sure that
your computer contains a wireless network interface card.
-
Click the icon
on the main panel, then click .
The Network Connections icon changes to a wireless signal
strength bar, and any detected wireless networks are displayed in
the menu.
If your network name is displayed, select the network name
from the menu. After you
are connected, the icon shows
that you have a wireless connection.
If you do not see your wireless network name in the menu:
-
Click the icon on the main panel, then click .
-
In the Specify an ESSID dialog, type
the wireless network name in the field.
-
(Conditional) If the wireless network
is encrypted, click to display
the field.
-
Type the encryption code, then click .
Your wireless network's name should now appear in the menu.
-
Select the wireless network's name.
Upon connection, the icon
turns blue.
You can also confirm connection by clicking the icon and viewing .
If connected, your IP address and other details are displayed in
the Connection Information dialog.
Managing Network Connections
The icon lets you monitor,
manage, and configure your network connections. Clicking the icon
opens a window that displays which network connection is active,
if you have more than one network device in your computer.
For example, if your laptop computer is configured to use
a wireless port and a port for a network cable, you will see two
network connections in the list.
If you are connected to the network via a cable and need to
switch to use your wireless, simply click the icon
and then click . SLED switches
your network connection and acquires a new IP address, if needed.
IMPORTANT:Prior to making the change, you should save any data, because
the change in services might require that certain applications or
services be restarted.
Using the menu, you can view connection informations such
as the IP address being used and your hardware address.
If you need to update or make changes to your network settings,
click > > . This launches the Network Card Setup wizard,
which steps you through the configuration process. Using this option
requires you to provide the password for root.
Accessing Network
Shares
Other network devices, like workstations and servers, can
be set up to share some or all of their resources. Typically, files
and folders are marked to let remote users access them. These are
called network shares. If your system is configured
to access network shares, you can use Nautilus File Manager to access
them.
To access network shares, double-click > ,
then click . The window displays
the network shares that you can access. Double-click the network
resource that you want to access. You might be required to authenticate
to the resource by providing a username and password.
To access NFS shares, double-click the icon.
A list of UNIX shares available to you is displayed.
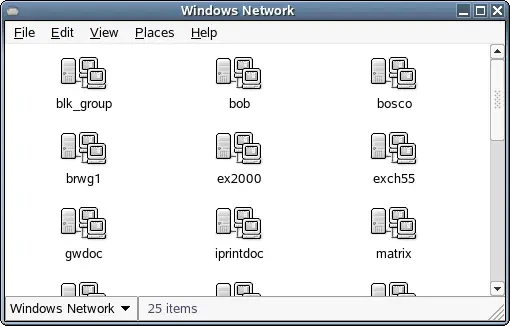
To access Windows shares, double-click the icon. The Windows shares available to you are
displayed.
Adding a Network Place
-
Click > > > .
-
Specify the name you want displayed for
this link and its URL, then click .
An icon for the network place is added to the desktop.
Sharing Directories from Your Computer
You can make directories on your computer available to other
users on your network.
Enabling Sharing
Use YaST to enable sharing on your computer. In order to enable
sharing, you must have root privileges and be a member of a workgroup
or domain.
-
Click > > > .
-
In YaST, click > .
-
In the Windows Domain Membership module,
click .
-
Click .
Sharing a Directory
If directory sharing is enabled on your computer, use the
following steps to configure a directory to be shared.
-
Open Nautilus
and browse to the directory you want to share.
-
Right-click the folder for the directory
you want to share, then click .
-
Select the check
box, then type the name you want to use for this share.
-
If you want other users to be able to
copy files to your shared directory, select the check box.
-
(Optional) Type a comment, if desired.
-
Click .
|
|
|