|
 |
|
| |
|
|
Red Hat Enterprise Linux 9 Essentials Book now available.
Purchase a copy of Red Hat Enterprise Linux 9 (RHEL 9) Essentials Red Hat Enterprise Linux 9 Essentials Print and eBook (PDF) editions contain 34 chapters and 298 pages
|
11.6.4. Generating a New Key and Certificate
In order to generate a new key and certificate pair, you must to have the crypto-utils package installed in your system. You can install it by typing the following at a shell prompt:
~]# yum install crypto-utils
This package provides a set of tools to generate and manage SSL certificates and private keys, and includes genkey, the Red Hat Keypair Generation utility that will guide you through the key generation process.
If the server already has a valid certificate and you are replacing it with a new one, specify a different serial number. This ensures that client browsers are notified of this change, update to this new certificate as expected, and do not fail to access the page. To create a new certificate with a custom serial number, use the following command instead of genkey:
~]# openssl req -x509 -new -set_serial number -key hostname.key -out hostname.crt
If there already is a key file for a particular hostname in your system, genkey will refuse to start. In this case, remove the existing file using the following command:
~]# rm /etc/pki/tls/private/hostname.key
To run the utility, use the genkey command followed by the appropriate hostname (for example, penguin.example.com):
~]# genkey hostname
To complete the key and certificate creation, take the following steps:
-
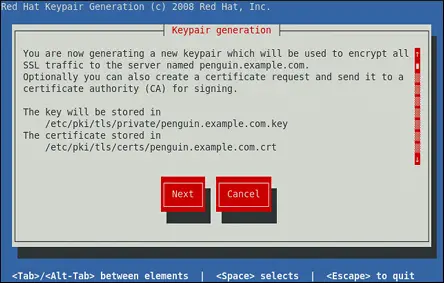
Review the target locations in which the key and certificate will be stored.
Use the Tab key to select the Next button, and press Enter to proceed to the next screen.
-
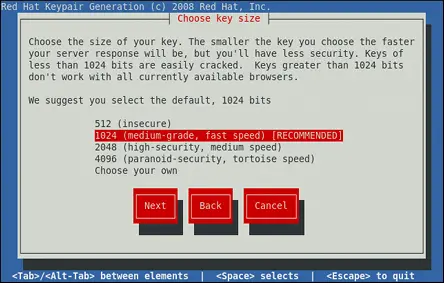
Using the Up and down arrow keys, select the suitable key size. Note that while the large key increases the security, it also increases the response time of your server. Because of this, the recommended option is 1024 bits.
Once finished, use the Tab key to select the Next button, and press Enter to initiate the random bits generation process. Depending on the selected key size, this may take some time.
-
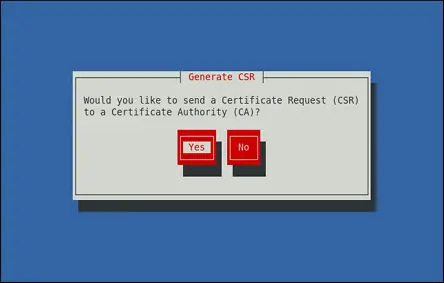
Decide whether you wish to send a certificate request to a certificate authority.
Use the Tab key to select Yes to compose a certificate request, or No to generate a self-signed certificate. Then press Enter to confirm your choice.
-
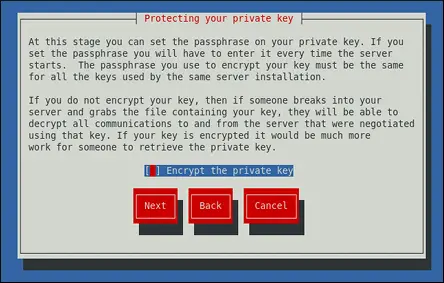
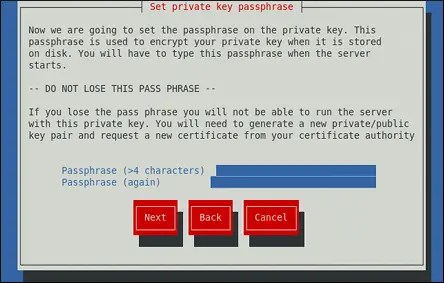
Using the Spacebar key, enable ([*]) or disable ([ ]) the encryption of the private key.
Use the Tab key to select the Next button, and press Enter to proceed to the next screen.
-
If you have enabled the private key encryption, enter an adequate passphrase. Note that for security reasons, it is not displayed as you type, and it must be at least five characters long.
Use the Tab key to select the Next button, and press Enter to proceed to the next screen.
Entering the correct passphrase is required in order for the server to start. If you lose it, you will need to generate a new key and certificate.
-
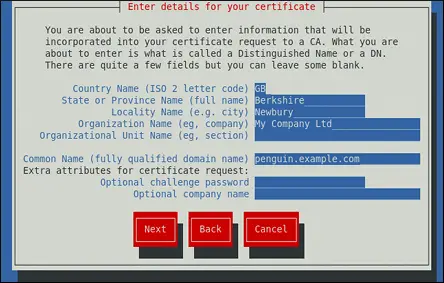
Customize the certificate details.
Use the Tab key to select the Next button, and press Enter to finish the key generation.
-
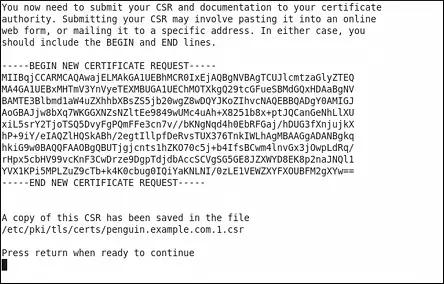
If you have previously enabled the certificate request generation, you will be prompted to send it to a certificate authority.
Press Enter to return to a shell prompt.
Once generated, add the key and certificate locations to the /etc/httpd/conf.d/ssl.conf configuration file:
SSLCertificateFile /etc/pki/tls/certs/hostname.crt
SSLCertificateKeyFile /etc/pki/tls/private/hostname.key
|
|
|