Follow Techotopia on Twitter

On-line Guides
All Guides
eBook Store
iOS / Android
Linux for Beginners
Office Productivity
Linux Installation
Linux Security
Linux Utilities
Linux Virtualization
Linux Kernel
System/Network Admin
Programming
Scripting Languages
Development Tools
Web Development
GUI Toolkits/Desktop
Databases
Mail Systems
openSolaris
Eclipse Documentation
Techotopia.com
Virtuatopia.com
Answertopia.com

How To Guides
Virtualization
General System Admin
Linux Security
Linux Filesystems
Web Servers
Graphics & Desktop
PC Hardware
Windows
Problem Solutions
Privacy Policy


Red Hat Enterprise Linux 9 Essentials Book now available.

Purchase a copy of Red Hat Enterprise Linux 9 (RHEL 9) Essentials

Red Hat Enterprise Linux 9 Essentials Print and eBook (PDF) editions contain 34 chapters and 298 pages

Preview Book

Chapter 13. Date and Time Configuration

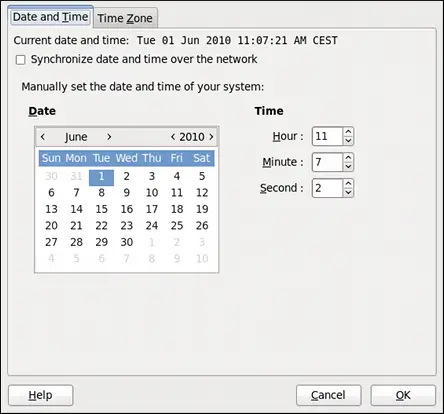
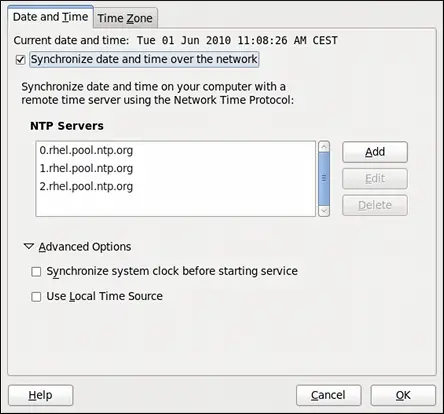
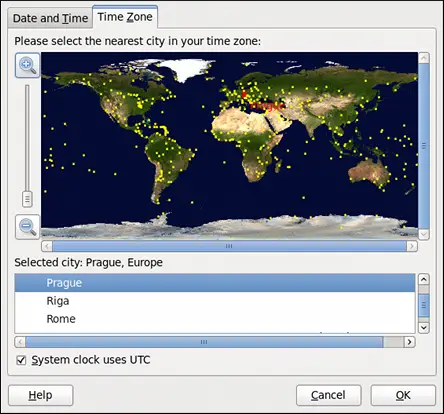
This chapter covers setting the system date and time in Red Hat Enterprise Linux, both manually and using the Network Time Protocol (NTP), as well as setting the adequate time zone. Two methods are covered: setting the date and time using the Date/Time Properties tool, and doing so on the command line.

13.1. Date/Time Properties Tool

The Date/Time Properties tool allows the user to change the system date and time, to configure the time zone used by the system, and to set up the Network Time Protocol daemon to synchronize the system clock with a time server. Note that to use this application, you must be running the X Window System.
To start the tool, select SystemAdministrationDate & Time from the panel, or type the system-config-date command at a shell prompt (e.g., xterm or GNOME Terminal). Unless you are already authenticated, you will be prompted to enter the superuser password.
Authentication Query
Figure 13.1. Authentication Query

13.1.1. Date and Time Properties

As shown in Figure 13.2, “Date and Time Properties”, the Date/Time Properties tool is divided into two separate tabs. The tab containing the configuration of the current date and time is shown by default.
Date and Time Properties
Figure 13.2. Date and Time Properties

To set up your system manually, follow these steps:
  1. Change the current date. Use the arrows to the left and right of the month and year to change the month and year respectively. Then click inside the calendar to select the day of the month.
  2. Change the current time. Use the up and down arrow buttons beside the Hour, Minute, and Second, or replace the values directly.
Click the OK button to apply the changes and exit the application.

13.1.2. Network Time Protocol Properties

If you prefer an automatic setup, select the checkbox labeled Synchronize date and time over the network instead. This will display the list of available NTP servers as shown in Figure 13.3, “Network Time Protocol Properties”.
Network Time Protocol Properties
Figure 13.3. Network Time Protocol Properties

Here you can choose one of the predefined servers, edit a predefined server by clicking the Edit button, or add a new server name by clicking Add. In the Advanced Options, you can also select whether you want to synchronize the system clock before starting the service, and if you wish to use a local time source.

Note

Your system does not start synchronizing with the NTP server until you click the OK button at the bottom of the window to confirm your changes.
Click the OK button to apply any changes made to the date and time settings and exit the application.

13.1.3. Time Zone Properties

To configure the system time zone, click the Time Zone tab as shown in Figure 13.4, “Time Zone Properties”.
Time Zone Properties
Figure 13.4. Time Zone Properties

There are two common approaches to the time zone selection:
  1. Using the interactive map. Click “zoom in” and “zoom out” buttons next to the map, or click on the map itself to zoom into the selected region. Then choose the city specific to your time zone. A red X appears and the time zone selection changes in the list below the map.
  2. Use the list below the map. To make the selection easier, cities and countries are grouped within their specific continents. Note that non-geographic time zones have also been added to address needs in the scientific community.
If your system clock is set to use UTC, select the System clock uses UTC option. UTC stands for the Universal Time, Coordinated, also known as Greenwich Mean Time (GMT). Other time zones are determined by adding or subtracting from the UTC time.
Click OK to apply the changes and exit the program.


  Published under the terms of the Creative Commons License Design by Interspire