|
 |
|
| |
3.6 Configuring System and Security Aspects
To adjust settings such as time and date format, number format, or
currency, select the desired country as the default country in KDE. If more
than one system language is installed on your computer, you can also select
different languages in which KDE should show the graphical user interface
and application interfaces.
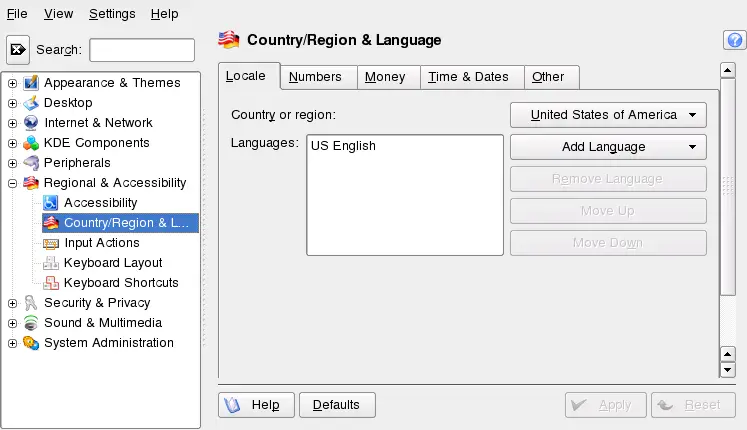
Adjusting Regional Settings
-
To set your default country options, open the Personal Settings and
select .
-
From , select the desired
country. If the language of the country is installed on your system, KDE
automatically sets the language as the default language and shows it at
the top position in the list.
-
If needed, adjust the other country-dependent options, such as
number or time and date format, on the other tabs.
-
If more than one language is installed on your system (as secondary
languages with YaST) and you want to change the graphical interface of
KDE to a different language, click on the
tab.
-
Choose to open a list of other languages
installed on your system. Select the language for the graphical user
interface. The new language is now shown at the top position in the
list.
-
To confirm the changes, click . All newly
started applications or desktop objects now appear in the new language.
-
To switch to another language, re-sort the languages in the
list until the desired language is at the
top position and apply your changes.
If you often need to enter texts in various languages, you may want to
add different language layouts for your keyboard. You can then easily
switch layouts when needed.
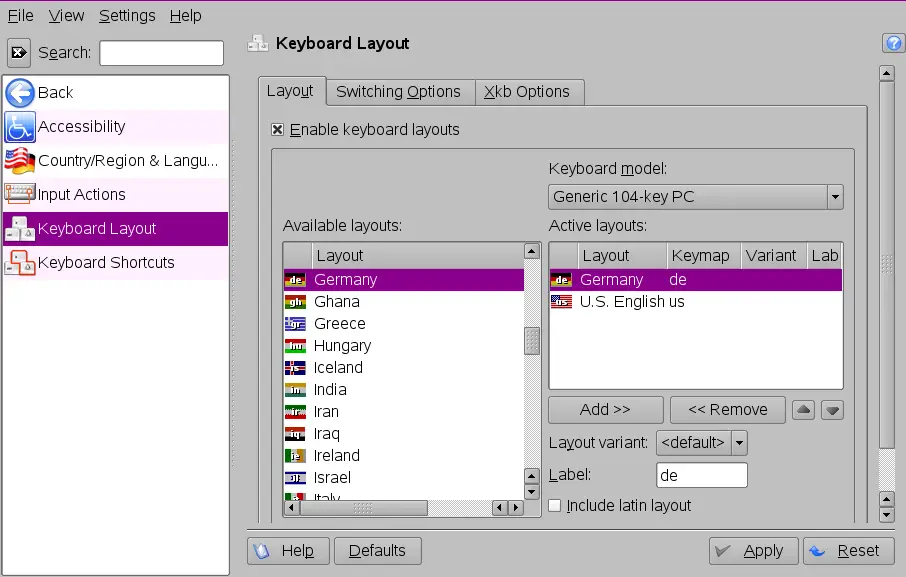
Adding Keyboard Layouts
-
To add additional keyboard layouts, open the Personal Settings and
select .
-
Activate at the
top.
-
In the list of , select a
layout. Click to transfer it to the list of
.
-
If you added several layouts, you can change the sorting order with
the help of the up and down arrow buttons.
-
Depending on the options you choose in the tab an indicator or country flag appears in the system
tray. With a click on the icon you can change between different keyboard
layouts after you confirmed your changes with
.
By default, openSUSE provides various fonts commonly available in
different file formats (Bitmap, TrueType, etc.). These are known as
system fonts. Users can additionally install their own
fonts from various collections. Such user-installed fonts are, however,
only visible and available to the corresponding user.
Installing New Fonts
To check which fonts are currently available, type the URL fonts:/ into the address field of a Konqueror session. This
displays two windows: Personal and
System. User-installed fonts are installed to the
folder Personal. Only root can install to the
System folder.
To install new fonts, proceed as follows:
-
Start the control center from the main menu or press Alt+F2 and enter kcontrol.
-
Click .
-
To update system fonts, click
and enter the root password. Then proceed as described below.
-
To install fonts as a user, click .
-
In the dialog that opens, select one or more fonts for
installation. The marked fonts are then installed to your personal font
folder. Selecting a font shows a preview.
KDE runs a session manager that starts after your
username and password are authenticated by the login process. It lets
you save the status of a certain session and return to that status
the next time you log in. For example, it can automatically start the
applications that you were running in the most recent session or when
you manually saved a session. It can save and restore the following
settings:
-
Appearance and behavior settings, such as fonts, colors, and
mouse settings.
-
Applications that you were running, such as a file manager or
OpenOffice.org.
NOTE: Saving and Restoring Applications
You cannot save and restore applications that Session
Manager does not manage. For example, if you start the vi editor
from the command line in a terminal window, Session Manager
cannot restore your editing session.
Adjusting the Session Handling
-
To change the session handling options, open the Personal Settings
and click . The groups and
hold options for the
confirmation dialog that usually appears on logout.
-
By default, Session Manager restores the applications that were
running when you logged out from the previous session, enabling an
automatic start of these applications.
To be able to save a certain session manually and restore this
session each time you log in to KDE, select . This adds a new menu item, , to your main menu. After a session is saved, KDE
automatically restores the saved session on each login.
-
To start with a fresh session each time you log in,
select .
-
Click to confirm your changes.
By default, you define the settings for KWallet password manager with
the help of a wizard when you use KWallet for the first time. You can
adjust the initial settings at any time to increase security.
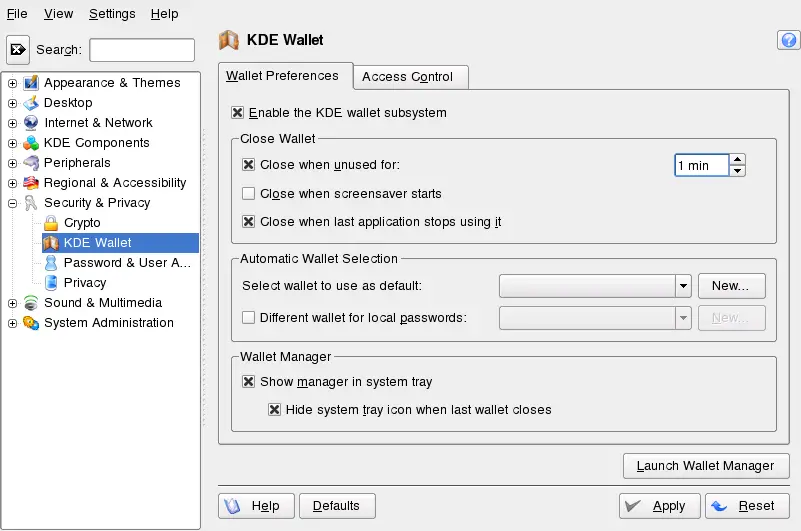
Adjusting KWallet Settings
-
If KWallet is already started, click the KWallet symbol in the panel
and select . Otherwise, open KDE
control center and click .
-
If KWallet Manager is not yet enabled, activate the respective check
box at the top.
-
By default, a wallet is closed when the last application stops using
it. To increase security, you can set a more restrictive policy: to close
a wallet automatically after a period of inactivity or after start-up of
the screen saver, activate the respective check boxes.
-
To remove the KWallet icon from the panel, deactivate . You can then only access KWallet from
the main menu.
-
By default, KWallet stores all passwords in one wallet named
kdewallet. To store local and network-related
passwords in different wallets, activate . Click to create an
additional wallet, if needed.
|
|
|