|
 |
|
| |
Customizing Your Desktop
You can change the way your KDE desktop looks and behaves to suit your
personal preferences.
Locking and Unlocking Desktop Objects
Desktop elements can be locked in their current position to prevent
them from being moved around on the desktop. As long as the desktop
elements are locked, you cannot add, move, or remove any objects to and
from your desktop.
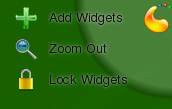
To lock or unlock the desktop elements, click the desktop toolbox at
the upper right corner of the desktop and select or .
Alternatively, right-click an empty patch on the desktop and select the
respective menu items from the context menu.
Changing Individual Desktop Elements
In the following, find some examples of how to change individual
desktops elements.
Adding Program Icons to the Desktop
To create a link to an application and place it on the desktop or the
panel, proceed as follows:
-
Click the main menu button and browse to the desired application.
-
Right-click and select from the
context menu that appears. If these menu items are not available,
your desktop elements are probably locked. Unlock them first as
described in Locking and Unlocking Desktop Objects.
-
To change the icon position on the desktop, left-click the icon and
drag it to the desired place.
To delete an icon from your desktop, right-click the program icon and
select .
Adding Widgets to the Desktop
Widgets (or plasmoids ) are small applications that can
be integrated into your desktop or your panel.
-
To add widgets to you desktop, right-click an empty patch on your
desktop and select .
If these menu items are not available, your desktop elements are
probably locked. Unlock them first as described in
Locking and Unlocking Desktop Objects.
-
In the dialog box that appears, you can limit the selection of
widgets that is shown with the drop-down list at the top.
-
Select a widget and click . The widget
appears on your desktop.
-
To position the widget on your desktop, left-click the widget and
drag it to the desired place. To align all widgets to a grid,
right-click an empty patch on the desktop and select or .
To remove a widget from your desktop, right-click the widget and select
the
entry.
Configuring Widgets
In order to configure widgets, the desktop elements need to be
unlocked as described in
Locking and Unlocking Desktop Objects.
-
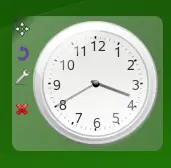
To configure a widget, hover your mouse pointer over the widget until
a translucent frame appears around the widget, showing a number of
symbols.
If the frame does not appear, your widgets are probably locked.
Unlock them first as described in
Locking and Unlocking Desktop Objects
-
To change the widget size, left-click the star symbol in the frame
and keep the mouse button pressed while moving your cursor across the
desktop to scale the widget size.
-
To rotate the widget in any direction, left-click the arrow symbol in
the frame and keep the mouse button pressed while moving your cursor
in a circle across the desktop. There is a sticky boundary in the
horizontal and vertical positions where you can clamp
the widget, if you like. Of course, you can also arrange it in any
tilted position.
-
To change the contents, settings, or properties of a widget,
left-click the wrench symbol in the frame. In the configuration
dialog box that appears, set the options according to your wishes.
Use the X symbol in the frame if you want to close
the widget.
You can customize the KDE panel according to your preferences:
Applications and widgets can be added to the quick launch area or the
system tray in the main panel or in additional panels. Panel elements
and additional panels can be moved to different places or be completely
removed at any time.
-
Click on the desktop toolbox (lower right corner, half-round icon) to
open the settings panel. If you cannot find the desktop toolbox, it
is probably locked. Click on a widget and choose .
-
To move panel objects to a different place within the panel, hover
the mouse over the respective widget. The mouse cursor turns into a
crosslines-like form. When you click on the widget, you can move it
to a different position. Click again to fix it at this place.
-
To change the overall appearance or behavior of the panel, click on
the icons at the borders of the settings panel. The icons have the
form of arrows and you can change the adjustment of the left and
right side. If you click on one of these icons and drag them inside,
the width of the panel is immediately changed.
The icons in the settings panel have the following meaning:
-
To place the panel on different sides of the screen use the
button. Drag and drop it to the
preferred place.
-
To change the height of the panel, click the
button and move the mouse cursor to the end
location.
-
If you need additional widgets on your panel, place them with the
button.
-
To prevent the panel and widgets from being moved accidentaly, use
.
-
To adjust additional configurations, use .
-
Close the settings panel with the red close button on the right side.
Changing the Desktop Background
You can change the background colors of your desktop or select a
picture to use as the background.
-
Right-click an empty patch of the desktop and select
. A configuration dialog appears.
-
Choose from the drop-down list, if you want
to use an , a
or as background first.
-
For an image wallpaper, choose a default wallpaper from the
list. Download and install new
wallpapers with . To use a
custom picture, click the folder button beneath the list and select
an image file from the file system. Define the
of the image.
-
To have multiple images appear in a
mode, define the directory from which to select the pictures and
set the interval after which to change the images.
-
If you do not want an image or slide show, you can set a
as desktop background.
-
Set the other options in the configuration dialog according to your
wishes and click to save your changes and leave
the configuration dialog.
Modifying Personal Settings
Apart from changing individual desktop elements, KDE allows you to
personalize your desktop to a very high degree. Possibilities to adjust
the overall appearance and behavior of your desktop can be found in the
configuration dialog.
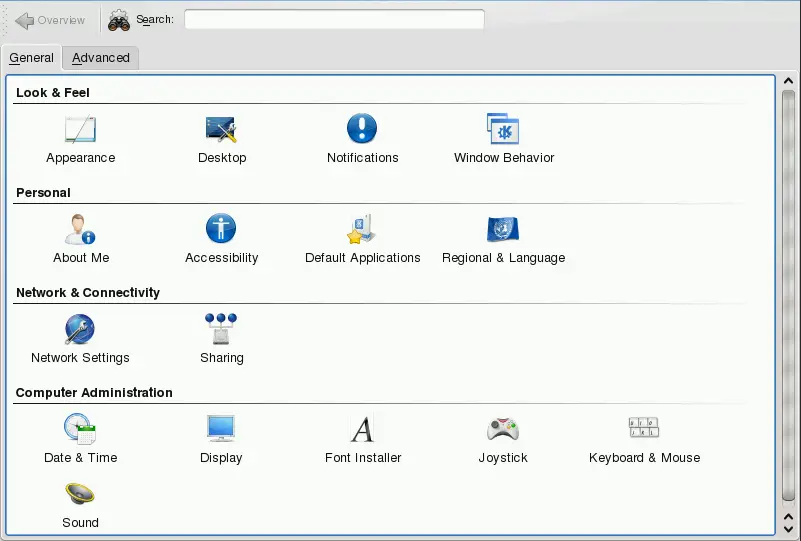
Start the from the main menu by
selecting
.
The and tabs
provide different categories of settings. To get an impression of the
numerous possibilities, just click a category icon and explore the
possibilities provided there. Performing tasks in some areas of the
control center requires system administrator (root) permissions.
Change the settings as desired. No changes take effect until you click
. To discard changes in the recent view that
you have not yet applied, click . To reset all
items in the recent view to the default values, click
.
To get back to the start-up view showing all categories again, click
. You can also enter a search string at the
top of the window (for example, ) to
find the category which holds options related to the search string.
Each character you enter in the field narrows
down the search.
|
|
|