Toolbars
Writer has several types of toolbars: docked, floating, and tear-off. Docked toolbars can be moved to different locations or made to float, and floating toolbars can be docked.
The top docked toolbar (default position) is called the Standard toolbar. The Standard toolbar is consistent across the OpenOffice.org applications.
The second toolbar across the top (default location) is the Formatting toolbar. It is a context-sensitive bar that shows the relevant tools in response to the cursor’s current position or selection. For example, when the cursor is on a graphic, the Formatting bar provides tools for formatting graphics; when the cursor is in text, the tools are for formatting text.
Displaying or hiding toolbars
To display or hide toolbars, choose View > Toolbars, then click on the name of a toolbar in the list. An active toolbar shows a check mark beside its name. Tear-off toolbars are not listed in the View menu.
Submenus and tear-off toolbars
Toolbar icons with a small triangle to the right will display submenus, tear-off toolbars, and other ways of selecting things, depending on the icon.

Example of a submenu
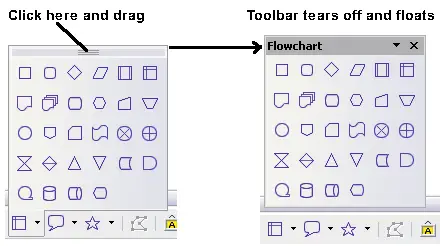
Example of a tear-off toolbar
The tear-off toolbars can be floating or docked along an edge of the screen or in one of the existing toolbar areas. To move a floating tear-off toolbar, drag it by the title bar. See
Moving toolbars.
Moving toolbars
To move a docked toolbar, place the mouse pointer over the toolbar handle, hold down the left mouse button, drag the toolbar to the new location, and then release the mouse button.
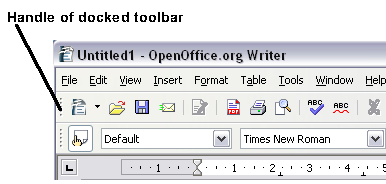
Moving a docked toolbar
To move a floating toolbar, click on its title bar and drag it to a new location.
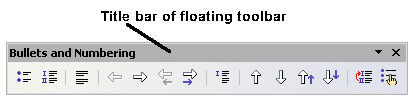
Moving a floating toolbar
Floating toolbars
Writer includes several additional context-sensitive toolbars, whose defaults appear as floating toolbars in response to the cursor’s current position or selection. For example, when the cursor is in a table, a floating Table toolbar appears, and when the cursor is in a numbered or bullet list, the Bullets and Numbering toolbar appears. You can dock these toolbars to the top, bottom, or side of the window, if you wish (see
Moving toolbars).
Docking/floating windows and toolbars
Toolbars and some windows, such as the Navigator and the Styles and Formatting window, are dockable. You can move, resize, or dock them to an edge.
To dock a window, do one of the following:
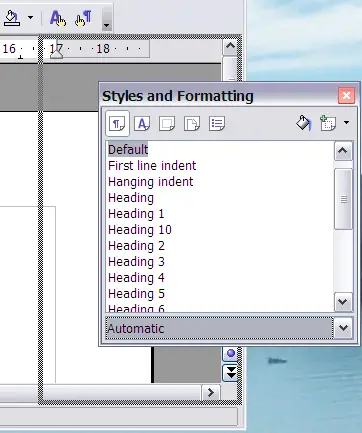
- Click on the title bar of the floating window and drag it to the side until you see the outline of a box appear in the main window and then release the window. This method depends on your system’s window manager settings, so it may not work for you.
-
Docking a window
- Hold down the Control key and double-click on a vacant part of the floating window to dock it in its last position. If that does not work, try double-clicking without using the Control key.
To undock a window, hold down the Control key and double-click on a vacant part of the docked window.
 | The Styles and Formatting window can also be docked or undocked by using Control+double-click on the gray area next to the icons at the top of the window.
|
Customizing toolbars
You can customize toolbars in several ways, including choosing which icons are visible and locking the position of a docked toolbar. You can also add icons and create new toolbars, as described in Chapter 17.
To access a toolbar’s customization options, use the down-arrow at the end of the toolbar or on its title bar.
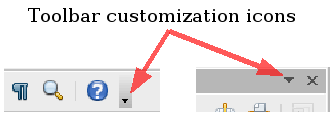
Customizing toolbars
To show or hide icons defined for the selected toolbar, choose Visible Buttons from the drop-down menu. Visible icons have a checkmark next to them. Click on icons to select or deselect them.


