Inserting a picture from the Gallery
The Gallery contains a collection of images that you can use in a presentation. You can also add your own images to the Gallery, making it an essential tool for creating presentations quickly and with a consistent look. The Gallery is available in all components of OpenOffice.org. For an introduction to the Gallery, see Chapter 11 (Graphics, the Gallery, and Fontwork) in the Getting Started guide.
Select Tools > Gallery or click the Gallery icon
 on the Drawing toolbar.
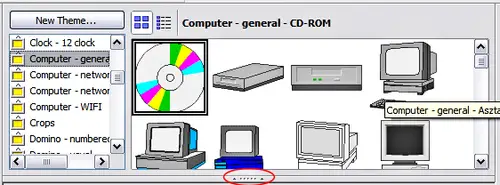
By default, the Gallery is docked above the Impress workspace. To expand the Gallery, position the pointer over the line that divides it from the top of the workspace. When the pointer changes to parallel lines with arrows, click and drag downward. The workspace will resize in response.

The Gallery with the Hide/Show selector circled
To expand the Gallery without affecting the Impress workspace, undock it so it floats over the workspace. To do so, hold down the Control key and double-click on the upper part of the Gallery next to the View icons. Double-click in the same area to dock it again (restore it to its position over the workspace).
When the Gallery is docked, to hide it and view the full Impress workspace, click the Hide/Show button in the middle of the thin bar separating the Gallery from the workspace. The Hide/Show button lets you keep the Gallery open for quick access while you create your slide show, yet out of the way when you need it to be. Additional information on the use of the Gallery can be found in
Managing the Gallery themes.
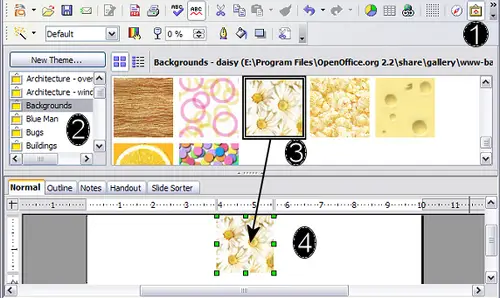
Once you are satisfied with the Gallery display, select a theme from the left pane and then scroll as necessary through the right pane to find a suitable image. Click on the image and drag it onto the workspace.
The figure below shows an example of an image dragged from the Gallery.
At this point the image will be in your slide, but may not be of a satisfactory size; if necessary, re-size it as described in
Resizing a picture.

Inserting an image from the Gallery
