2.6.2.2 Image Resizing
At first blush it would seem that the Canvas Size function found in the Image:Image menu should
work in a similar fashion to Scale Image. However, there is an
important difference between resizing an image and scaling it.
Because the image contents do not change with the image boundaries,
there is a non-unique choice in how they are positioned within the
resized image window. Thus, when resizing to a smaller image window,
the position of the image within the new window depends on the values
for the new width, height, and X and Y offsets.
Figure
2.16
Figure 2.16:
Image Resizing (Original Becomes Smaller)
 |
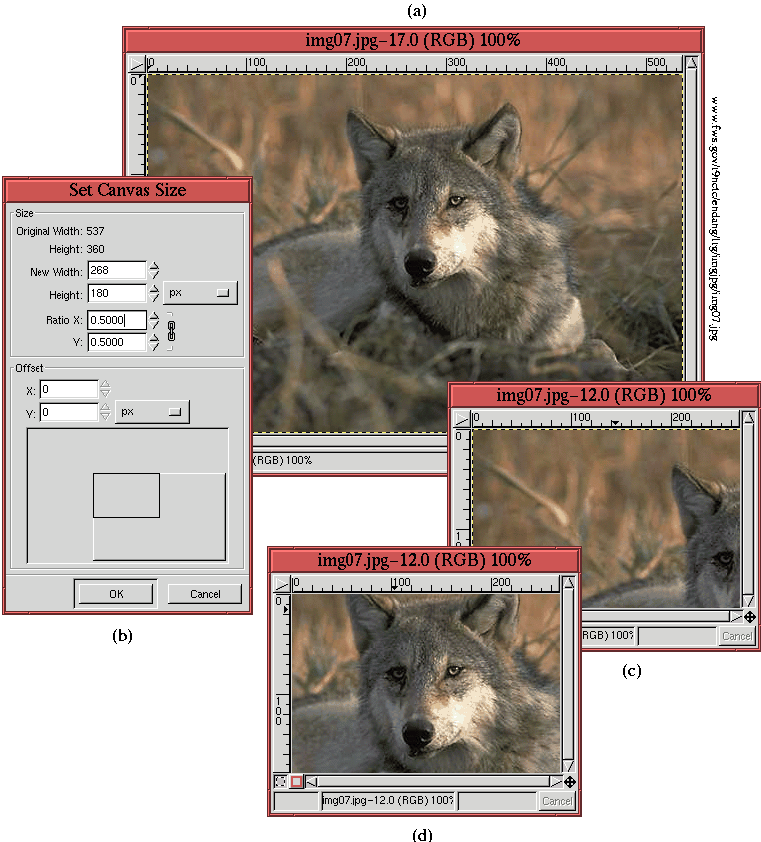
illustrates how using
Canvas Size can give rise to an
inconvenient problem. Figure
2.16(a)
shows the original image, and
Figure
2.16(b) shows the
Set
Canvas Size dialog. In the dialog the X and Y ratios have been set
to 50% of the original image size. The result is shown in
Figure
2.16(c). As can be seen, the
image is poorly positioned within the new window. This can be
compensated for by using the
Move tool to reposition the image
inside the window. The result of doing this is shown in
Figure
2.16(d). However, the result
still leaves the image subject, the wolf's head, poorly framed. The
problem is that there is no easy way to enter numbers into the
Set Canvas Size dialog to obtain an
aesthetically pleasing result.
A better solution is to resize the image interactively using the Crop tool.
Figure
2.17
Figure 2.17:
Resizing Using the Crop Tool
 |
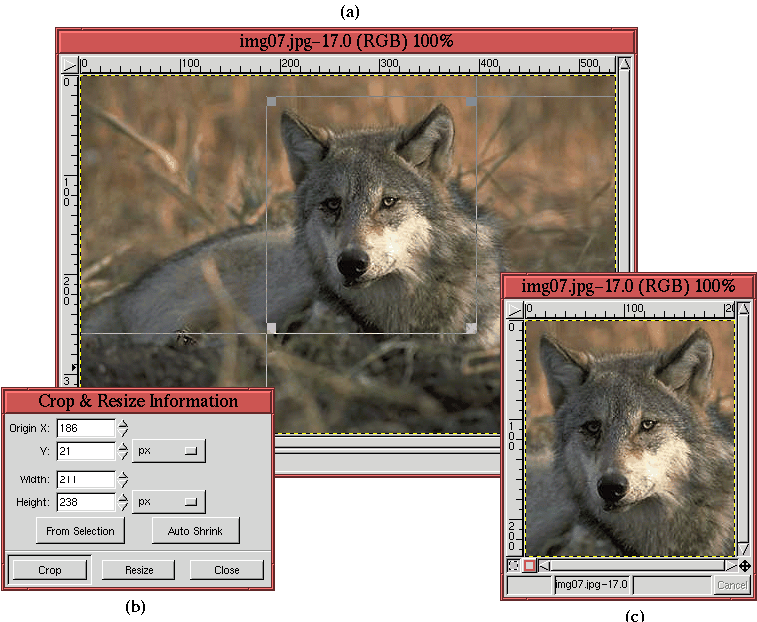
illustrates how the original image can be resized smaller this way.
The tool is applied by clicking on the
Crop tool icon in the
Toolbox and then clicking and dragging in the image window to create
the crop rectangle. Once drawn, the dimensions of the crop rectangle
can be adjusted by clicking and dragging either the upper-left or
lower-right corners of the rectangle. The rectangle can also be
repositioned by clicking and dragging the upper-right or lower-left
corners.
The result of using the Crop tool to nicely frame the wolf's
head is shown in Figure
2.17(a).
When using this tool, the Crop dialog appears, as shown in
Figure
2.17(b). It is possible to
crop the image by clicking on the Crop button in the dialog or by
simply clicking inside the crop rectangle in the image window. This
makes the image smaller and simultaneously discards the image parts
outside of the window. Alternatively, the image can be resized by
clicking on the Resize button in the Crop dialog. This makes the
image window smaller without discarding the image parts outside
the resulting window.
Figure
2.17(c) shows the result of
cropping the image to the crop rectangle seen in
Figure
2.17(a). From the above
discussion, it should be clear that there is really no reason to use
Canvas Size to make an image window smaller. It is simply more
convenient to do it with the Crop tool.
Although Canvas Size is not optimum for making an image smaller,
it is quite useful for making it larger. This is especially valuable
when compositing several raw images. Typically you discover, after
positioning various imported layers, that the resulting image window
is not large enough to adequately frame the composition. When this
happens, Canvas Size is the tool that fixes the problem.
Figure
2.18
Figure 2.18:
Image Resizing (Original Becomes Larger)
 |
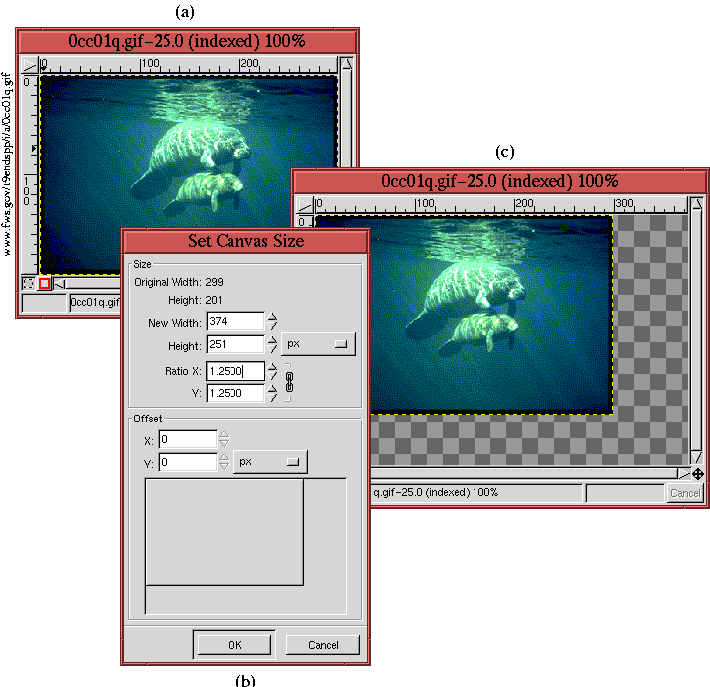
illustrates the result of resizing an image.
Figure
2.18(a) shows the original image,
and Figure
2.18(b) shows the Set
Canvas Size dialog box. This time the X and Y ratios are scaled to
125% of the original. The result is shown in
Figure
2.18(c). Once the image window
has been resized it is possible to reposition the image layer or
layers using the Move tool.
