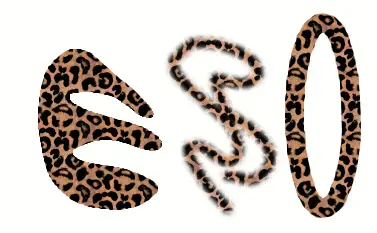
A pattern is an image, usually small, used
for filling regions by tiling, that is, by
placing copies of the pattern side by side like ceramic tiles. A
pattern is said to be tileable if copies of
it can be adjoined left-edge-to-right-edge and
top-edge-to-bottom-edge without creating obvious seams. Not all
useful patterns are tileable, but tileable patterns are nicest for
many purposes. (A texture, by the way, is
the same thing as a pattern.)
In GIMP there are three main uses for patterns:
-
With the Bucket
Fill tool, you can choose to fill a region with a
pattern instead of a solid color.
-
With the Clone tool,
you can paint using a pattern, with a wide variety of
paintbrush shapes.
-
When you stroke a path or selection, you
can do it with a pattern instead of a solid color. You can
also use the Clone tool as your choice if you stroke the
selection using a painting tool.
![[Tip]](images/tip.png)
|
Tip |
|
Note: Patterns do not need to be opaque. If you fill or paint using a
pattern with translucent or transparent areas, then the previous
contents of the area will show through from behind it. This is one of
many ways of doing “overlays” in GIMP.
|
When you install GIMP, it comes presupplied with a few dozen
patterns, which seem to have been chosen more or less randomly.
You can also add new patterns, either ones you create yourself, or
ones you download from the vast number available online.
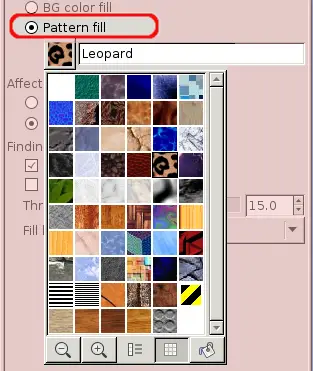
GIMP's current pattern,
used in most pattern-related operations, is shown in the
Brush/Pattern/Gradient area of the Toolbox. Clicking on the pattern symbol
brings up the Patterns dialog,
which allows you to select a different pattern. You can also access the
Patterns dialog by menu, or dock it so that it is present continuously.
To add a new pattern to the collection, so that it shows up in the
Patterns dialog, you need to save it in a format GIMP can use, in a folder
included in GIMP's pattern search path. There are several file formats you
can use for patterns:
-
PAT
-
The .pat format is used for
patterns which were created specifically for GIMP. You can convert
any image into a .pat file by
opening it in GIMP and then saving it using a file name ending in
.pat.
![[Caution]](images/caution.png)
|
Caution |
|
Do not confuse GIMP-generated
.pat files with files
created by other programs (e.g.
Photoshop) – after all,
.pat is just a part of an
(arbitrary) file name.
(However, GIMP does
support Photoshop
.pat files until a certain
version.)
|
-
PNG, JPEG, BMP, GIF, TIFF
-
Since GIMP 2.2 you can use
.png,
.jpg,
.bmp,
.gif, or
.tiff files as patterns.
To make a pattern available, you place it in one of the folders in GIMP's
pattern search path. By default, the pattern search path includes two
folders, the system patterns folder, which you should
not use or alter, and the patterns
folder inside your personal GIMP directory. You can add new folders to the
pattern search path using the
Pattern Folders
page of the Preferences dialog. Any PAT file (or, in GIMP 2.2, any of the
other acceptable formats) included in a folder in the pattern search path
will show up in the Patterns dialog the next time you start GIMP.
There are countless ways of creating interesting patterns in GIMP, using
the wide variety of available tools and filters -- particularly the
rendering filters. You can find tutorials for this in many locations,
including the GIMP home page [GIMP].
Some of the filters have options that allows you to make their results
tileable. Also, see Section 2.7, “Tileable Blur”, this
filter allows you to blend the edges of an image in order to make it more
smoothly tileable.
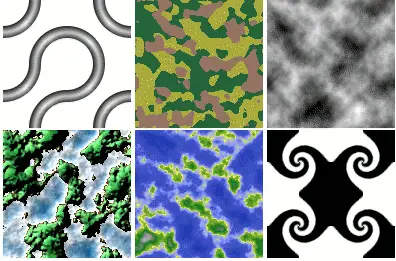
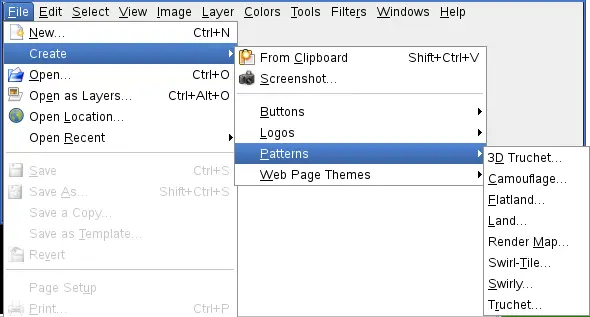
Also of interest are a set of pattern-generating scripts that come with
GIMP: you can find them in the menu bar, through
→ → .
Each of the scripts creates a new image filled with a particular type of
pattern: a dialog pops up that allows you to set parameters controlling
the details of the appearance. Some of these patterns are most useful for
cutting and pasting; others serve best as
bumpmaps.