Adding a new JRE definition
In your workspace you can have any number of JRE definitions. You can also add as many JRE definitions as you want.
To add a new JRE definition:
 Java > Installed JREs
preference page.
Java > Installed JREs
preference page.
- Select the Add... button. The Add JRE wizard opens.
- You will have to select the type of JRE you would like to create:
-
Standard VM
- You will select a folder where the JRE is installed. The details of the JRE will be determined
by scanning the location. You can further customize the JRE install, specifying vm arguments, source attachments, etc.
-
Standard VM 1.x.x
- Same options as a standard VM install, but the install is customized to handle the 1.x.x install
-
Execution Environment Description
- You will select an execution environment (EE) file that describes all the details required to set up the JRE. You will be able
to customize some aspects of the install.
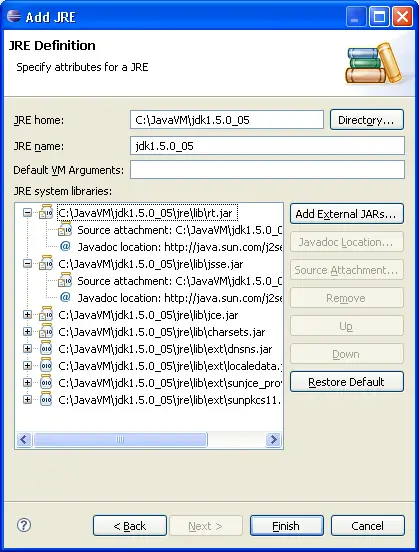
Standard VM:
- In the JRE home field, click Browse...
to select a path to the root directory of a JRE installation
(usually the directory containing the bin and lib
directories for the JRE). You may also type a folder name
into this field.
- In the JRE name field, type a name for the new JRE
definition. All JREs of the same type must have a unique name.
- In the Default VM Arguments field, you can add/edit the default
arguments that will be passed to the VM when launching.
- The default libraries appear for the JRE in the JRE system libraries list.
You can modify the libraries as desired.
- Source and javadoc locations can be specified for the referenced JARs.
The Javadoc location is used by the Javadoc export wizard as a default
value and by the 'Open External Javadoc' action.
- Jars can be added, removed, and reordered.
- Click Finish when you are done.
Standard 1.1.x VM:
Follow the same steps as for
Standard VM
JREs.
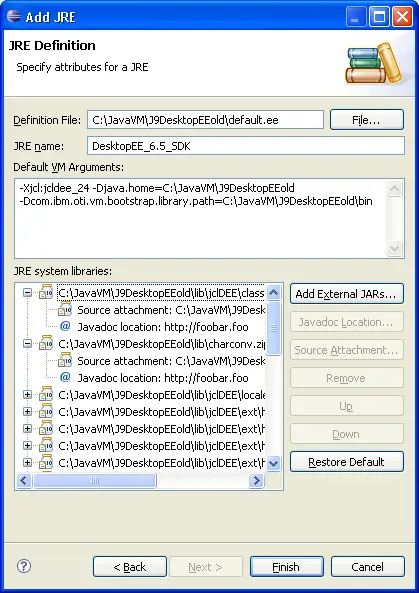
Execution Environment Files:
For more information on EE File structure see the
Wiki Page.
- In the Definition home directory field, click File...
to select a execution environment description file to load the JRE
installation from. You may also type a file path into this field.
- In the JRE name field, type a name for the new JRE
definition. All JREs of the same type must have a unique name.
- In the Default VM Arguments field, you can add/edit the default
arguments that will be passed to the VM when launching.
- The default libraries appear for the JRE in the JRE system libraries list.
You can modify the libraries as desired.
- Source and javadoc locations can be specified for the referenced JARs.
The Javadoc location is used by the Javadoc export wizard as a default
value and by the 'Open External Javadoc' action.
- Jars can be added, removed, and reordered.
- Click Finish when you are done.

Java development tools (JDT)

Working with JREs
Deleting a JRE definition
Choosing a default JRE
Choosing a JRE for launching a project

Installed JREs preference page


