Creating handouts
A
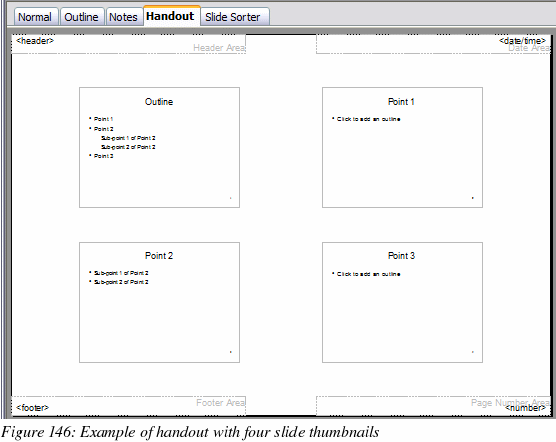
handout is a special view of the presentation suitable to be printed
and distributed to the audience. Each handout page contains from one
to six thumbnails of the slides so that the audience can follow what
is presented as well as use it as reference. This section explains
how to customize the handout page, an example of which is given in
Figure 146.
Note
that the handout view consists of only one page regardless of the
number of slides that compose the presentation.
Changing
the layout
When
creating handouts, first decide how many slide thumbnails you want
printed on each handout page.
Select
the Handout view either by clicking on the tab in the work area or
by selecting View >
Handout Page from the menu bar.
If
the Task pane is not visible, select View
> Task Pane from the menu bar.
|
Tip
|
As
for any other toolbar, you can undock the Task pane by holding
down the Control
key and double-clicking on an empty part of the pane.
|
In
the Task pane select the Layouts
tab, which looks like Figure 147 in Handout view.
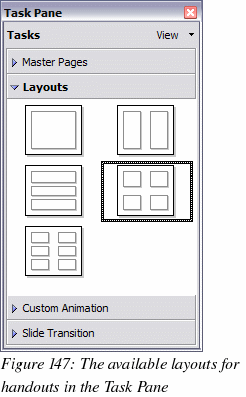
Choose
the preferred layout. The main work area changes to reflect the
choice.
Formatting
handouts
You
can format several aspects of the handout, from the page style to
the elements that appear on the page. You cannot format individual
handout pages; any changes apply to all handouts in the presentation
file.
Formatting
the page
To format the
handout pages:
Be
sure you are in Handouts view. (Click the Handouts tab in the work
area or select View >
Handout Page from the menu bar.)
Select
Format > Page
from the main menu, or right-click on the handout and select Slide
> Page Setup from the pop up menu.
On
the Page Setup dialog (Figure 142 on page 188), set the paper size,
orientation (portrait or landscape), margins, and other parameters.
Click
OK to close the
dialog.
Setting
automatic layout options
In Handout view, as
in Notes view, Impress creates four areas where you can put
information about the presentation:
Header
area
Date
and Time area
Footer
area
Slide
number area
The
way to access and customize these areas is the same as for the Notes
and uses the same dialog. Refer to “Setting automatic layout options”
on page 188 for information.
|
Note
|
The
information in these areas does not show in Handout view, but it
does appear correctly on the printed handouts.
|
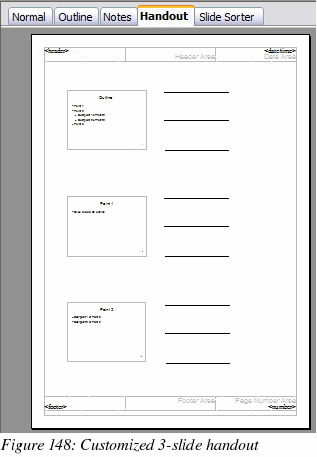
Moving
thumbnails and adding graphics
You
can move (but not resize) the slide thumbnails and add lines, boxes,
and other graphic elements to the handouts. Figure 148 shows an
example. See Chapter 5 (Creating Graphic Objects) for instructions
on using the graphics tools.
|
Tip
|
After
designing a handout, you may wish to save it in a template so you
can reuse it whenever you want. See “Working with templates”
in Chapter 2 (Using slide masters, styles and templates) for
instructions on saving templates and starting a new presentation
from a template.
|
|
Caution

|
If
you click on one of the other handout layouts and then return to
the one you have reformatted, the slide thumbnails return to
their original positions, although any lines or other graphics
you have added remain where you put them. You will need to move
the thumbnails back to where you want them.
|
Printing
handouts
Choose File
> Print from the menu bar.
Click
the Options
button on the Print dialog.
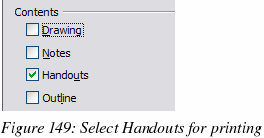
In
the Contents
section of the Printer Options dialog, make sure that only the
Handouts checkbox
is selected (Figure 149).
Click
OK to save the
change and return to the Print dialog.
On
the Print dialog, you can select which slides to include in the
handouts. In the Print
range section (Figure 145), select Pages
and specify the slide numbers to be included. Any numbers entered
here correspond to slides,
not pieces of paper.

For
more about printing slides, notes, and handouts, see Chapter 10.
|
Note
|
At
present there is no way to export handouts to PDF.
|


