Options for positioning text
The Position page of the Paragraph Style dialog box collects all the options that affect the position of the text on the screen or printed page. This page is divided into three sections, plus a preview area. They are: Position, Rotation, and Scaling.
Use the Position section to control the appearance of superscripts and subscripts. However, you will normally apply superscript and subscripts to groups of characters rather than to entire paragraphs. Therefore, it is strongly recommended to change these parameters only when defining a character style and, instead, leave the default settings for the paragraph styles.

The position page of the Paragraph Style (default options).
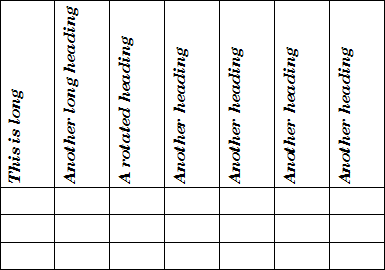
The second section of the Position page controls the rotation of the paragraph area. Two common uses for rotated paragraphs are (a) to put portrait headers and footers on a landscape page and (b) to fit headings above narrow table columns.

A table with rotated headings.
The Scale Width box controls the percentage of the font width by which to compress or stretch the rotated text horizontally.
Chapter 4 (Formatting Pages) describes how to create portrait headers and footers on landscape pages by rotating characters. You can achieve the same effect by defining a separate header or footer paragraph style specifically for landscape pages.
Example: Rotating the text in a paragraph style
As an example, we will apply rotated table headings to a pre-existing table.
- Create a new paragraph style. Name it Table Heading Rotated.
- On the Position page of the Paragraph Style dialog box, in the Rotation / scaling section, select 90 degrees. Click OK to save the new style.

Rotating a paragraph 90 degrees.
- Select the heading row of the table and apply the new style. Any text in the cells of the heading row is now rotated.
- If the headings are aligned to the top of the cells, you may want to change the alignment to the bottom of the cells. To do this, click the Bottom button on the Table toolbar or select Format> Alignment > Bottom from the main menu.
Spacing options
The spacing section of the Position page allows you to control the spacing between individual characters in the paragraph. When selecting an option other than default in the drop-down menu, use the edit box to enter the value in points by which you want to expand or condense the text. Selecting the Pair Kerning option results in increasing or decreasing the amount of space between certain pairs of letters to improve the overall appearance of the text. Kerning automatically adjusts the character spacing for specific letter combinations (see an example of kerning pair below). Kerning is only available for certain font types and, for printed documents, only works if your printer supports it.

Kerning disabled (left) and enabled (right).
