Creating line styles
Use the Line Styles page of the Line dialog (shown below) to create new line styles and load previously saved line styles. Normally it is not a good practice to modify the predefined styles; instead, create new ones when necessary.
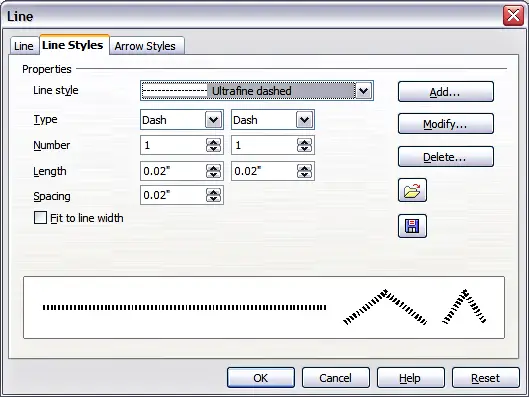
Advanced options for creating line styles.
To create a new line style:
- Choose Format > Line from the menu bar.
- Select from the Line style drop‑down menu a style similar to the desired one.
- Click Add. On the pop-up dialog, type a name for the new line style and click OK.
- Now define the new style. Start by selecting the line type for the new style. To alternate two line types (for example, dashes and dots) within a single line, select different types in the two Type boxes.
- Specify the number and length (not available for dot style) of each of the types of line selected, set the spacing between the various elements, and decide if the style should fit to the line width (length).
The new line style is available only in the current presentation. If you want to reuse the line style in other presentations, click the Save Line Styles icon and type a memorable name. This saves all of the line styles in this presentation. (Saved styles have a file extension of .sod.)
To make previously saved line styles available in the current presentation, click the Load Line Styles icon, select the saved list of styles, and click Open.
Use the Modify button to change the name of the style. Recommended only for custom line styles, not the built-in ones.


