Using the Formatting toolbar
Now let us go further and customize the Fontwork object with several more attributes.
Click on the Fontwork object. The Formatting toolbar changes to show all the options for editing the object. (For example, the toolbar shown below appears when you use Fontwork in Writer.)
Note that in this figure the toolbar has been undocked for ease of illustration: unless you have chosen to float the toolbar in this way, it appears in its default, docked position somewhere below the menu bar.
On the Formatting toolbar you have a large choice of options for customizing your object. These choices are the same as the ones for other drawing objects. You can read about them in more detail in the Draw Guide.
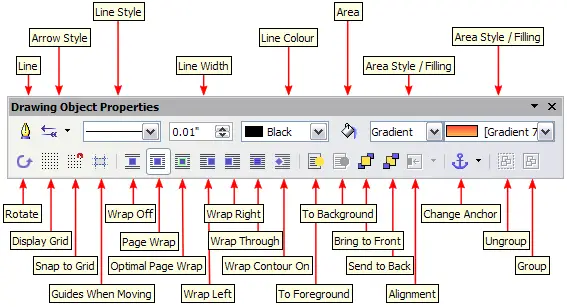
Formatting toolbar with a Fontwork object selected in Writer
Line options
Line icon: Opens a dialog (Error: Reference source not found) with three tabs: Line, Line Styles, Arrow Styles.
- Use the Line tab to edit the most common properties of the line around the selected Fontwork object, by choosing from previously-defined attributes including line style, line color, and arrow styles.
- Use the Lines Styles and Arrow Styles tabs to edit the properties of line and arrow styles, and define new styles.
Arrow Style icon: Choose from the different arrow styles.
Line Style box: Choose from the available line styles.
Line Width box: Set the width of the line.
Line Color box: Select the color of the line.
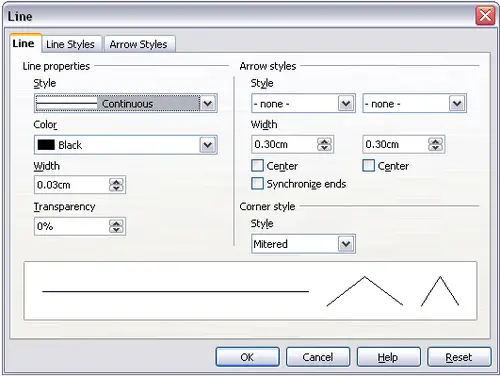
Line options dialog
Area options
Area icon: Opens a dialog (Figure 11) with seven tabs: Area, Shadow, Transparency, Colors, Gradients, Hatching, Bitmaps.
- Area tab: Choose from the predefined list a color, bitmap, gradient or hatching pattern to fill the selected object.
- Shadow tab: Set the shadow properties of the selected object.
- Transparency tab: Set the transparency properties of the selected object.
- Colors tab: Modify the available colors or add new ones to appear on the Area tab.
- Gradients tab: Modify the available gradients or add new ones to appear on the Area tab.
- Hatching tab: Modify the available hatching patterns or add new ones to appear on the Area tab.
- Bitmaps tab: Create simple bitmap patterns and import bitmaps, to make them available on the Area tab.
Area Style / Filling boxes: Select the type of the fill of the selected object. For more detailed settings, use the Area icon.
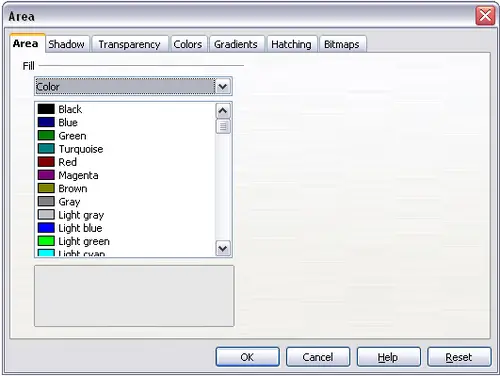
Area options dialog
Positioning options
Rotate icon: Rotate the selected object manually using the mouse to drag the object.
To Foreground icon: Moves the selected object in front of the text.
To Background icon: Moves the selected object behind the text.
Alignment icon: Modifies the alignment of the selected objects.
Bring to front icon: Moves the selected object in front of the others.
Send to back icon: Moves the selected object behind the others.
Change Anchor icon: Switch between anchoring options:
- To Page - The object keeps the same position in relation to the page margins. It does not move as you add or delete text.
- To Paragraph - The object is associated with a paragraph and moves with the paragraph. It may be placed in the margin or another location.
- To Character - The object is associated with a character but is not in the text sequence. It moves with the paragraph but may be placed in the margin or another location. This method is similar to anchoring to a paragraph.
- As Character - The object is placed in the document like any character and moves with the paragraph as you add or delete text before the object.
Ungroup icon: Ungroups the selected objects, so you can manage them individually.
Group icon: Groups the selected objects, so you can manage them as a single object.


