Defining a custom print range
In addition to highlighting a print range for each print job, you can define a range of cells to be used repeatedly. This may be useful, for example, if there are different areas of a large spreadsheet that need to be printed for different reports. Several different print ranges can be defined to meet this need.
- To define a print range, use the same procedure as labeling an area of the sheet. Highlight the cells you want to define as a print range and select Insert > Names > Define. (The cells can be highlighted after opening the Define Names dialog as well.)
- On the Define Names dialog, type a name for the range in the text box with the blinking cursor. The name of the range cannot contain any spaces.
- Click the More button and then select the Print range option. Click the Add button.
- To include more than one group of cells in the selection, type in the additional ranges. For example, to select the rectangle with A3 as the top left cell and F20 as the bottom right cell, enter ;$A$3:$F$20 or ;A3:F20 (both work and are equivalent) after the initial selection. Make sure that each group of cells is separated with a semicolon.
- Click OK.
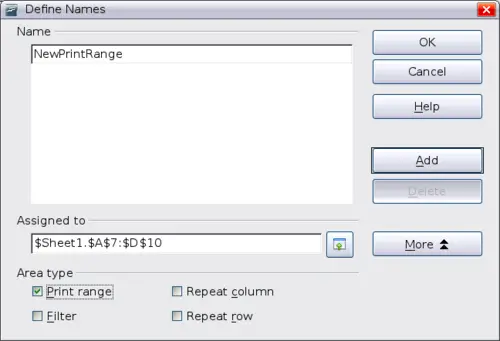
Define Names dialog
To print this range:
- Go to Format > Print Ranges > Edit. The previously defined area now appears in the drop-down box under Print range.
- Select the defined print range and click OK.
This method can be useful to quickly change the print range without highlighting a large area of cells every time.
 | If the cell range name refers to more than one group of cells, it will not appear in the drop-down list.
|


