Inserting new sheets
There are several ways to insert a new sheet. The first step, in all cases, is to select the sheet that will be next to the new sheet. Then do any of the following:
- Select Insert > Sheet from the menu bar, or
- Right-click on the tab and select Insert Sheet, or
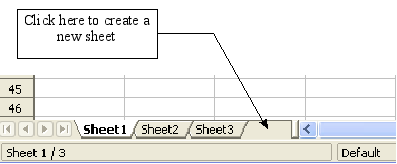
- Click in an empty space at the end of the line of sheet tabs.
Creating a new sheet
Each method opens the Insert Sheet dialog. Here you can choose to put the new sheet before or after the selected sheet and how many sheets to insert.
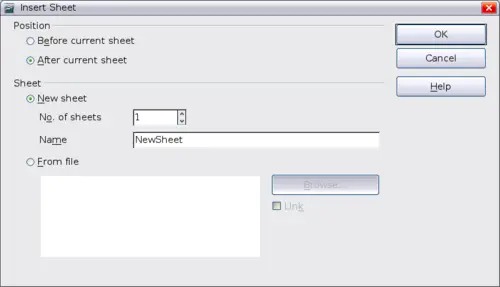
Insert Sheet dialog
We need 6 sheets, one for each of the 5 accounts and one as a summary sheet so we will add 3 more. We also want to name each of these sheets for the account they represent: Summary, Checking Account, Savings Account, Credit Card 1, Credit Card 2, and Car Loan.
We have two choices: insert 3 new sheets and rename all 6 sheets afterwards; or rename the existing sheets, then insert the three new sheets 1 at a time, renaming each new sheet during the insert step.
To insert sheets and rename afterwards:
- In the Insert Sheet dialog, choose the position for the new sheets (in this example, we use After current sheet).
- Choose New sheet and 3 as the No. of sheets. (Three sheets are already provided by default.) Because you are inserting more than one sheet, the Name box is not available.
- Click OK to insert the sheets.
- For the next steps, go to “Renaming sheets” below.
To insert sheets and name them at the same time:
- Rename the existing sheets Summary, Checking Account, and Savings Account, as described in “Renaming sheets” below.
- In the Insert Sheet dialog, choose the position for the first new sheet.
- Choose New sheet and 1 as the No. of sheets. The Name box is now available.
- In the Name box, type a name for this new sheet, for example Credit Card 1.
- Click OK to insert the sheet.
- Repeat steps 1–4 for each new sheet, giving them the names Credit Card 2 and Car Loan.
On the Insert Sheet dialog, you can also add a sheet from a different spreadsheet file (for example, another Calc or Excel spreadsheet), by choosing the From file option. Click Browse and select the file; a list of the available sheets appears in the box. Select the sheet to import. If, after you select the file, no sheets appear you probably selected an invalid file type (not a spreadsheet, for example).
 | For a shortcut to inserting a sheet from another file, choose Insert > Sheet from file from the menu bar. The Insert Sheet dialog opens with the From file option preselected, and then the Insert dialog opens on top of it.
|
If you prefer, select the Link option to insert the external sheet as a link instead as a copy. This is one of several ways to include “live” data from another spreadsheet. (See also “Error: Reference source not found” on page Error: Reference source not found.) The links can be updated manually to show the current contents of the external file; or, depending on the options you have selected in Tools > Options > OpenOffice.org Calc > General > Updating, whenever the file is opened.


