Side panes - docked or floating windows
MSO
XP introduced the concept of side panes. These are the closest
equivalent to OOo’s
docked or floating windows. In OOo
these windows include:
Navigator
to help move around the document (the closest equivalent in MSO
would be the Outline view in Word).
Styles
and Formatting for managing styles.
Gallery,
a clip art viewer.
Function
Wizard, which helps you interactively create
formulas; available only in Calc.
Data
Source Explorer, from
which you can drag and drop fields from registered databases into
your documents; available in Calc and Writer.
There
is no equivalent of the MSO
Clipboard for handling multiple copies.
Docking
and undocking
Some windows in
OpenOffice.org, such as the Navigator and the Styles and
Formatting window, are dockable. You can move, re-size or dock
them to an edge.
|
To
dock a window, do one of the following:
Click
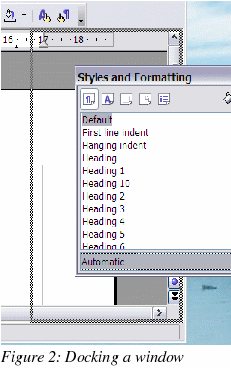
on the title bar of the floating window and drag it to the side
until you see the outline of a box appear in the main window (see
Figure 2), then release the window. This method depends on your
system’s window manager settings, so it may not work for you.
Hold
down the Control key and double-click on a vacant part of
the floating window to dock it in its last position. If that does
not work, try double-clicking without using the Control
key.
To
undock a window, hold down the Control key and double-click
on a vacant part of the docked window.
|
|
It
is possible to have two windows in the same area. For example, the
Styles
and Formatting window and the Navigator
can be at the right edge with one above the other rather than side by
side. Then the show/hide and stick/floating buttons work for both
docked windows.
Resizing
Docked
windows can be resized by moving the border. When the mouse pointer
changes to a double-ended arrow, click
and drag the window to the desired size.
Navigator
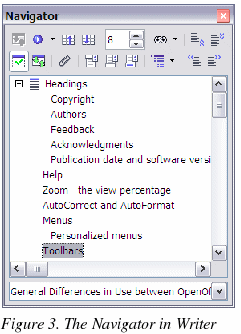
The
Navigator (Figure 3) is activated and deactivated by F5,
the Navigator
button,
 ,
in the Standard
toolbar, or Edit
> Navigator. This window shows the different objects in
the current document and enables you to move quickly among them.
Details vary from one application to another. For example in Writer
it shows the list of headings and has controls similar to Outline
view in Word. The drop-down list at the bottom of the Navigator is
for selecting which of the currently open documents has information
displayed in the Navigator.
For
more information, see “Using the Navigator” in Chapter 4, “Menus
and Toolbars” in the Getting Started guide, and descriptions
of the Navigator in the guides for each of the applications.
Styles
and Formatting
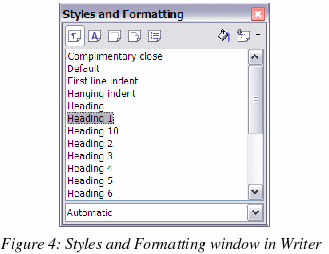
The
Styles and Formatting window (Figure 4) can be activated and
deactivated by F11,
the Styles and Formatting
icon
 , or Format
> Styles and Formatting.
To
change the category of styles displayed, use the buttons across the
top of the window. For example, in Writer the buttons are Paragraph,
Character, Frame, Page, and List. The drop-down list at the bottom of
the Styles and Formatting window determines which of the style types
get displayed in the window. For example, in Writer for character
styles the options are Hierarchical, All, Applied, and Custom.
The
style of the current selection is highlighted in the list of styles.
See
Chapter 6 “Introduction to Styles” and Chapter 7 “Working with
Styles” in the Writer Guide for more information about
style types and how the other icons in the window work.
Gallery
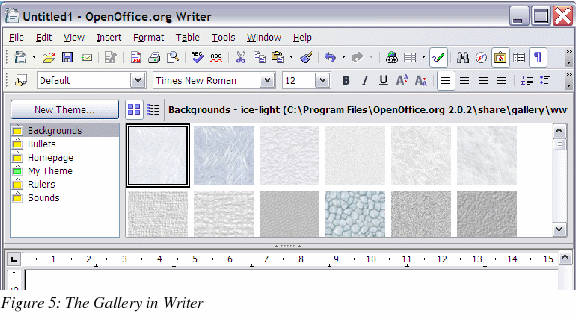
The
Gallery (Figure 5) is activated and deactivated by clicking the
Gallery button
 ,
in the Standard toolbar
or by selecting Tools >
Gallery.
|
Note
|
There
is no default shortcut key to activate the Gallery.
|
The
Gallery is OOo’s
equivalent to MSO’s
Media Gallery, except that it does not have ties to the Web and there
is no search facility. In order to keep the OOo download as small as
possible, very little clip-art comes with OOo.
To download some public domain clip-art, see
https://www.openclipart.org/.
Media
in the Gallery is organized by themes. Themes are displayed down the
left side of the Gallery window.
For
information on how to use the Gallery, see Chapter 14 “Working with
the Gallery” in the Getting
Started guide.
Data
Source Explorer
The Data Source
Explorer is activated and deactivated by pressing F4
or by clicking the Data
Sources button
 in the Standard
Toolbar or by selecting View
> Data Sources.
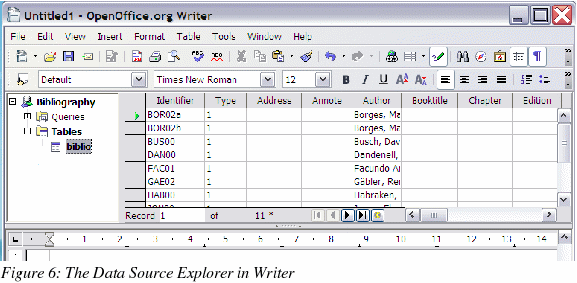
A
common use for this window is in setting up a template for a mail
merge letter. You can drag and drop fields from data sources in the
Explorer to create fields in the current document.
The
Data
Source Explorer can only be docked at the top of
the main window.
For
more information on how to use data sources, see Chapter 10 “Getting
Started with Base” in the Getting Started guide.
