You can use either of the following methods to access the
Cluster Configuration Tool:
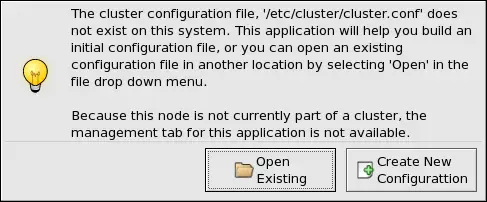
If this is the first time you have started the
Cluster Configuration Tool, the program prompts you to
either open an existing configuration or create a new one. Click
Create New Configuration to start a new
configuration file.
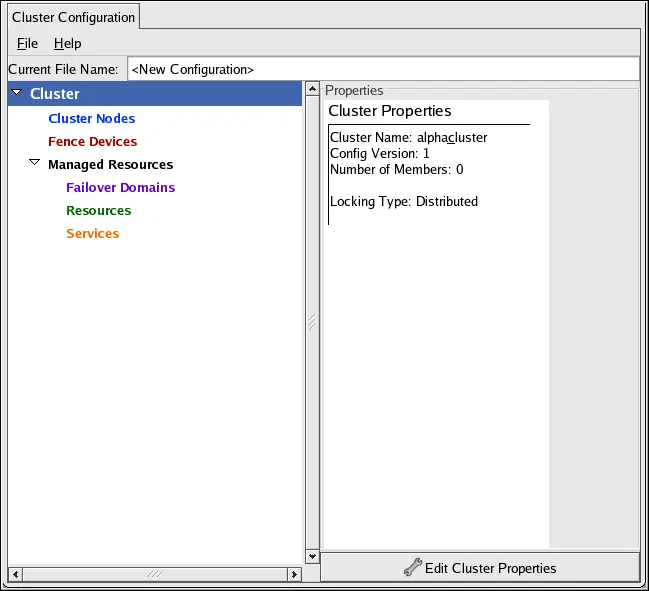
The following sections are available within the
Cluster Configuration Tool:
Cluster Nodes — Use this
section to add members to the cluster and optionally configure a power
controller connection for any given member.
Fence Devices — Use this
section to establish one or more devices or methods to control each
node in a cluster, which maintains cluster availability and
integrity.
Managed Resources — Use this
section to configure one or more resources to be controlled and
configured for the cluster.
Failover Domains — Use this
section to configure one or more subsets of cluster nodes used to
run a service in the event of a node failure.
Resources — Use this section to
configure resources to be managed by the system. Choose from the
available list of filesystems, IP addresses, NFS mounts and
exports, and user-created scripts and configure them
individually.
Services — Use this section to
create and configure services that combine cluster resources,
nodes, and failover domains as needed.
The hierarchical relationships in the
Cluster Configuration Tool reflect the organization of
the resource information in the
/etc/cluster/cluster.conf file.
 | Warning |
|---|
| | Do not manually edit the contents of the
/etc/cluster/cluster.conf file unless you fully
understand the consequences of manual configuration. |
Save your configuration at any point (using =>
) while running the
Cluster Configuration Tool. When
=> is selected, it prompts you to save
changes if any unsaved changes to the configuration are detected.
 | Note |
|---|
| | When you save the cluster configuration for the first time using the
Cluster Configuration Tool and exit the application,
the next time you configure the cluster (either by choosing
=> =>
=>
or by running
system-config-cluster from a shell prompt) the
Management tab will appear along with the
Cluster Configuration tab. The
Management
Cluster Configuration Tool displays the status of the
cluster service manager, cluster nodes, and resources, and shows
statistics concerning cluster service operation. If you need to
further configure the cluster system, choose the Cluster
Configuration tab. |
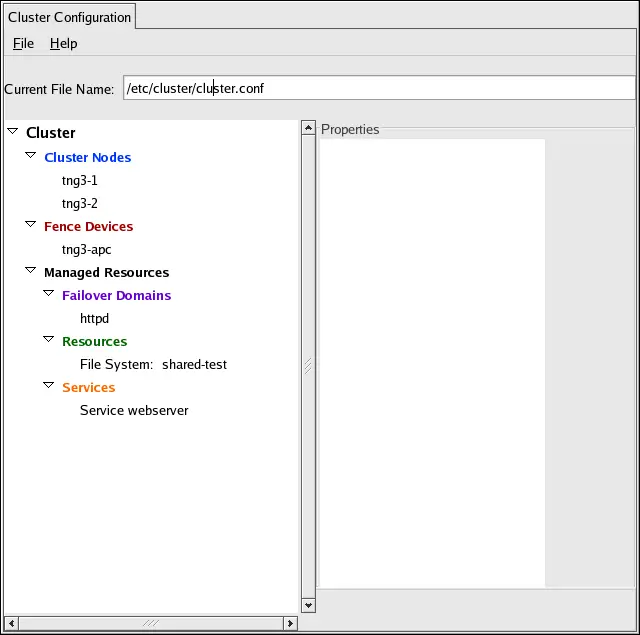
The Cluster Configuration Tool uses a hierarchical
structure to show relationships between components in the cluster
configuration. A triangular icon to the left of a component name
indicates that the component has resources configured. To expand or
collapse the portion of the tree below a component, click the triangle
icon.
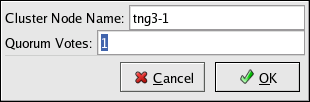
For example, to configure an existing node, click the triangle icon
next to the Cluster Nodes property and select the
node. Three buttons appear in the Properties
portion of the window. Click Edit Node
Properties.