Follow Techotopia on Twitter

On-line Guides
All Guides
eBook Store
iOS / Android
Linux for Beginners
Office Productivity
Linux Installation
Linux Security
Linux Utilities
Linux Virtualization
Linux Kernel
System/Network Admin
Programming
Scripting Languages
Development Tools
Web Development
GUI Toolkits/Desktop
Databases
Mail Systems
openSolaris
Eclipse Documentation
Techotopia.com
Virtuatopia.com
Answertopia.com

How To Guides
Virtualization
General System Admin
Linux Security
Linux Filesystems
Web Servers
Graphics & Desktop
PC Hardware
Windows
Problem Solutions
Privacy Policy


11.2.  Add Bevel

11.2.1.  Overview

Figure 16.207.  Example for the “Add Bevel” filter

Example for the Add Bevel filter

Original image, the colored rectangle is selected

Example for the Add Bevel filter

Add Bevel” applied


This filter adds a slight bevel to an image using a bump map (see below). If there is a selection, it is bevelled, otherwise the filter has no effect.
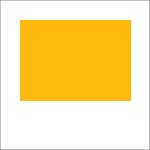
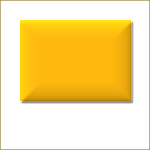
Figure 16.208.  Another “Add Bevel” example, with bumpmap

Another Add Bevel example, with bumpmap

Original image

Another Add Bevel example, with bumpmap

Bumpmap

Another Add Bevel example, with bumpmap

Filter applied


11.2.2.  Activate the filter

You can find this filter in the image window menu under FiltersDecorAdd Bevel.

11.2.3.  Options

Figure 16.209.  Add Bevel” options

Add Bevel options

Thickness

You can specify the thickness of the bevel, in pixels. Maximal thickness is 30 pixels.

Work on copy

By default the filter creates a copy and bevels this copy. This is one more open window on your desktop. However, since you can undo the filter effect you may also uncheck this option and work on the original image.

Keep bump layer

When checked, you will keep the generated bumpmap as a new, not visible layer (below the layer dialog):


  Published under the terms of the GNU General Public License Design by Interspire