|
 |
|
| |
Creating a simple MIDlet
In this section, you will create a new MIDlet class, which is a
Java class that derives from the javax.microedition.midlet.MIDlet
superclass.
Java ME perspective
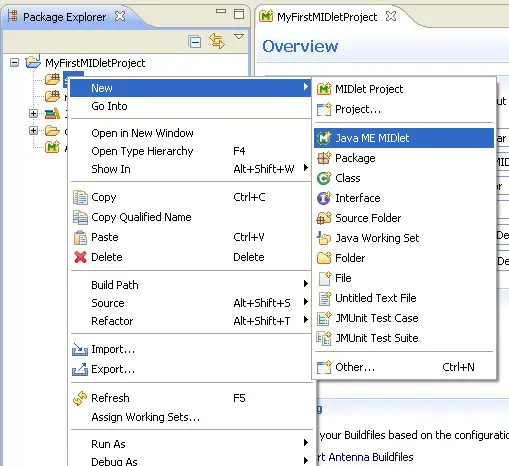
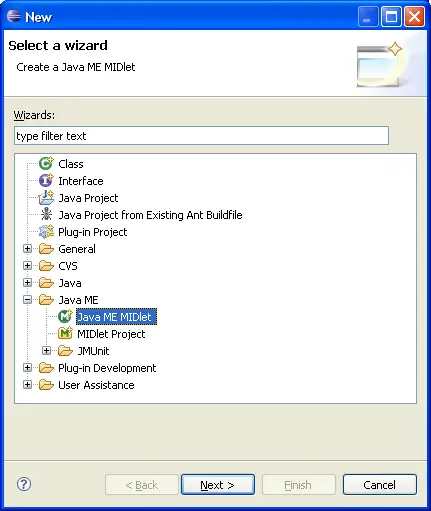
- In the Package Explorer view, right click the
src
folder and select the
 New > Java ME MIDlet wizard. New > Java ME MIDlet wizard.
-
On the New Java ME MIDlet wizard, select the
appropriate information for the MIDlet to be generated. With the
exception of the Add to Application Descriptor
checkbox, all other information are the similar to the standard class
creation parameters from JDT.
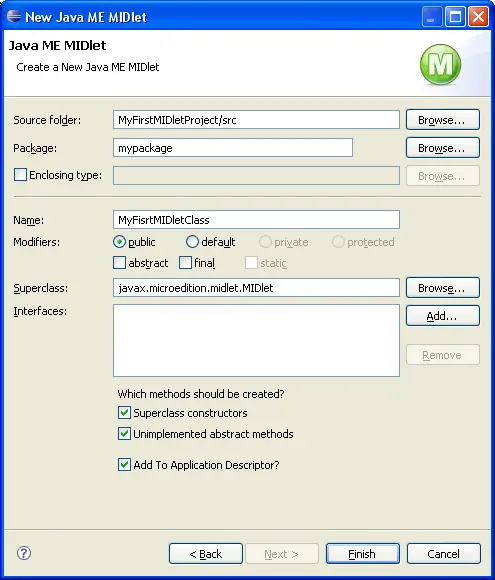
Note that only classes derived from the javax.microedition.midlet.MIDlet
class can be used in the Superclass field.
- Select the checkbox for Add to Application
Descriptor.
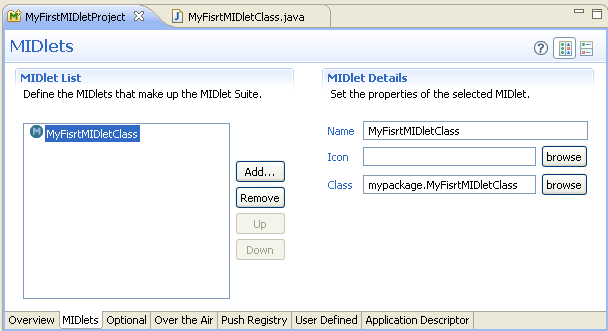
When this parameter is selected, the newly created MIDlet will
automatically be added to the project's Application Descriptor with
default information. The MIDlet information may be further refined by
accessing the Application Descriptor Editor.
Note that if you do not select the Add to
Application Descriptor option, you must use the Application
Descriptor Editor to enter the details for the particular MIDlet so it
is properly registered as part of the project's MIDlet suite. If you do
not do this, Java ME devices will not be able to access the MIDlet.
- Click Finish to create the new MIDlet class.
- The new MIDlet class is opened in the editor.

- If the Add to Application Descriptor checkbox
was left unchecked the new MIDlet class must be added in the Application
Descriptor.
- You can now start working in the new MIDlet.
Other perspectives
- In the Package Explorer view, right click the
src
folder and select the New > Other... option.
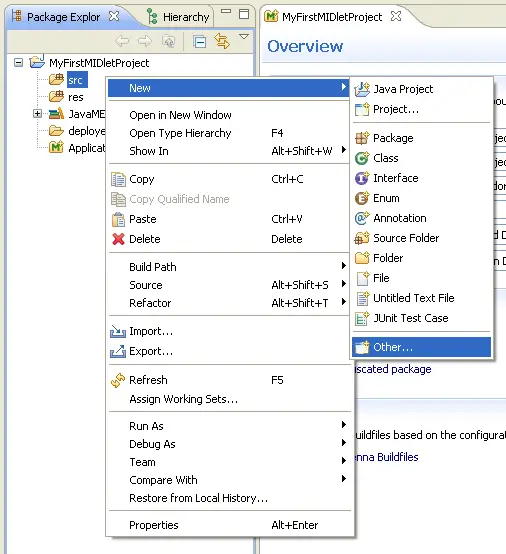
- Select the Java ME MIDlet wizard from the Java
ME category.
- Follow steps
2
through
7 from the Java ME perspective
section.
|
|
|


