2.5.
Customizing your GNOME session
The sub-menu of the menu offers many customization options
for your GNOME session. Below are some
of the highlights.
2.5.1.
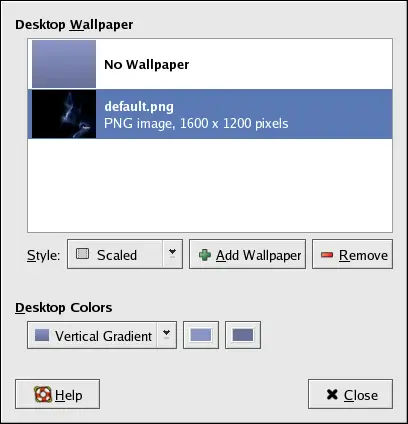
Configuring your Background
One way to dramatically alter the appearance of your graphical
desktop is to change the background using the Desktop Background Preferences tool. You can
choose from several background images included with Red Hat
Enterprise Linux in the /usr/share/backgrounds/ directory, or you can
use your own image. To start the Desktop
Background Preferences tool, right-click on the desktop and
choose from
the menu.
The Desktop Background Preferences
tool allows you to load a background from a directory of provided
images (/usr/share/backgrounds/images/). To add
images to the list of available backgrounds, you can either drag
them from your directory into the list (which does not move the
file) or you can click the Add Wallpaper
button and select image files on your system.
There are several ways to display your images. The Tiled option displays multiple instances of your
image across the desktop, which is useful if you use a small image
or if you use a tile (or pattern) image from /usr/share/backgrounds/tiles/ (or from your
own image collection). The Centered option
places your image in the center of the desktop, leaving the default
background colors to fill in any remaining desktop space. To fill
the desktop with an image without tiling it, use the Scaled or Stretched
options.
To create a background with your own custom colors and no
images, choose the No Wallpaper option and
adjust your colors below Desktop Colors.
You can choose either a solid color or a gradient of two colors.
Clicking on the color buttons allows you to change the colors.
Click Close to save and exit the Background Preferences tool.
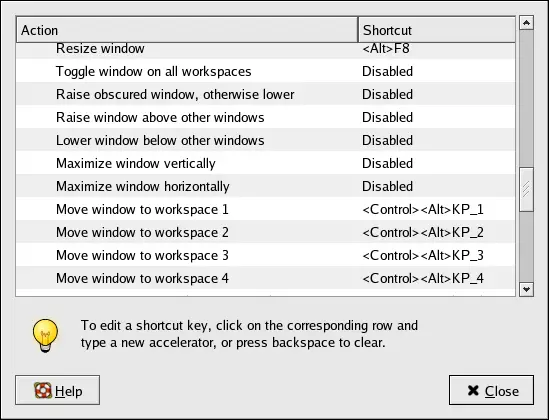
2.5.2. Keyboard Shortcuts
You can create keyboard shortcuts — pressing a combination
of keys on the keyboard — to perform actions within an
application or on your desktop. Open the Keyboard Shortcuts application from the =>
sub-menu. The application provides a list of every action to which
you can assign a shortcut. It might be helpful to spend a few
moments looking at the default shortcuts; using them can be a great
time-saver. Scroll through the list until you find the action you
would like to assign a shortcut. Click once on the description of
the action, and then press the keystrokes that you would like to
use as a shortcut.
To create a keyboard shortcut to switch between workspaces by
pressing [Ctrl] -[Alt] and workspace number:
-
Click on Switch to workspace 1
-
Press [Ctrl] -[Alt] -[1] >.
-
The Keyboard Shortcut application
records that these were the keys pressed, and lists that under the
Shortcut column. (The application notifies
you if the keystrokes you have chosen are already used for another
action.)
-
Repeat this process for workspaces 2-4, assigning each of them
similar keystrokes.
-
Close the Keyboard Shortcuts
application to save your changes.
-
Pressing [Ctrl] -[Alt] -[2] at any time
takes you to Workspace 2. Likewise, pressing [Ctrl] -[Alt]
-[3] takes you to workspace 3,
[Ctrl] -[Alt] -[4] takes you to
workspace 4, and [Ctrl] -[Alt] -[1] takes you
back to workspace 1.
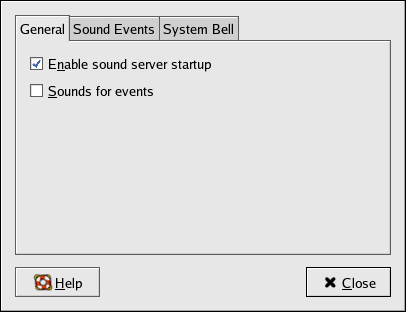
2.5.3. Sound
The Sound preference tool allows you
to set sounds to accompany events. For example, your system can
play a certain sound every time you login. When you first open this
tool, you should see a series of tabs across the top of the window.
Under the General tab, check that the
Enable sound server startup box is
checked.
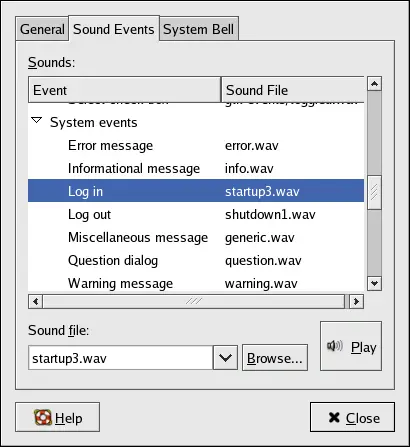
Click on the Sound Events tab, to
display a list of actions that can be accompanied by a sound. To
change or add a sound to an event, click on the description of the
event, then click on the Browse... button.
Choose a sound located in the file system, and then click Open. Sound files installed with Red Hat Enterprise
Linux are located in /usr/share/sounds/. You may also choose a
sound file from your home directory. Any file with a .wav extension
can be used for an event sound. To listen to a sound that has been
selected, click the Play button. (If you
do not hear a sound, follow the steps in Section 10.3 Troubleshooting Your Sound
Card.) When you are finished, close the Sound tool, and your changes are saved.
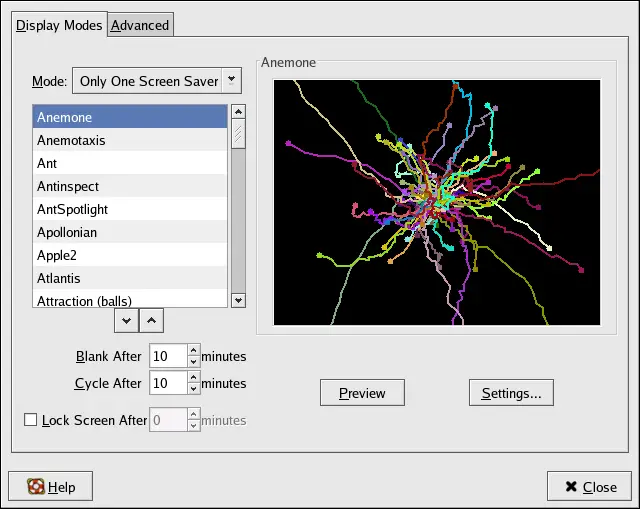
2.5.4.
Screensaver
Double-click the Screensaver icon to
launch the Screensaver Preferences tool.
The list on the left displays the available screensavers. Nearly
all screensavers can be customized by clicking on the Settings... button. To see if this is the
screensaver you would like to use, click on the Preview button. When you have seen enough, click
the mouse anywhere on the screen and you will return to Screensaver Preferences. When you are finished,
close the window to save your changes and exit.
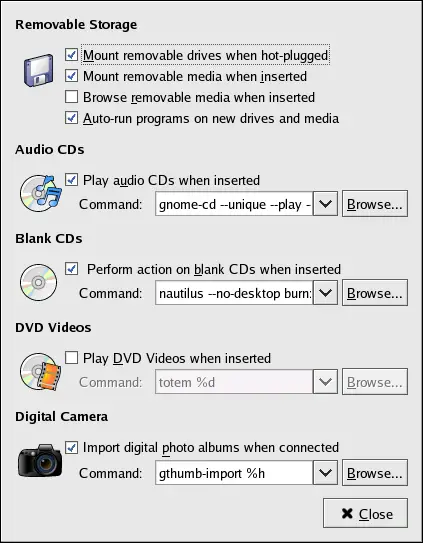
2.5.5.
Removable Storage
Launch the tool
from the => sub-menu. The application opens a list of
options for the way your system handles removable storage media
such as floppy diskettes and CD-ROMs. One default option is
auto-mounting. Auto-mount means that the
data on your removable media is automatically available a few
moments after you insert it; manual mounting is not necessary. For
more information on removable media, refer to Chapter 13 Diskettes and CD-ROMs or the
Red Hat Enterprise Linux System Administration
Guide.