Impress provides two separate dialogs related to text formatting.
- To modify the formatting such as font, font effects and so on, select the text in the shape and then go to Format > Character. This is covered in
Chapter 3.
- To determine how the text which is added to a line or a shape behaves, use the settings on the Text dialog, as described in this section.
Before formatting text, add it to the object (a shape or a line):
- Select the object to which text will be added.
- With the green (or blue) resizing handles showing, double-click on the object and wait for the cursor to become an I-beam or just start typing.
- Type the text. When finished, click somewhere outside the object or press Esc.
To format the text in a shape:
- Select the object to which text was added.
- Select Format > Text or right-click on the shape and select Text from the pop-up menu. The Text dialog is displayed.
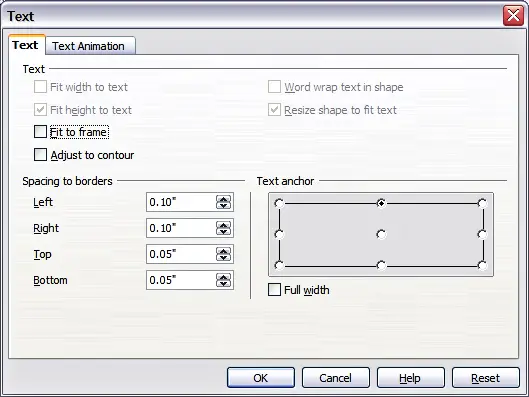
Main dialog to set the text properties.
The top section of the dialog offers several options in the form of checkboxes. Some of the checkboxes will be grayed out, depending on the object to which the text will be attached.
- Select Fit width to text to expand the width of the shape or line if the text is longer than it.
- Select Word wrap text in shape to automatically start a new line when the edge of the shape is reached.
- Select Fit height to text to expand the object height whenever it is smaller than the text (set by default for lines.
- Select Resize shape to fit text to expand a custom shape when the text inserted in the shape is too large.
- Select Fit to frame to expand the text so that it fills all the available space.
- Select Adjust to contour to make the text follow a curved line.
In the Spacing to borders section, specify the amount of space to be left between the border of the shape or line and the text; this is similar to the settings for indentation and spacing for paragraphs.
The text anchor grid is used to decide where to anchor the text. The Full width checkbox determines if the anchoring should be performed to the full width of the shape.


