You can safely leave the default values for the remainder of the tabs in the Network dialog box. Click on the OK button to complete the configuration. Once the proper files are loaded (if any), you will need to reboot in order for your changes to take effect.
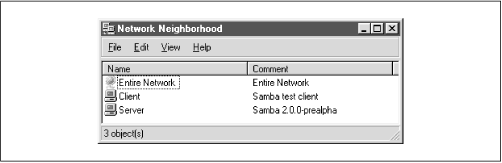
Now for the big moment. Your Samba server is running and you have set up your NT client to communicate with it. After the machine reboots, login and double-click the Network Neighborhood icon on the desktop, and you should see your Samba server listed as a member of the workgroup, as shown in
Figure 3.26.
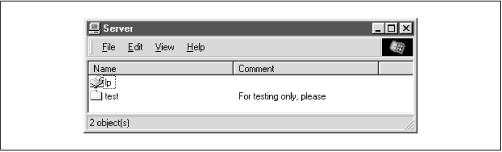
Double-clicking the server name will show the resources that the server is offering to the network, as shown in
Figure 3.27. In this case, the test and the default printer are offered to the Window NT workstation. For more information, see the warning under the "Accessing the Samba Server" section, earlier in this chapter.
WARNING: If you are presented with a dialog requesting the password for a user
IPC$, then Samba did not accept the password that was sent from the client. In this case, the username and the password that were created on the client side
must match the username/password combination on the Samba server. If you are using Windows 98 or Windows NT Service Pack 3 or above, this is probably because the client is sending encrypted passwords instead of plaintext passwords. You can remedy this situation by performing two steps on the Samba server. First, add the following entry to the
[global] section of your Samba configuration file:
encrypt password=yes. Second, find the
smbpasswd program on the samba server (it is located in
/usr/local/samba/bin by default) and use it to add an entry to Samba's encrypted password database. For example, to add user
steve to Samba's encrypted password database, type
smbpasswd -a steve. The first time you enter this password, the program will output an error message indicating that the password database does not exist; it will then create the database, which is typically stored in
/usr/local/samba/private/smbpasswd.
If you don't see the server listed, don't panic. Start the Windows NT Explorer (not Internet Explorer!) and select Map Network Drive from the Tools menu. A dialog box appears that allows you to type the name of your server and its share directory in Windows format. For example, you would enter
\\
server
\temp if your server happened to be named "server." If things still aren't right, go directly to the section "The Fault Tree" in Chapter 9, to see if you can troubleshoot what is wrong with the network.
If it works, congratulations! Try writing to the server and sending data to the network printer. You will be pleasantly surprised how seamlessly everything works! Now that you've finished setting up the Samba server and its clients, we can starting talking about how Samba works and how to configure it to your liking.


