9.1.6 IWarp
The IWarp filter, found in the
Image:Filters/Distorts menu, can interactively warp parts of an
image and then automatically generate an animation that
morphs from the original image to the warped one.
This can be useful for creating certain types of animations.
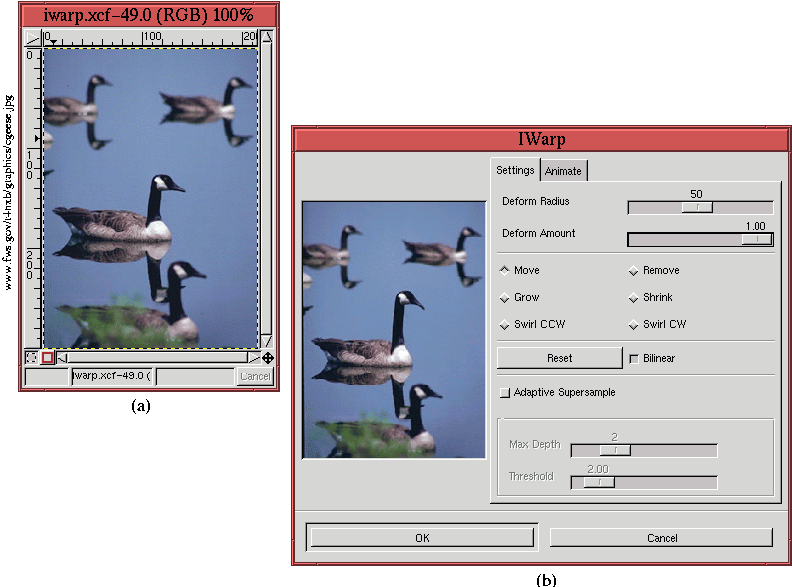
Figure
9.11(a)
Figure 9.11:
The IWarp Filter
 |
illustrates an image of Canadian geese, and
Figure
9.11(b) shows the dialog for the
IWarp filter. The dialog opens in the Settings tab, which offers a
number of options. The Deform Radius and Deform Amount sliders
control the size and intensity of the warping effect, and the type of
warping is selected using one of the Move, Remove, Grow, Shrink, Swirl
CCW, or Swirl CW radio buttons. The warping is applied by clicking
and dragging in the thumbnail of the image. The selected warping mode
is applied in the region around the mouse cursor; the size of the
region of application is specified by the Radius slider. In this
example, the Move warping function is applied, and the mouse is
clicked in the middle of the head of the central goose. Dragging the
mouse vertically upwards creates the distortion shown in the dialog's
thumbnail in Figure
9.11(b).
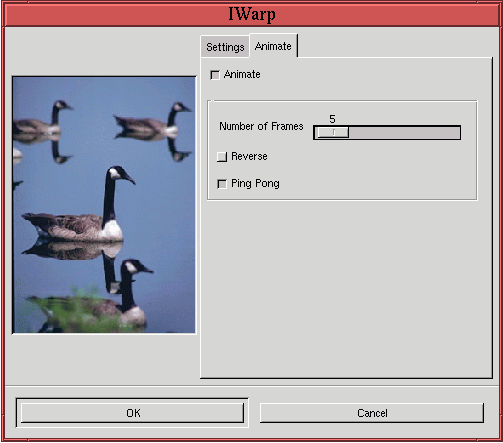
To automatically convert the distortion into an animation, click on
the Animate tab in the dialog. The dialog corresponding to this tab
is shown in Figure
9.12.
Figure 9.12:
Using the IWarp Automated Animation Feature
 |
The animation is created by clicking the Animate checkbox and then
using the slider to choose the number of frames to use. This creates
a sequence that morphs from the original image to the distorted one.
If the Reverse radio button is clicked, the animation goes from the
distorted image to the original. If the Ping Pong radio button is
chosen, the animation starts with the original image, animates to the
distorted, and then returns to the original. This last option
generates twice the number of frames selected by the Number of Frames
slider. Choosing the Ping Pong animation option for the example with
the Canadian goose produces an animation where the goose stretches its
neck up, perhaps to get a better look around, before returning to its
original state.
The result is shown here:
(Note: The animation can be turned off by clicking on the Stop
button of your browser.)
©2000 Gimp-Savvy.com
