31.1 Configuring an NTP Client with YaST
xntp is preset to use the local computer clock as a time reference. Using
the (BIOS) clock, however, only serves as a fallback for the case that no
time source of greater precision is available. SUSE® Linux Enterprise facilitates the
configuration of an NTP client with YaST. Use the quick or complex
configuration for clients that do no run the SuSEfirewall because they are
part of a protected intranet. Both are described in the following.
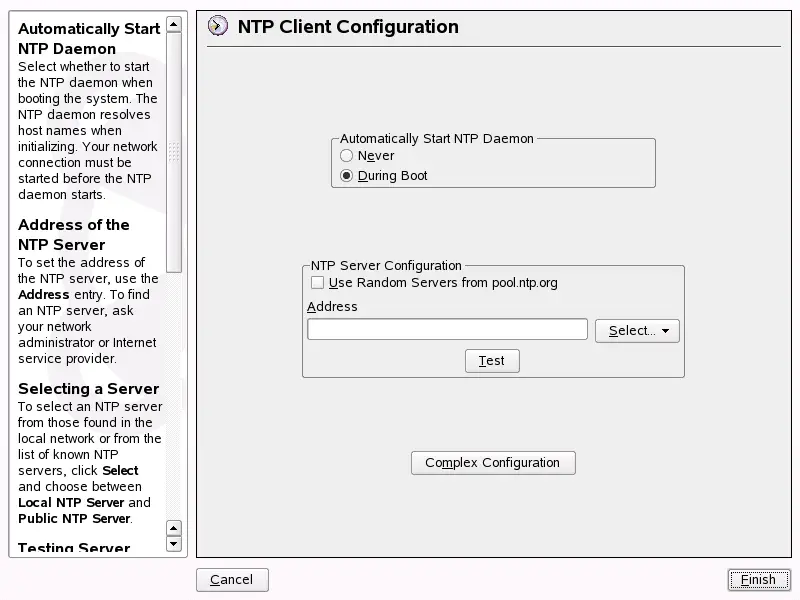
31.1.1 Quick NTP Client Configuration
The quick NTP client configuration () consists of
two dialogs. Set the start mode of xntpd and the server to query in the
first dialog. To start xntpd automatically when the system is booted,
click . Then specify the . Either click if you cannot use a local time server or click
to access a second dialog in which to select
a suitable time server for your network.
In the detailed server selection dialog, determine whether to implement
time synchronization using a time server from your local network
() or an Internet-based time server that
takes care of your time zone (). For a
local time server, click to start an SLP query
for available time servers in your network. Select the most suitable time
server from the list of search results and exit the dialog with
. For a public time server, select your country (time
zone) and a suitable server from the list under then exit the dialog with . In the
main dialog, test the availability of the selected server with
and quit the dialog with .
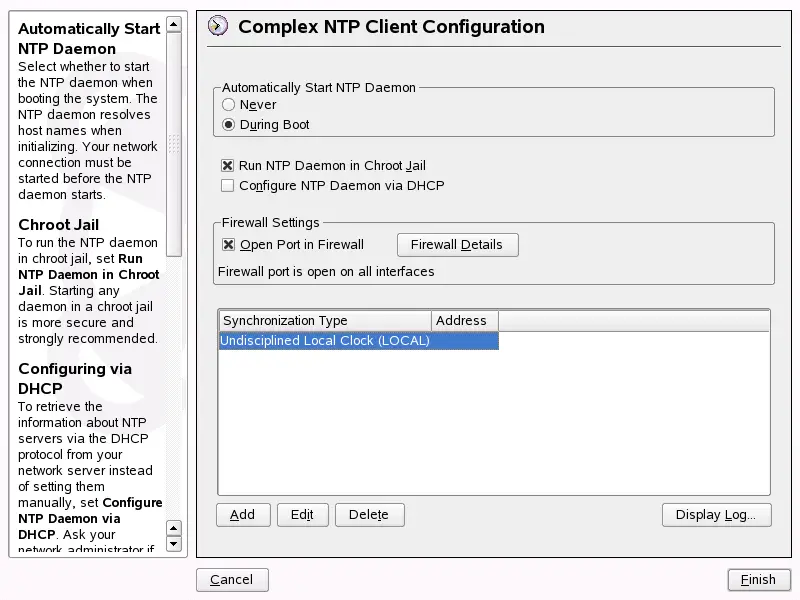
31.1.2 Complex NTP Client Configuration
The complex configuration of an NTP client can be accessed under
from the main dialog of the
module, shown in
Figure 31-1, after selecting
the start-up mode as described in the quick configuration.
In , determine whether
xntpd should be started in a chroot jail. By default, is activated. This increases the security
in the event of an attack over xntpd, because it prevents the attacker from
compromising the entire system. sets up the NTP client to get a list of the NTP servers
available in your network via DHCP.
The servers and other time sources for the client to query are listed in
the lower part. Modify this list as needed with ,
, and . provides the possibility to view the log files of your
client.
Click to add a new source of time
information. In the following dialog, select the type of source
with which the time synchronization should be made. The following
options are available:
- Server
-
Another dialog enables you to select an NTP server (as
described in Section 31.1.1,
Quick NTP Client Configuration).
Activate
to trigger the synchronization of the time
information between the server and the client when the system is booted.
An input field allows you to specify additional options
for xntpd. Refer to /usr/share/doc/packages/xntp-doc
(part of the xntp-doc package) for detailed
information.
- Peer
-
A peer is a machine to which a symmetric relationship is established:
it acts both as a time server and as a client.
To use a peer in the same network instead of a server,
enter the address of the system.
The rest of the dialog is identical to the
dialog.
- Radio Clock
-
To use a radio clock in your system for the time
synchronization, enter the clock type, unit
number, device name, and other options in this dialog.
Click to fine-tune the driver.
Detailed information about the operation of a local radio clock
is available in
/usr/share/doc/packages/xntp-doc/html/refclock.htm.
- Outgoing Broadcast
-
Time information and queries can also be transmitted by broadcast
in the network.
In this dialog, enter the address to which such broadcasts should be
sent.
Do not activate broadcasting unless you have a reliable
time source like a radio controlled clock.
- Incoming Broadcast
-
If you want your client to receive its information via broadcast,
enter the address from which the respective packets should be
accepted in this fields.