|
 |
|
| |
10.1 Managing Profiles Using the KIOSK Admin Tool
The Kiosk Admin Tool allows you to define profiles with desktop policies,
environment restrictions, and menu definitions. It allows you to modify
existing profiles and lets you assign them to groups and users. Kiosk also
lets you automatically deploy profiles to a remote host.
Start the Kiosk Admin Tool from the KDE main menu or with
F2 and the command
kiosktool.
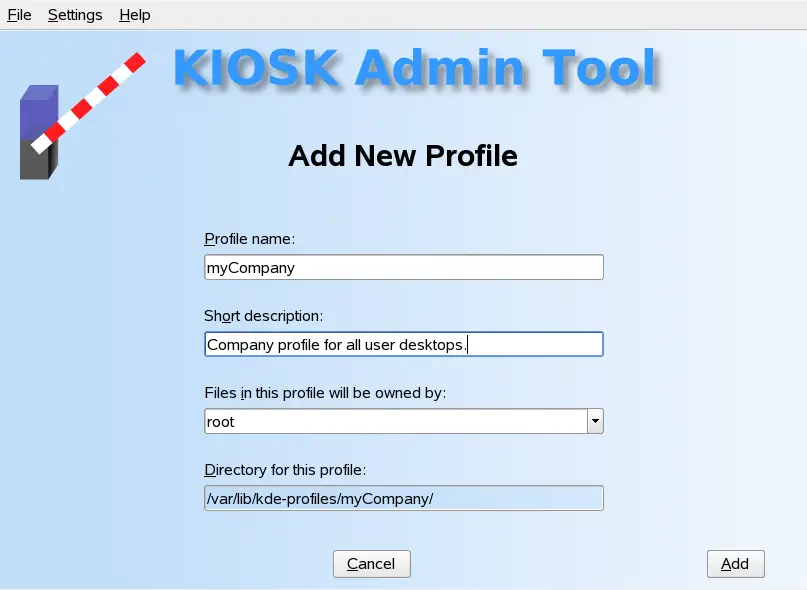
10.1.1 Creating a New Profile
To create a new profile, click . In
the dialog that opens, enter a and a
. You can also specify an owner to
which the files of the profile should belong. The user specified
here must have write access to the profile directory. You also need to
know the password of the user specified here. See
Deploying Profiles to the Local Machine for more information about
the profile directory.
It is possible to change the data entered here any time with
.
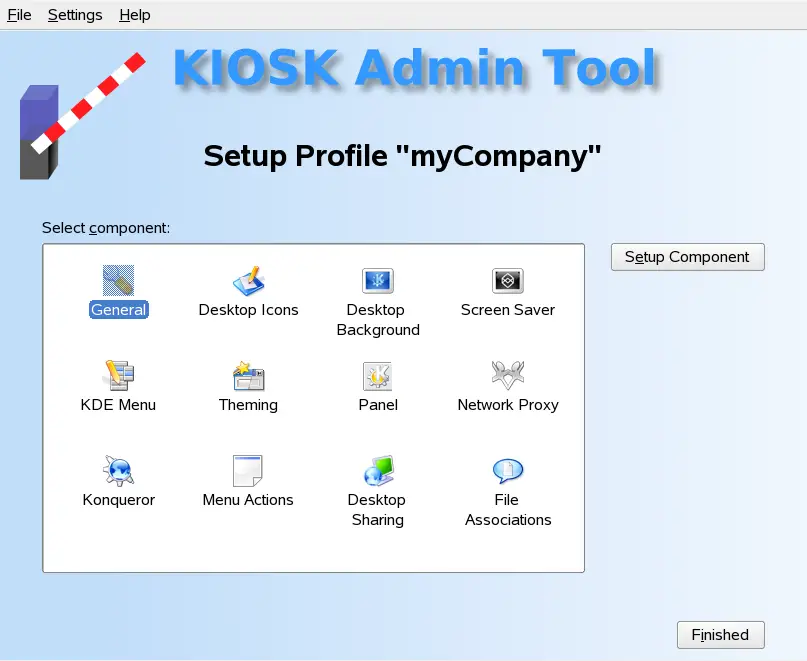
10.1.2 Setting Up a Profile
By choosing an existing
profile and clicking , set up
configurations for all KDE components, such as icons, menus, and file
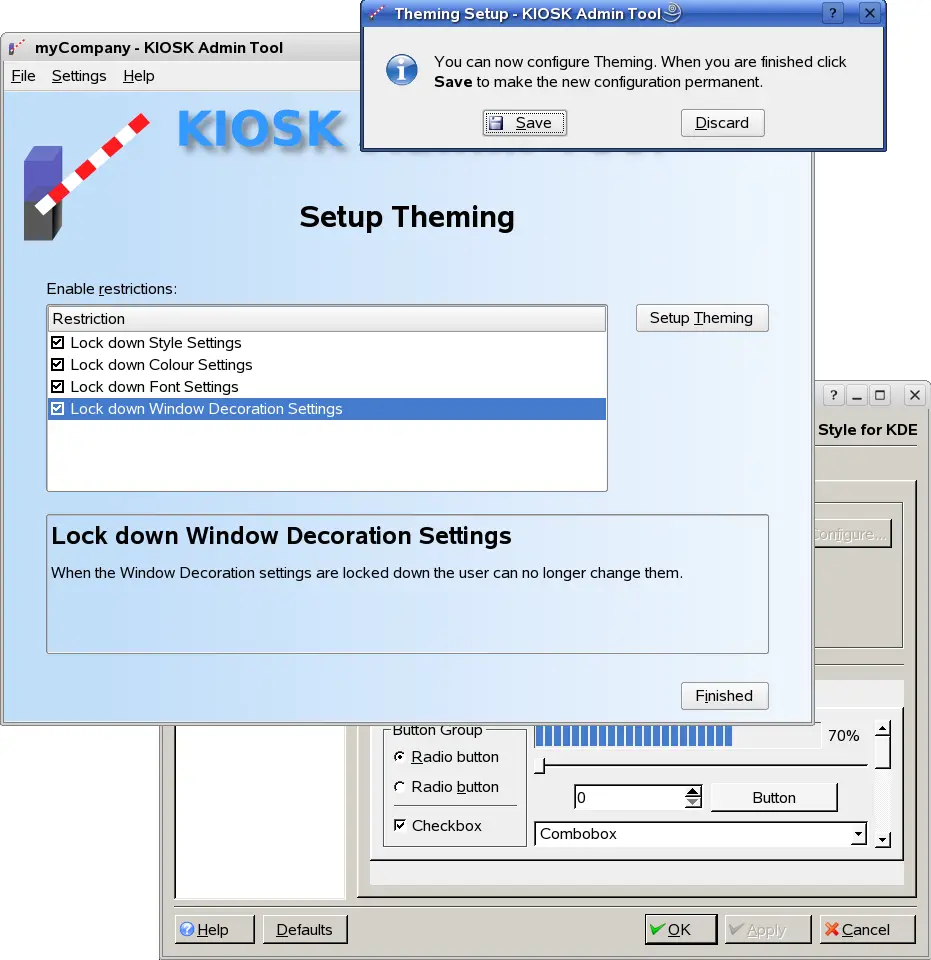
associations. After choosing a component, activate a
restriction by checking the box of the respective entry. Choosing an entry
with the mouse displays a help text explaining the effect the
restriction has.
Entries either describe a specific feature that you can
disable (such as ) or describe configuration options that you can
lock down (such as ). By doing so, the feature or configuration option is
not available when the profile is used.
Apart from disabling features and locking down configuration options, you
can also configure the look and feel of the desktop itself. When selecting
the components , , , , and , get two additional
buttons— and . When
clicking , the desktop settings of the currently
selected profile are loaded and temporarily overwrite your own desktop
settings. Now you can make changes just as you would when configuring your
own desktop. When you confirm your changes by clicking
, the changes made are permanently
added to the profile and your own desktop settings are restored.
10.1.3 Assigning Profiles to Users and Groups
When you create a profile, it is not active by default.
First assign it to users or groups first.
opens a dialog where you can assign all
existing profiles to distinct users or groups. If you are applying more
than one profile to a user or group, settings from all profiles are used.
If a profile contains settings that conflict with settings in another
profile, the settings in the earlier listed profile take precedence. The
same rule applies if you apply a profile to a specific user and another
profile to a group of which this user is a member.
IMPORTANT: Users and Groups on Remote Hosts
You can assign profiles to groups and users available on the local
machine. If you are planning to deploy your profiles to a remote server,
make sure that the needed users and groups from the remote host are also
available on the local machine (for example, by
using NIS).
10.1.4 Deploying Profiles
The KIOSK Admin Tool not only allows you to deploy profiles to the local
machine, but also to a remote computer. In doing so, you can, for instance,
deploy the profiles onto an NFS server from which they are exported to all
clients on the network.
Deploying Profiles to the Local Machine
If you are deploying your profiles to the same machine as the KIOSK Admin
Tools is running on, no manual intervention is required—the tool
takes
care that the profiles are found on start-up. By default, all
profiles are stored in /var/lib/kde-profiles to
which only the user root is
allowed to write. It is recommended not to change this setting.
However, if you need to change the location to which the profiles are
written, select and change the
.
It is also possible, although not recommended, to distribute profiles to
different locations. Uncheck in the configuration dialog. Having done so, you must
specify the when
creating a profile.
Deploying Profiles to a Remote Machine
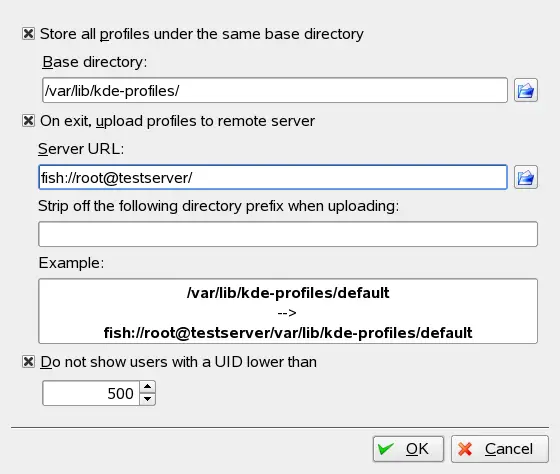
The KIOSK Admin Tool configuration
() lets you specify a location on a remote host to which to
upload the profiles when exiting the tool. This upload mechanism uses
the fish protocol. The
field in the configuration dialog is initialized with
fish://root@host/. Replace root with
the user to which the files on the remote server should belong and
host with the remote hostname. By default, the same
directory as on the local host is used. To change this,
click to specify a
new directory on the remote server. After entering the password for
the remote user, you can browse directories. By default, the directory on
the local host is appended to the
specified. Use to change
this.
By default, KDE expects its profiles in
/var/lib/kde-profiles. If you are deploying them to
this directory on a remote machine or to a directory on an NFS server that
will be mounted with this path by the clients, no further interaction is
required. Otherwise, adjust
/etc/kde3rc. See https://websvn.kde.org/trunk/KDE/kdelibs/kdecore/README.kiosk?view=markup for details.
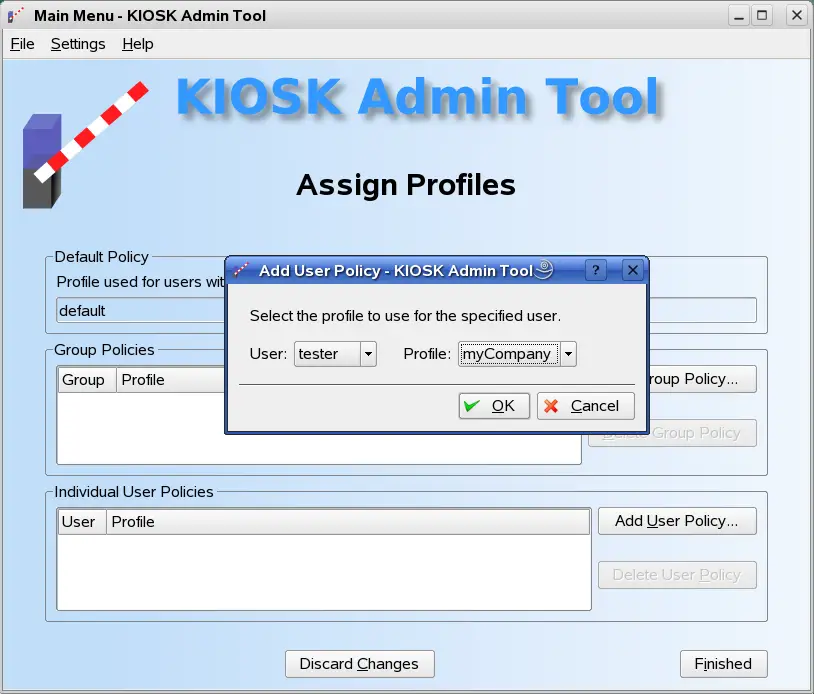
10.1.5 Example: Creating and Assigning a Profile
In the following example, a profile called myCompany is created and
assigned to the user tester on the remote host
testserver.
-
Start the Kiosk Admin Tool from the KDE main menu or with
F2 and the command
kiosktool.
-
Open the configuration dialog with
. On the local machine, all profiles are
stored in /var/lib/kde-profiles by default. Also
by default, users with a UID lower than 500 are
not displayed.
The profile in this example should be deployed to a remote host named
testserver in the default profile
location. Therefore, activate
and change the to fish://root@testserver/.
-
Open the dialog and create a new
profile called myCompany.
Click to save the new profile. You are
prompted for the root password before the files can be saved.
-
Clicking opens a dialog where you can
configure the various aspects of KDE.
If you choose, for example, then
, the configuration dialog for the themes
opens. All changes you make here do not affect your current desktop, but
are added to the profile you are working on after you confirm
your changes with in the window.
After finishing setting up the profile, return to the main menu by
clicking .
-
Assign the profile to distinct users or groups by clicking
.
Return to the main menu by clicking .
-
Now the profile is available on the local machine. Before deploying it to
the remote host, you can test it. Start a new session by right-clicking
the desktop and choosing then log in as user
tester.
Return to your own desktop by logging out as
tester. If you need to make changes, start the setup
procedure again. Otherwise leave the KIOSK Admin Tool. On exit, it
deploys all profiles to testserver. You must
enter the root password on testserver for this
operation. Because the profiles are deployed to the default KDE profile
location in this example, no further action is required. The next time
tester logs in on testserver, the
myCompany profile is used.
|
|
|