| |
Using AutoText to insert often-used fields
If you use the same fields often, you will want a quick and easy way to insert them. Use AutoText for this purpose. To define an AutoText entry for a field:
-
Insert a field into your document, as described previously.
-
Select the field, and then click Edit > AutoText (or press Ctrl+F3).
-
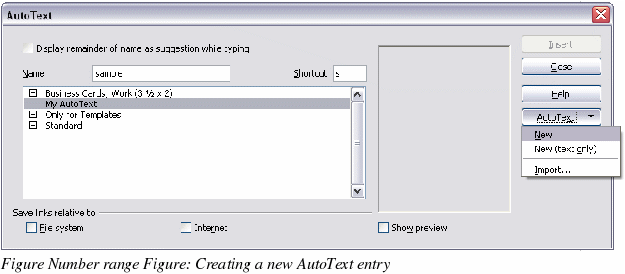
On the AutoText dialog box (Figure 361), choose the group where this new entry will be stored (in this example, it is going into My AutoText), type a name for the entry, and change the suggested shortcut if you wish.
-
Click the AutoText button and click New to have the entry inserted as a field. Do not choose New (text only) because the AutoText entry will be plain text, not a field. Click Close to close the AutoText dialog box.
-
Now whenever you want to insert this field at the cursor position, type the shortcut, and then press F3.

|
|
