Chapter 4. Installation Using The Graphical Installer
Launching the Graphical Installer
The installer is an executable JAR file named enterprise-installer-<release>.jar
On many operating systems, you can run executable JARs by double-clicking them. If your system doesn't support that, you can run the installer directly from the command line:
The installer will then guide you through a series of installation steps explained in detail in the following section. You can quit the installation process any time before you confirm the final installation.
Installation Steps
Choose the language to be used for the installation instructions and press the OK button.
Read the License Agreement carefully. If you agree to the terms of the agreement select "I accept the terms of this license agreement" option and press the Next button. If you do not accept to the terms then choose "I do not accept to the terms of this license agreement" option. If you choose the second option you will not be able to proceed with the installation.
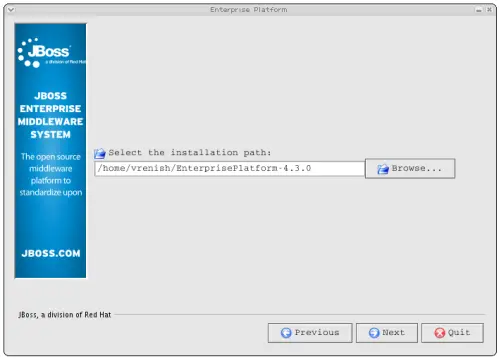
Select the Installation Path where you would like JBoss Enterprise Application Platform to be installed. You can either type the complete path or browse for it. If the directory corresponding to the path you entered does not exist, the installer will create the target directory in the specified path. If the directory corresponding to the path you entered exists already, the installer will overwrite the contents of the directory. In either case the installer will prompt you to confirm the action.
Note
It does not matter where on your system you install JBoss Enterprise Application Platform, however note that installing JBoss Enterprise Application Platform into a directory that has a name containing spaces causes problems in some situations with Sun-based VMs. This is caused by bugs with file URLs not correctly escaping the spaces in the resulting URL.
Figure 4.1. Select Installation Path
Configure JMX Security - In this section you can control the security settings for the JMX interfaces. You can choose to secure the following services:
It is recommended that you click to enable security for all services and change the username/password from the default admin/admin values.
Figure 4.2. Configure JMX Security
Note
The JMX and web console would ask for your password if you install from the GUI installer.
You can find the latest release notes available here: https://www.redhat.com/docs/manuals/jboss. Read the release notes information carefully to know about important compatibility and configuration issues, library updates, feature requests and bugs, links to additional documentation and license information.
JBoss Enterprise Application Platform is now ready to install. Verify the installation path displayed in the summary screen before you hit the Next button. Pressing the Next button will begin the installation.
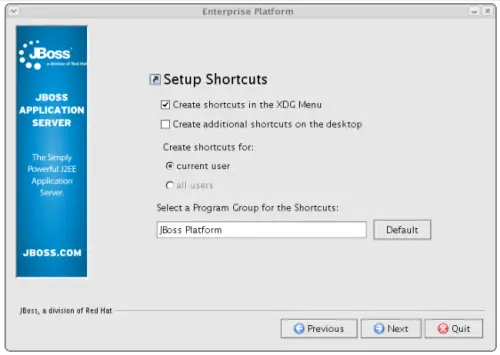
You can add the JBoss Platform menu in the XDG menu and also choose to create shortcuts on the desktop. If you select the "Create additional shortcuts on the desktop" checkbox, the installer will create the following shortcuts:
Shortcut to Start the application server
Shortcut to Stop the application server
Shortcut to the documentation
Shortcut to the JMX Console
Shortcut to start the demo application
If you run the installer as the root user you can choose to create these shortcuts for all users.
Figure 4.3. Create Desktop Shortcuts
You are done with the installation! You should now have a directory called EnterprisePlatform-<release>, or whatever other name you specified. To explore the Platform directory structure and to understand the layout in detail, refer to the Getting Started Guide.