Branding
Introduction
With the help of RAPs branding features you're able to define several (visual) aspects of your
RAP application. This includes for example the page title which is shown in the
browser or the theme to be used for the application.
Capabilities of the Branding
You can define a new branding by creating an extension for the
org.eclipse.rap.ui.branding
extension point.

And here the same as it appears in the plugin.xml:
<extension
point="org.eclipse.rap.ui.branding">
<branding
id="org.eclipse.rap.demo.teaBranding"
servletName="tea"
defaultEntrypointId="org.eclipse.rap.demo.defaultEntrypoint"
themeId="org.eclipse.rap.demo.teaTheme"
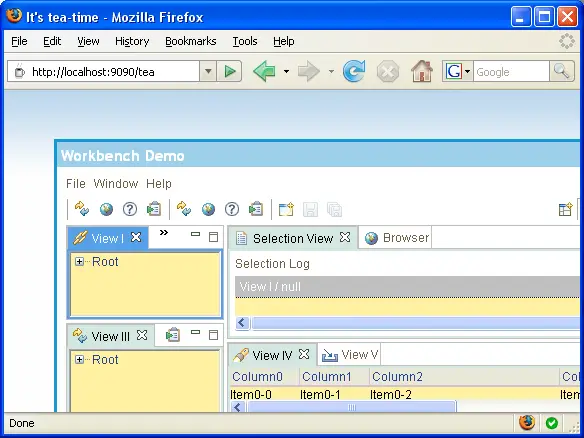
title="It's tea-time"
favicon="icons/teapot.ico"
body="body.html"
exitConfirmationClass="org.eclipse.rap.demo.DemoExitConfirmation">
</branding>
</extension>
servletName
The servletName attribute is responsible for the URL of the
application for the outside
world. For those without J2EE experience this means that you your application
will be available at <host>:<port>/<servletName>
.
defaultEntrypointId
The defaultEntrypointId refers to an entrypoint which should be
used as the default one for this servlet. Looking at the example branding above
the URI https://<host>:<port>/tea and
https://<host>:<port>/tea?startup=foo
are equivalent if
there is an entrypoint defined with the id org.eclipse.rap.demo.entrypoint1
and parameter foo.
themeId
Which theme to be used for this branding can be specified here. You need to provide
an id for the theme that is defined by an extension of org.eclipse.rap.ui.themes.
Without the themeId the RAP standard theme will be used.
See also
RWT Theming
title
To define the title which will be shown in the browser title or the the title of
the browser tab, you can use the title attribute.
favicon
The
favicon is a 16x16 pixel
square icon shown in the address bar of the browser. This has to be a valid
.ico file
to be correctly displayed in the browser.
body
If you have the need for some custom (X)HTML markup in the RAP index page you can
register a valid (X)HTML file with the body attribute which will be included
in the body tag of the generated index page.
exitConfirmationClass
This attribute is optional. If specified, the value must denote a class that
implements the interface IExitConfirmation.
Implementations of this interface can control the exit confirmation that is
shown whenever the user tries to close the browser window or tab or navigates
to another URL.
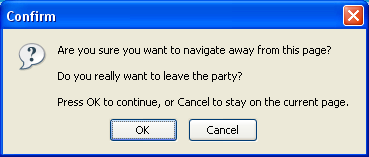
NOTE:
Note that this is feature is not supported by every browser. Furthermore,
some browsers may show additional text in the confirmation dialog.
Element additionalHeaders
To extend different aspects of the generated index page you can add a subelement
called additionalHeaders to your branding to add for example meta tags.
These informations will be added to the <head> tag of the index page.
See this example:
  <additionalHeaders>
    <meta
      content="RAP Team"
      name="author">
    </meta>
  </additionalHeaders>
Available tags are meta and link. Furthermore you
can add as much additional attributes to each tag with the attribute
element.
Element associatedEntrypoints
The idea behind this is to have several different entrypoints in your application
but you want to group them behind a special branding (servletname, theme, etc).
In the normal use case you will not have the associatedEntrypoints
and thus every entrypoint is available in every branding. Introducing such an element
will give you the chance to allow only certain entrypoints for this branding.
Imagine you have the following entrypoints defined:
- AppForCustomerA
- AppForCustomerB
- AppForAdministrationA
- AppForAdministrationB
With branding in place you can now group them together so Customer A and Administration A
have the same branding (page title, servletName, theme) and are not allowed to use
the stuff of Customer B with this branding.
A sample implementation of the branding for Customer A could look like this:
  ...
  <associatedEntrypoints>
    <entrypoint
      id="org.eclipse.rap.demo.customerA">
    </entrypoint>
    <entrypoint
      id="org.eclipse.rap.demo.customerA_Admin">
    </entrypoint>
  </associatedEntrypoints>
  ...
And the same should be done for Customer B (with other entrypoint ids)


