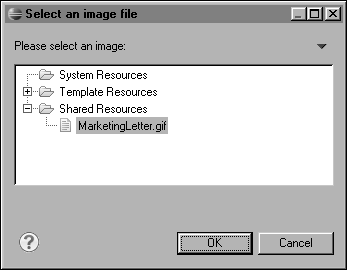
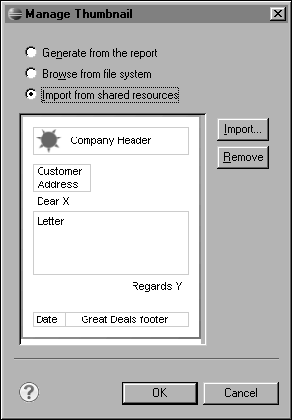
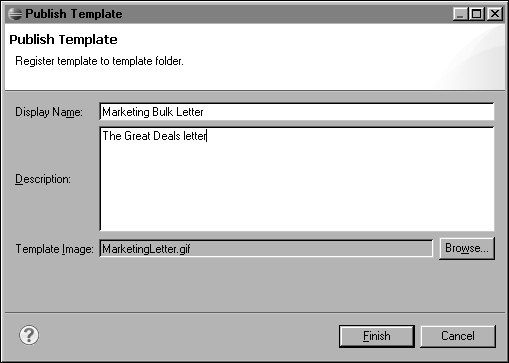
How to publish a template 1 Open the report template. 2 In the Outline view, select the report root. 3 Set the Template Image property if you want the image that appears in the New Report wizard to be a thumbnail or an image file on the file system. 1 In the Property Editor, next to Thumbnail, choose the ellipsis button. 2 On Manage Thumbnail, select the type of thumbnail for the template. o If you selected Generate from the report, choose Generate. o If you selected Browse from file system, choose Browse. On Select an image file, navigate to and select the thumbnail image for the template. Then, choose Open. o If you selected Import from shared resources, choose Import. On Select an image file, navigate to and select the thumbnail image for the template, as shown in Figure 19‑6. Then, choose OK. Figure 19‑6 Choosing a thumbnail image from shared resources The thumbnail image appears in Manage Thumbnail, as shown in Figure 19‑7. Figure 19‑7 A thumbnail image selected for the template 3 On Manage Thumbnail, choose OK. The name of the thumbnail appears in the Thumbnail property in the Property Editor. 4 Save the report template. 4 Choose File→Register Template with New Report Wizard. 5 In Publish to Template Folder, check the properties. Make any corrections to the display name and description, as shown in Figure 19‑8. Figure 19‑8 Publishing a template 6 To change the template image, choose Browse, then select the required image. 7 Choose Finish.