Follow Techotopia on Twitter

On-line Guides
All Guides
eBook Store
iOS / Android
Linux for Beginners
Office Productivity
Linux Installation
Linux Security
Linux Utilities
Linux Virtualization
Linux Kernel
System/Network Admin
Programming
Scripting Languages
Development Tools
Web Development
GUI Toolkits/Desktop
Databases
Mail Systems
openSolaris
Eclipse Documentation
Techotopia.com
Virtuatopia.com
Answertopia.com

How To Guides
Virtualization
General System Admin
Linux Security
Linux Filesystems
Web Servers
Graphics & Desktop
PC Hardware
Windows
Problem Solutions
Privacy Policy


Red Hat Enterprise Linux 9 Essentials Book now available.

Purchase a copy of Red Hat Enterprise Linux 9 (RHEL 9) Essentials

Red Hat Enterprise Linux 9 Essentials Print and eBook (PDF) editions contain 34 chapters and 298 pages

Preview Book

3.2.2. Adding Unallocated Volumes to a Volume Group

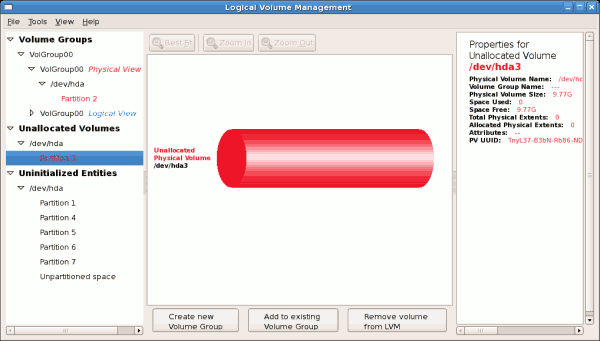
Once initialized, a volume will be listed in the 'Unallocated Volumes' list. The figure below illustrates an unallocated partition (Partition 3). The respective buttons at the bottom of the window allow you to:
  • create a new volume group,
  • add the unallocated volume to an existing volume group,
  • remove the volume from LVM.
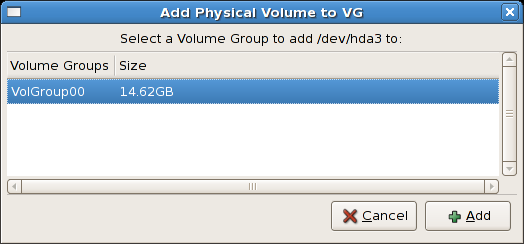
To add the volume to an existing volume group, click on the Add to Existing Volume Group button.
Unallocated Volumes
Unallocated Volumes
Figure 3.8. Unallocated Volumes

Clicking on the Add to Existing Volume Group button will display a pop up window listing the existing volume groups to which you can add the physical volume you are about to initialize. A volume group may span across one or more hard disks. In this example only one volume group exists as illustrated below.
Add physical volume to volume group
Figure 3.9. Add physical volume to volume group

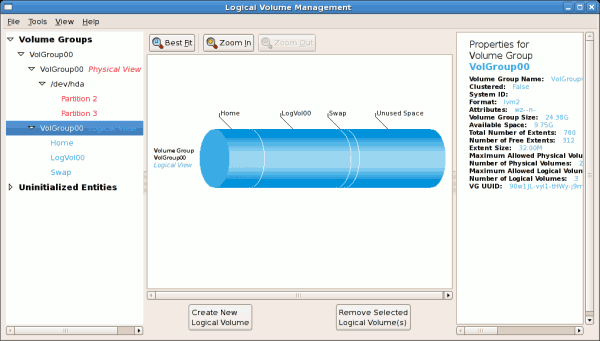
Once added to an existing volume group the new logical volume is automatically added to the unused space of the selected volume group. You can use the unused space to:
  • create a new logical volume (click on the Create New Logical Volume(s) button,
  • select one of the existing logical volumes and increase the extents (see Section 3.2.6, “Extending a Volume Group”),
  • select an existing logical volume and remove it from the volume group by clicking on the Remove Selected Logical Volume(s) button. Please note that you cannot select unused space to perform this operation.
The figure below illustrates the logical view of 'VolGroup00' after adding the new volume group.
Logical view of volume group
Figure 3.10. Logical view of volume group

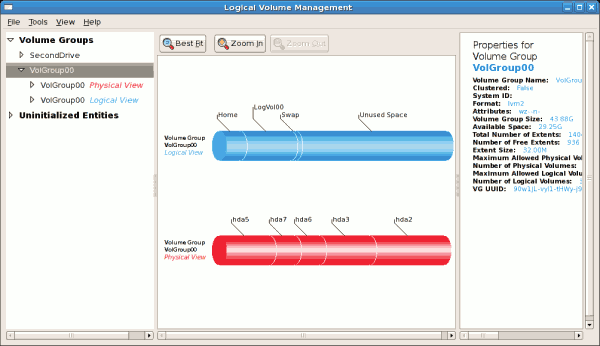
In the figure below, the uninitialized entities (partitions 3, 5, 6 and 7) were added to 'VolGroup00'.
Logical view of volume group
Figure 3.11. Logical view of volume group


  Published under the terms of the Creative Commons License Design by Interspire